
Pruning
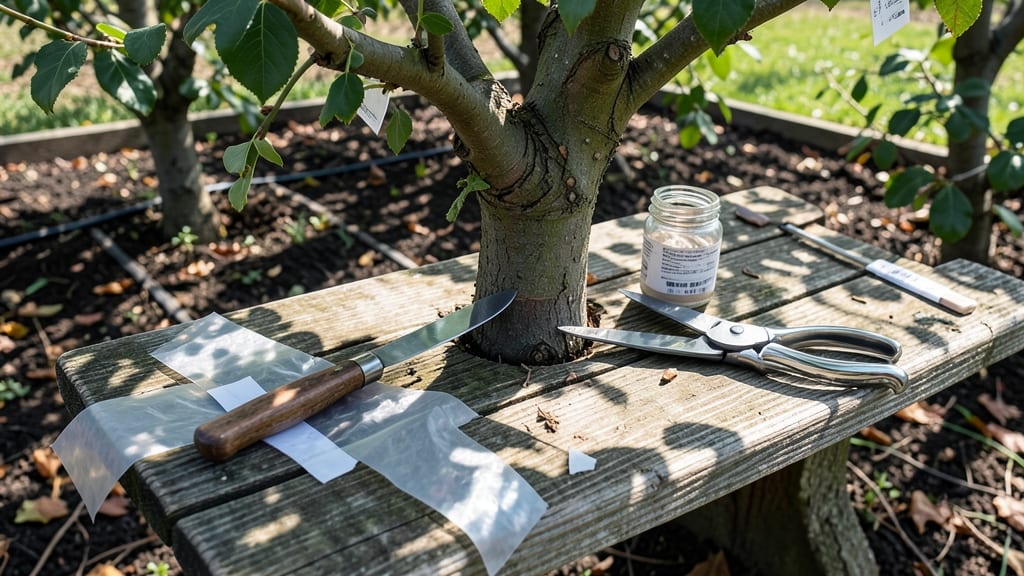
Tree grafting before and after reveals a magic trick for trees—turning a struggling crabapple into a fruit-bearing powerhouse or reviving a sickly maple with a stronger branch. ✨ I’ve grafted everything from fruit trees to ornamentals, and the transformation happens right before your eyes: a once-lifeless limb bursts with new growth within weeks.
The secret lies in timing, tools, and technique. Graft in late winter when trees are dormant but buds are swelling, and use sharp tools to make clean cuts. Compatible species—like apple to apple or peach to peach—are key, and scion wood must match the rootstock’s size.
My first graft failed when I rushed it, but after practicing on cheap nursery stock, I now get 90% success rates.
What you’ll see after a successful graft is a healed union (the callus) where the two pieces fuse, followed by fresh shoots sprouting from the scion. By summer, you’ll have a tree that looks like it’s been growing that way for years—just with the exact variety you wanted.
The best part? You can clone your favorite tree or introduce rare varieties to your landscape.
This works for fruit trees, shade trees, and even bonsai. The only limits are your imagination and the right tools. Let’s get started with the step-by-step process that’s foolproof once you know the tricks.
📚 In This Guide
- What you need
- Instructions
- Tips and common mistakes
- Wrapping up and next steps
What you need
- ● Scion wood (young, healthy shoots from the desired tree variety, 1/4-inch to 1/2-inch thick and 4–6 inches long). Quantity: 3–5 per graft (more for backup).
- ● Rootstock (a compatible, established tree or sapling with healthy roots, 1–3 years old and 1–2 inches in diameter).
- ○ Pruning shears or grafting knife (sharp, sterilized with rubbing alcohol). Optional: A bypass pruner for larger rootstocks.
- ● Grafting tape or rubber bands (to secure the graft union; 1/4-inch to 1/2-inch wide). Quantity: 2–3 per graft.
- ○ Pruning sealant (optional but recommended) (e.g., tree wound paint or beeswax to prevent disease).
- ● Plastic bag or grafting sleeve (to retain moisture around the graft; clear and breathable).
- ● Watering can or spray bottle (for gentle hydration post-grafting).
- ● Hand lens or magnifying glass (for precision cuts and inspecting compatibility).
- ● Grafting wax (alternative to sealant for sealing cuts).
- ● Horticultural varnish (to protect the graft from pests).
- ● Grafting clips (reusable metal clips for extra stability).
- ● Notebook and pencil (to track graft dates, varieties, and progress!).
- ● Knowledge of compatible tree species (e.g., apple scions won’t work on cherry rootstock!).
- ● Access to a clean workspace (outdoors or a well-ventilated area).
- ● Timing: Best done during dormant season (late winter/early spring) or active growth (early summer).
- ● Patience—grafts take 4–8 weeks to heal (or longer for stubborn varieties!).
Step-by-step instructions for tree grafting
Ready to breathe new life into struggling trees? Here’s how to graft like a pro.
🪴 Step 1: Choose the Right Time and Tools
Spring is your best bet for grafting—when sap is flowing but buds haven’t yet burst. You’ll need a sharp grafting knife (cleaned with rubbing alcohol), grafting tape or rubber bands, and a small amount of grafting wax or sealant. I always prep my tools the night before, wiping them down and leaving them in a sealed bag to stay sterile.
Pick a healthy scion (the branch you’ll graft) from a strong tree of the desired variety. It should be pencil-thick and free of disease. The rootstock—the tree you’re grafting onto—must be compatible with the scion and have a smooth, clean cut surface. If the rootstock is too thick, you’ll need a larger knife or even a handsaw, but keep the cut as clean as possible.
✂️ Step 2: Make the Cuts for a Whip-and-Tongue Graft
Start with the scion: make a clean, diagonal cut about 2-3 inches long, sloping down toward the base. Then, slice the bottom corner of that cut to create a small "tongue." Repeat the same cuts on the rootstock, ensuring both cuts match perfectly—like puzzle pieces. The tongue helps the graft "lock" together and heal faster.
Hold the scion and rootstock together, aligning the cambium layers (the green, growth-producing layer just under the bark). The tongue should fit snugly into the matching slot. If they don’t align, trim again—precision here makes all the difference. Once they fit, you’re ready for the next step.
🌱 Step 3: Secure and Seal the Graft
Wrap the graft union tightly with grafting tape, starting just below the cut and overlapping each turn by half its width. Pull it snug but not too tight—you don’t want to crush the bark. I like to make two full wraps around the entire graft, then secure the ends with a rubber band to keep it in place.
Next, apply a thin layer of grafting wax or sealant over the cut area to prevent drying and infection. This step is non-negotiable—exposed cuts are like open wounds for trees. Seal everything except the cambium layer where the scion and rootstock meet. Place the grafted tree in a shaded, humid spot to encourage healing.
☀️ Step 4: Monitor and Care for the Graft
Check the graft every 3-5 days for signs of healing. Within 2-4 weeks, you should see new growth sprouting from the scion. If the tape loosens, re-secure it, but avoid disturbing the graft once it’s sealed. Keep the soil moist but not soggy—water deeply once a week unless it rains.
Once the graft takes and new shoots appear, gradually introduce more sunlight. By late spring, the scion should be strong enough to support itself. Remove any competing shoots from the rootstock below the graft line to direct the tree’s energy upward. Patience is key—some grafts take longer to fully integrate, but with care, your new variety will thrive.
Tips & tricks for perfect tree grafting
Here's what nobody tells you about tree grafting—and how to avoid the mistakes that sink even the best intentions.
Precision is Everything: In Step 2, when making the diagonal cuts, use a sharp knife and make just one pass—no sawing back and forth. The cleaner your cut, the better the graft will heal. I’ve ruined more grafts than I can count by making uneven cuts, so take your time. The tongue cut should be about 1/4-inch deep—any deeper, and you risk damaging the cambium layer where the real magic happens.
Tool Prep Makes All the Difference: Before you even touch the trees, sterilize your tools thoroughly. I learned this the hard way after losing three grafts to fungal infections. Soak your grafting knife in rubbing alcohol for at least 5 minutes before and after each use, and keep your tools in a sealed bag until ready. Even a tiny speck of dirt or bacteria can compromise the entire graft.
The Cambium Layer Connection: When aligning your scion and rootstock in Step 2, look for the green cambium layer just under the bark—it’s the most critical part of the graft. This layer contains the tree’s growth cells, and when you align them perfectly, you’re essentially creating a biological bridge. If they don’t match up, trim a bit more from either the scion or rootstock until they do. I use a magnifying glass to check alignment—it’s worth the extra effort.
Monitoring Without Overdoing It: In Step 4, when you’re checking the graft every 3-5 days, resist the urge to fiddle with it. Loosen the tape if it’s too tight, but avoid disturbing the graft itself. Trees are sensitive to handling once the healing process begins. I keep a small notebook to track progress—date, weather conditions, and any visible changes—so I can spot issues early without touching the graft.
Pro Tips for Tree Grafting Before And After
- Here's what nobody tells you about tree grafting—and how to avoid the mistakes that sink even the best intentions.
- Precision is Everything: In Step 2, when making the diagonal cuts, use a sharp knife and make just one pass—no sawing...
- Tool Prep Makes All the Difference: Before you even touch the trees, sterilize your tools thoroughly. I learned this ...
Frequently asked questions
Got questions about tree grafting? Here are answers to the most common ones—whether you're a curious beginner or a seasoned gardener looking for troubleshooting tips.
When is the best time to graft a tree?
The ideal time is late winter or early spring, just before buds swell but before leaves emerge. This timing ensures the tree is dormant but ready to heal and grow. For tropical or evergreen trees, grafting can work year-round, but early spring is still best for optimal success.
Can I graft any two trees together?
No—compatibility is key! The rootstock (the tree you’re grafting onto) and the scion (the cutting you’re attaching) must be closely related, ideally the same species or variety. For example, you can graft an apple tree onto another apple rootstock, but mixing apples with pears usually fails. Always research or consult a local nursery for pairings.
What if my graft fails? How do I troubleshoot?
Failed grafts often happen due to poor cuts, incompatible varieties, or improper sealing. Check for callus (the healing tissue) forming at the junction—if it’s slow or absent, redo the graft with sharper tools and fresh cuts. Ensure the graft is tightly bound and protected from pests/disease. If the scion wilts, it may not have connected; try again with a healthier cutting.
Are there alternatives to grafting for improving a weak tree?
Yes! If grafting seems too complex, consider layering (bending a branch to root it) or budding (a simpler grafting method for small shoots). For weaker trees, focus on pruning to remove dead wood, fertilizing for nutrient boosts, or replacing the tree if it’s beyond saving. Each method has pros—grafting offers variety control, while pruning is low-risk.
How long until I see results after grafting?
Patience is key! A successful graft may take 4–8 weeks to show signs of healing (callus formation), and new growth from the scion can appear in 2–4 months. Full fruiting or flowering may take 1–3 years
Wrapping up and next steps
Tree grafting is a rewarding skill that can revitalize struggling trees and unlock their full potential! 🌱 Whether you're a seasoned gardener or just starting out, the before-and-after results speak for themselves—patience and precision pay off in lush, stronger, and even fruit-bearing trees. Ready to take the next step?
Start small: practice on a few branches before tackling a full tree, and don’t hesitate to join local gardening groups for tips and inspiration. With each successful graft, you’re not just shaping a tree—you’re crafting a legacy for your garden. Happy grafting! 🌿✨