
Pruning
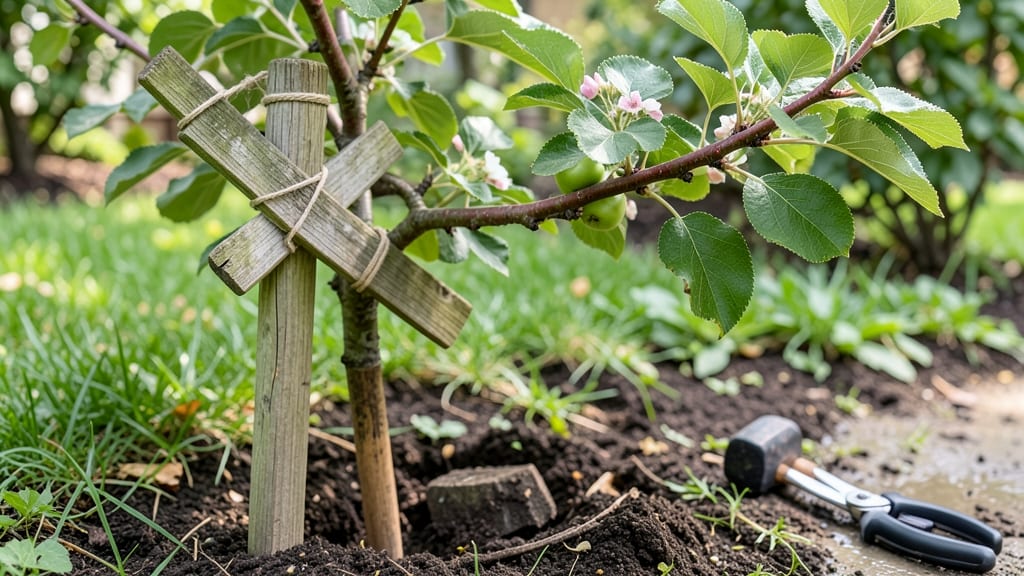
Your apple tree’s branches need support to grow strong and bear fruit—without it, they’ll snap under the weight of apples or storm winds. 🌳 I’ve seen weak branches break during harvest, and it’s a heartbreaking waste of years of growth.
The right support system turns floppy limbs into sturdy frameworks that hold fruit and resist damage.
For young trees, simple T-posts with spreaders work best—drive them into the ground at a 45-degree angle and attach branches with soft ties. Mature trees need trellis systems or cabling to distribute weight evenly.
The key is checking supports every spring and after heavy fruit loads to prevent stress on the trunk.
With proper support, your tree will develop a balanced canopy, produce larger fruit, and last decades longer. You’ll notice fewer broken limbs, easier harvesting, and a stronger tree that stands up to weather.
The investment in time and materials pays off in healthier growth and bigger harvests year after year.
Whether you’re working with a sapling or a mature tree, the same principles apply—just adjust the scale. Start with lightweight materials for young trees, and upgrade to heavier-duty systems as they grow. A little support now means fewer headaches—and more apples—later.
📚 In This Guide
- What you need
- Instructions
- Tips and common mistakes
- Wrapping up and next steps
What you need
- ● Tree ties or soft garden straps: 5–10 pieces (3–4 inches wide, made of dacron or polypropylene to avoid damaging bark).
- ● Stakes or posts: 2–4 wooden or metal stakes (1.5–2 inches in diameter, 4–6 feet tall).
- ● Bamboo or flexible plastic spreaders: 2–3 pieces (to distribute weight evenly).
- ● Heavy-duty twine or nylon cord: 50–100 feet (for securing stakes to the tree).
- ● Pruning shears or loppers: For trimming excess branches if needed.
- ● Measuring tape: To ensure proper spacing between supports.
- ○ Mallet or hammer: For driving stakes into the ground (optional if using pre-installed stakes).
- ● Saw (if needed): To adjust stake lengths or cut branches.
- ● Tree guards or protective sleeves: To shield branches from rubbing against ties.
- ● Concrete mix or heavy stones: For anchoring stakes in windy areas.
- ● Adjustable tree supports: For larger or mature trees needing extra reinforcement.
Step-by-Step guide to installing apple tree branch support
Here's how I reinforce young apple trees to prevent storm damage and encourage strong structural growth.
🪴 Step 1: Assess Tree Structure and Select Support Materials
Examine your apple tree for weak crotches or branches growing at sharp angles—these are prime candidates for support. For young trees, I use 4-6 inch wide tree ties made from soft, stretchable fabric or rubberized material that won't girdle the bark as it grows. Avoid wire or plastic ties that can cut into stems over time.
Choose support stakes that are 1/3 the tree's height—for a 4-foot tree, that's a 16-inch stake. Drive the stake 6 inches deep into moist soil at a 30-degree angle away from the prevailing wind direction. This creates a natural leaning angle that strengthens the trunk over time. Mark the stake location with a small flag so you don't forget which side needs support.
✂️ Step 2: Install Temporary Support and Position Branches
Attach the first support stake to the main trunk using a figure-eight tie positioned just above the graft union. This prevents the tree from rocking while still allowing some natural movement. For branches, use spreader bars or Y-shaped supports to gently separate them at 45-degree angles—never force them into position, as this can cause bark damage.
I like to use soft nylon straps to secure branches to the spreader bars, leaving just enough room to slide a finger between the strap and branch. This prevents constriction while maintaining proper spacing. For heavy branches, add a second stake on the opposite side to create a triangle of support—this is the strongest structural configuration for wind resistance.
🌱 Step 3: Secure the System and Monitor Growth
Once all stakes and ties are in place, give the entire system a gentle tug to ensure nothing is loose. The tree should feel firmly anchored but still have some give. Water the base thoroughly after installation—this helps settle the soil around the stakes and encourages root establishment. I check the ties every 2-3 weeks during the growing season to ensure they haven't loosened or become too tight.
Here's the thing—you'll need to adjust the support system as the tree grows. Remove any ties that are rubbing against the bark, and replace them with new ones higher up on the trunk. By year three, your apple tree should have developed enough structural strength to stand independently, but I always leave the spreader bars in place until the branches reach their mature size to prevent sudden weight-related damage.
☀️ Step 4: Maintain Support Through Seasonal Changes
Before winter, inspect all support components for signs of wear or damage. Replace any broken stakes or frayed ties immediately—weak points can fail under snow or ice load. I wrap the main trunk with tree guard around the tie areas to prevent rodent damage during dormancy. In spring, remove any ties that have become embedded in the bark and reposition them for the new growth cycle.
Watch for branches that are growing too close together—they'll compete for sunlight and nutrients. Use the spreader bars to maintain 12-18 inches of space between major limbs. This creates an open canopy that improves air circulation and reduces disease risk. The goal is to guide the tree toward its natural vase shape while preventing structural weaknesses that could lead to breakage during storms.
Tips & tricks for perfect apple tree branch support
These practical insights will help you create a sturdy, long-lasting support system that protects your young apple tree without causing damage.
Material Selection: The right materials make all the difference. For the 4-6 inch wide tree ties mentioned in Step 1, look for ones with a slight stretch—this accommodates trunk growth without constriction. I've found that fabric ties with a Velcro closure work best because they can be easily adjusted as the tree grows. Avoid anything with metal components that could cut into the bark over time, even if they seem sturdy.
Stake Placement Strategy: When positioning your 16-inch stakes at a 30-degree angle in Step 1, think about wind patterns in your specific location. If your area experiences strong winds from one direction, angle the stake away from that wind to create natural resistance. For particularly windy climates, consider using two stakes on opposite sides to create that strong triangle configuration mentioned in Step 2—this is especially helpful for trees over 6 feet tall.
Seasonal Adjustment: The 2-3 week monitoring schedule in Step 3 is crucial, but don't forget to adjust your approach with the seasons. In late winter, when the tree is dormant, ties can become too tight as the bark doesn't expand. I always check ties in early spring and adjust them before new growth begins. This prevents the classic "tie marks" you see on many supported trees where the tie has been too tight for too long.
Winter Protection: The tree guard mentioned in Step 4 serves a dual purpose beyond rodent protection. In areas with heavy snowfall, wrap the guard around the entire support system (ties, stakes, and branches) to prevent ice accumulation that could add dangerous weight. I've seen cases where snow buildup on unsupported branches caused them to snap despite proper staking—this extra layer of protection makes all the difference during winter storms.
Pro Tips for Apple Tree Branch Support
- These practical insights will help you create a sturdy, long-lasting support system that protects your young apple tr...
- Material Selection: The right materials make all the difference. For the 4-6 inch wide tree ties mentioned in Step 1,...
- Stake Placement Strategy: When positioning your 16-inch stakes at a 30-degree angle in Step 1, think about wind patte...
Frequently asked questions
Got questions about keeping your apple tree branches sturdy and healthy? You’re not alone! Here are some of the most common concerns—and straightforward answers—to help you support your tree like a pro.
When is the best time to add branch support to an apple tree?
Ideally, install support structures like stakes, spreaders, or cables during dormant seasons—late fall or early spring. This minimizes stress on the tree and allows it to heal quickly. If your tree is already struggling (e.g., leaning or cracking branches), act fast but avoid heavy pruning or support adjustments during extreme heat or frost.
What materials work best for apple tree branch support?
For young trees, T-posts with soft ties (like tree straps or rubber guards) are gentle and effective. Mature trees may need spreader bars or cable systems for heavy branches. Avoid wire or anything that can cut into bark—opt for flexible, breathable materials (e.g., burlap, canvas, or plastic). Pro tip: Check local hardware stores for pre-made orchard stakes!
How do I know if my apple tree’s branches need support?
Watch for these red flags: leaning heavily, cracks or splits in the trunk/branches, or splaying (branches growing too far apart). If branches rub together (called "branch union"), they’ll eventually damage each other. Test stability by gently shaking the branch—if it wobbles excessively, it’s time to reinforce it.
Can I use DIY methods (like stakes or ropes) instead of commercial supports?
DIY works for light support, but follow these tips: Use wide, soft ropes (like nylon webbing) to avoid girdling. Secure stakes 3 feet deep into the ground for stability. For heavy branches, combine stakes with spreader bars (cut from PVC pipes or wood). Just avoid tight knots or metal hardware that can harm the bark.
What should I do if my supported branches still look unhealthy?
If branches remain weak or yellow (a sign of poor circulation), check for root issues or pests first. Loosen ties every 6–12 months to prevent girdling. If the problem persists, consult a local arborist—they can diagnose disease or nutrient deficiencies (like zinc deficiency, common in apples). Healthy soil and mulch can also boost recovery!
Wrapping up and next steps
Supporting your apple tree’s branches isn’t just about aesthetics—it’s a game-changer for fruit production and long-term health. 🌳 By investing in sturdy stakes, cables, or pruning techniques, you’re setting your tree up for stronger growth, heavier harvests, and fewer structural headaches.
Whether you’re a seasoned gardener or just starting out, every little effort now pays off in juicier apples and a thriving orchard.
Ready to take action? Start by assessing your tree’s needs today—your future harvest (and your tree!) will thank you. Check out our pruning checklist to keep your apple tree in top shape year-round.