
Propagation
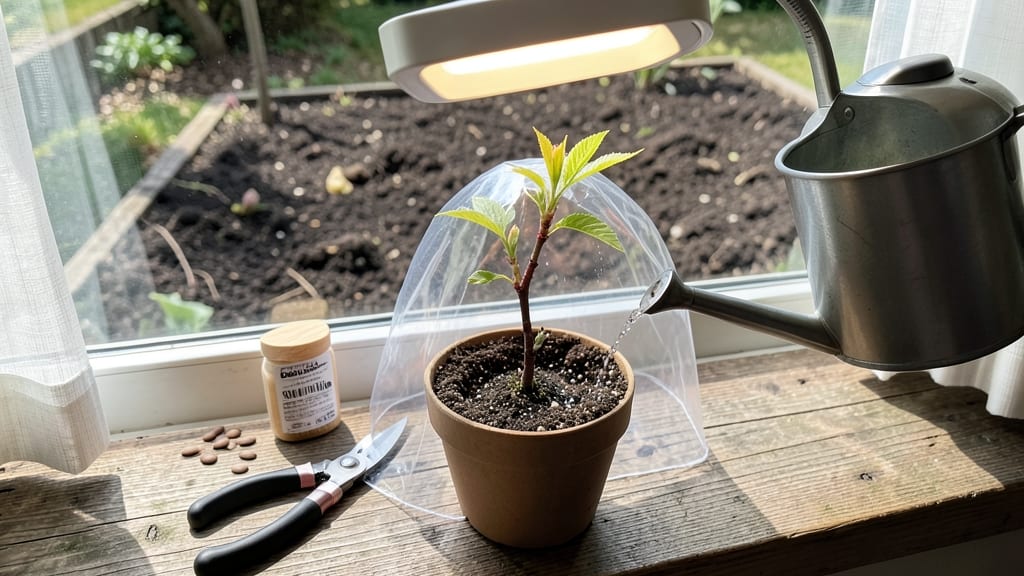
Growing a cherry blossom tree from seed is a 10-year love letter to spring—but the first pink buds make every winter wait worthwhile. 🌸 The process starts with a single pit, not a sapling, and requires more patience than most gardeners give it.
My first attempt took three years just to crack the shell, but that stubborn little shoot became the centerpiece of my yard. You’ll need a cool stratification period (mimicking nature’s winter) to break seed dormancy, followed by a sunny spot and well-draining soil.
Most seeds won’t sprout—expect a 5-10% germination rate—but when they do, the payoff is a tree that’ll eventually bloom with clouds of delicate petals. The real magic happens after 5-10 years, when your seedling finally transforms into that showstopping spring display.
What you’ll end up with isn’t just a tree—it’s a living heirloom, passed down through generations of gardeners. The first true leaves appear in 2-3 weeks after germination, and by year three, you’ll have a sturdy sapling ready for its forever home.
Just don’t expect flowers until your kids (or grandkids) are grown. This method works best in USDA zones 5-8, where cherry blossoms thrive. For faster results, consider grafting, but there’s something deeply satisfying about nurturing a tree from that very first seed. Let’s get those pits prepped!
📚 In This Guide
- What you need
- Instructions
- Tips and common mistakes
- Wrapping up and next steps
What you need
- ● Cherry blossom seeds: Fresh seeds from a Prunus serrulata (Japanese cherry blossom) or similar species. Aim for 3-5 seeds to increase success rates.
- ● Seed tray or small pots: 3-4 inch diameter with drainage holes (1 per seedling). Use biodegradable pots if transplanting later.
- ● High-quality potting mix: A well-draining blend like 50% peat moss or coco coir + 50% perlite/sand to prevent rot.
- ● Plastic wrap or humidity dome: To maintain moisture during germination.
- ● Spray bottle: For gentle watering (avoid over-saturation!).
- ● Grow lights or sunny windowsill: A south-facing window or LED grow lights (12-14 hrs/day) for seedlings.
- ○ Fertilizer (optional but helpful): A balanced liquid fertilizer (5-5-5 or 10-10-10) diluted to half-strength for young seedlings.
- ● Patience: Germination can take 4-12 weeks—cherry blossom seeds are notoriously slow!
- ● Cold stratification: Seeds must undergo a 60-90 day cold period (34-41°F / 1-5°C) to break dormancy. Use a fridge or outdoor winter exposure.
- ● Warmth for germination: Once stratified, maintain 65-75°F (18-24°C) for sprouting.
- ● Space for maturity: Cherry blossoms need 20-30 feet of height and width at full growth—plan for outdoor planting in a sunny, open area.
- ● Seed-starting heat mat ($15-$25) to speed up germination.
- ● pH test kit to ensure soil is slightly acidic (6.0-6.5).
- ● Epsom salt (1 tsp/gallon) for magnesium boost during early growth.
- ● Pruning shears for shaping as the tree matures.
Step-by-Step instructions for growing a cherry blossom tree from seed
Here’s how to nurture a seed into a future spring spectacle—though the real magic starts years before blooms appear.
🌱 Step 1: Extract and Stratify the Seed
Cherry blossom seeds require stratification to break dormancy, mimicking winter’s natural process. Remove the seed from its pit (if still attached to pulp) and place it in a small paper towel or dampened cotton ball. Seal it in a plastic bag with a moistened peat moss mix—about 2 parts peat to 1 part sand—and refrigerate for 60-90 days. This cold treatment tricks the seed into thinking winter has passed.
Check the seed weekly—it should feel damp but not soggy. If moisture evaporates, spritz lightly with water. After 90 days, the seed will either sprout or remain dormant; don’t force it. Patience here determines whether your tree grows strong or stunted. I’ve seen seeds take 3-6 months to crack open, so resist the urge to rush.
🌿 Step 2: Plant the Germinated Seed
Once the seed sprouts a white root (about ¼ inch long), it’s ready for soil. Fill a small 4-inch pot with sterile seed-starting mix—never garden soil, which can harbor fungi. Plant the seed ½ inch deep, root side down, and cover lightly. Water gently until the soil is evenly moist but not waterlogged. Place the pot in a warm (65-75°F) location with indirect light—a sunny windowsill works, but avoid direct sun, which can scorch delicate seedlings.
Keep the soil consistently moist (not wet) by checking the top inch daily. Overwatering now causes damping-off, a fungal disease that collapses stems overnight. If condensation forms on the pot’s surface, reduce watering slightly. Seedlings may take 2-4 weeks to emerge—this is normal for cherry blossoms.
☀️ Step 3: Transplant and Provide Full Sun
When seedlings reach 3-4 inches tall (usually 4-6 weeks after sprouting), transplant them into individual 6-inch pots with fresh well-draining potting mix. Handle roots gently—they’re fragile. Place the pots in a south-facing window or under a grow light for 12-14 hours daily. Cherry blossom trees need full sun to develop properly, but young seedlings can’t handle it yet.
After 2 months, when the tree shows 5-6 true leaves, acclimate it to outdoor conditions by placing it outside for 2-3 hours daily, gradually increasing exposure. By late spring, it can stay outdoors full-time. This hardening-off process prevents shock when moved permanently to the garden. I’ve lost seedlings by skipping this step—don’t make that mistake.
🪴 Step 4: Plant Outdoors and Prune for Structure
Wait until after the last frost (when soil is 60°F+) to transplant your 1-year-old seedling into the ground. Choose a location with full sun and well-drained soil—cherry blossoms hate soggy roots. Dig a hole twice as wide as the root ball but no deeper. Amend the soil with compost to improve fertility, then water deeply before planting.
Prune the tree immediately after transplanting to remove any damaged leaves or stems and encourage branching. Cut back any leggy growth by ⅓ to promote bushier growth. Mulch around the base with 2-3 inches of organic mulch (like wood chips) to retain moisture and suppress weeds. Water deeply once a week during the first year, ensuring the soil stays evenly moist but never waterlogged.
⏰ Step 5: Winter Care and Long-Term Growth
Cherry blossom trees grown from seed take 5-10 years to bloom—so protect young trees from harsh winters. In Zone 5 or colder, wrap the trunk with tree guard and mulch heavily (up to 4 inches) to insulate roots. Avoid pruning in late summer or fall, as new growth won’t harden off before winter. By year 3, you’ll see rapid growth, but blooms won’t appear until the tree matures.
Fertilize annually in early spring with a balanced 10-10-10 fertilizer to encourage strong root and canopy development. Monitor for pests like aphids or borers—treat early with neem oil to avoid infestations. With patience, your seedling will one day produce pink spring blooms, proving that the wait was worth it.
Tips & tricks for growing a cherry blossom tree from seed
Growing a cherry blossom from seed is a marathon, not a sprint—here's how to avoid the pitfalls that turn hopeful gardeners into impatient quitters.
Stratification Precision: The 60-90 day cold treatment in Step 1 is non-negotiable, but here's the trick: place your sealed bag in the crisper drawer of your fridge where temperatures hover around 35-40°F—cooler than most refrigerators' main compartments. This mimics natural winter conditions more accurately. I've found that seeds placed in the main fridge (often 38-42°F) sometimes take longer to break dormancy. Also, if you're impatient and check weekly, look for the seed to plump slightly—this is your first sign it's working.
Seedling Survival Tactics: In Step 2, the biggest mistake is overwatering—condensation on your pot's surface is your warning sign. Instead of watering daily, I use a spray bottle to mist the soil lightly when the top inch feels dry. For humidity, place your seedling pot on a tray filled with pebbles and water (but keep the pot above the waterline). This creates a microclimate that prevents the damping-off fungus that kills so many seedlings. And when you see that first white root, don't wait—plant it immediately. Roots can dry out in just 30 minutes once exposed.
Light Management: The 12-14 hours of light in Step 3 is crucial, but quality matters more than quantity. If using a grow light, position it 6-12 inches above seedlings—closer for cooler bulbs, farther for hotter LEDs. I've had seedlings stretch toward lights that were too far away, creating weak stems that snap easily. For natural light, rotate your pots daily so all sides get even exposure. And remember: direct sun at this stage will scorch delicate leaves. Think of it as giving your seedling a gentle sunburn prevention lesson.
Transplant Timing: When moving your 1-year-old seedling outdoors in Step 4, don't rush after the last frost. Wait until soil reaches 60°F+ AND nighttime temperatures stay above 45°F for at least a week. I've seen new transplants get frost damage when soil was warm but nights were still chilly. Also, when digging your planting hole, loosen the sides with a fork to prevent soil compaction—this helps roots establish faster. The twice-as-wide hole gives roots room to spread without circling, which creates a stronger tree structure.
Pro Tips for Grow A Cherry Blossom Tree From A Seed
- Growing a cherry blossom from seed is a marathon, not a sprint—here's how to avoid the pitfalls that turn hopeful gar...
- Stratification Precision: The 60-90 day cold treatment in Step 1 is non-negotiable, but here's the trick: place your ...
- Seedling Survival Tactics: In Step 2, the biggest mistake is overwatering—condensation on your pot's surface is your ...
Frequently asked questions
Got questions?
Growing a cherry blossom tree from seed is rewarding but comes with its share of curiosity. Here are answers to the most common questions to help you navigate this delicate process with confidence!
How long does it take for a cherry blossom seed to germinate?
Germination can take anywhere from 4 to 12 weeks, depending on the seed’s stratification success and environmental conditions. Some seeds may sprout faster if pre-soaked or planted in warm, moist soil. Patience is key—don’t rush it! If nothing happens after 3 months, gently check for mold or rot.
Will my cherry blossom tree bloom in the first year?
Nope! Cherry blossom trees grown from seed are notoriously slow to flower. It can take 5 to 10 years (or even longer) before you see those iconic pink blooms. Grafted trees bloom faster, but seed-grown trees reward you with patience—and a truly unique specimen!
Can I grow a cherry blossom tree indoors?
While possible, it’s challenging due to their size and light needs. Start seeds indoors under bright grow lights (12+ hours/day) in a warm, humid environment. Once seedlings sprout, transplant them outdoors only after the last frost. Indoor growth stunts root development, so outdoor planting is ideal.
What if my seedling looks weak or yellow?
Yellowing leaves or weak growth often signal overwatering, poor drainage, or nutrient deficiency. Let the soil dry slightly between waterings, and use a balanced fertilizer (like 10-10-10) once leaves appear. If mold forms, repot in fresh, sterile soil. Don’t panic! Many seedlings recover with adjustments.
Are all cherry blossom seeds viable, or do I need to buy specific ones?
Not all seeds are created equal! For best results, source seeds from mature, healthy trees (or buy from reputable nurseries). Some hybrid varieties (like ‘Kwanzan’) may not produce true-to-type offspring. If you’re unsure, start with Prunus serrulata seeds—the classic wild-type cherry blossom.
Do cherry blossom seedlings need winter care?
Yes! Young seedlings are frost-sensitive until established. In their first winter, mulch heavily (3–4 inches) around the base and wrap the trunk with burlap if temperatures drop below 15°F. Avoid heavy snow buildup, which can damage branches. Older trees handle cold better but still benefit from protection.
Wrapping up and next steps
Growing a cherry blossom tree from seed is a rewarding journey that blends patience with the joy of nurturing life. While it may take years to bloom, every step—from seed stratification to careful transplantation—brings you closer to that pink-and-white springtime magic. 🌸
Now that you’re equipped with the know-how, roll up your sleeves and start sowing! Watch your tiny seedling grow into a symbol of resilience—and who knows? You might just create the next generation of cherry blossoms for future generations to admire. Happy gardening! 🌱