
Blooming
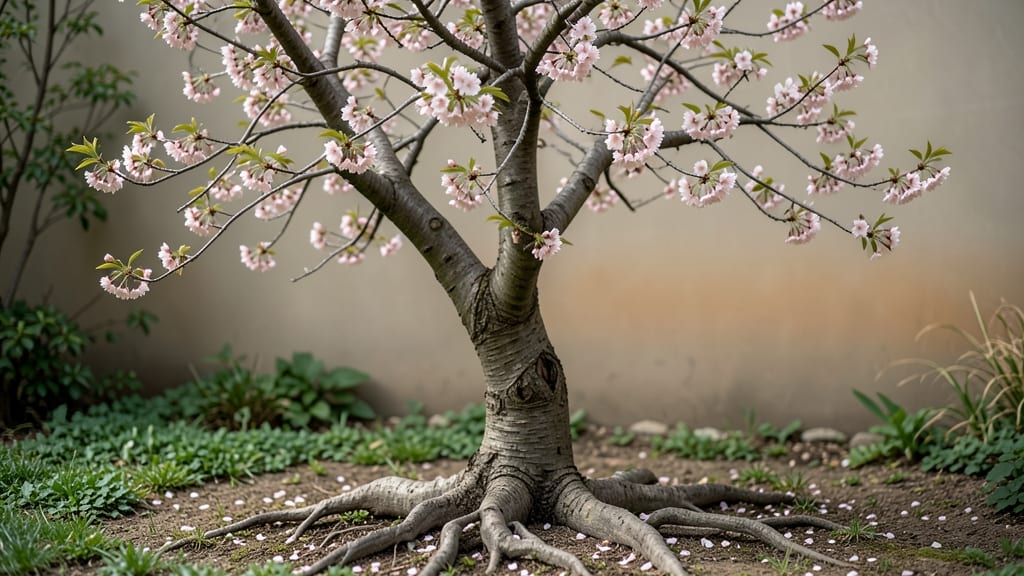
Caring for a cherry blossom bonsai tree means mastering the delicate balance between art and science. ✨ The secret to those iconic pink blooms lies in precise pruning, seasonal adjustments, and understanding what your tree truly needs—not just what it looks like it wants.
My first bonsai nearly died from over-pruning, but now I’ve perfected the timing and technique for year-round beauty.
The right tools and setup make all the difference: a well-draining soil mix, a humidity tray for dry climates, and sharp bonsai scissors to avoid tearing branches. Watering isn’t about keeping the soil soggy—it’s about consistency.
Let the top inch dry between waterings, and your tree will reward you with vibrant foliage and those dreamy spring blooms.
By late winter, you’ll start shaping the branches to encourage blooms, and by summer, your bonsai will be a lush, flowering masterpiece. The key is patience—bonsai care is a slow dance, not a sprint.
With each season, your tree will grow stronger, and those delicate blossoms will become a reliable highlight of your home.
Whether you’re a beginner or refining your skills, this approach works for any space—sunny windowsills or shaded patios. The satisfaction of nurturing a living work of art is unmatched. Let’s get your bonsai thriving!
📚 In This Guide
- What you need
- Instructions
- Tips and common mistakes
- Wrapping up and next steps
What you need
- ● Cherry Blossom Bonsai Tree – Choose a healthy specimen (preferably Prunus serrulata or Prunus x yedoensis) with a sturdy trunk and vibrant buds.
- ● Bonsai Pot – A shallow, well-draining pot (5–10 inches wide) with drainage holes. Unglazed clay is ideal.
- ● Bonsai Soil Mix – A blend of 70% inorganic material (like akadama, pumice, or lava rock) and 30% organic matter (peat moss or compost). Pre-mixed bonsai soil works too!
- ● Pruning Tools – Concave cutter (for branch pruning)
- ● Bypass pruners (for fine trimming)
- ● Wire cutters (for removing support wires)
- ● Root Pruning Knife or Shears – For shaping roots during repotting.
- ● Wire (Aluminum or Copper) – 1–3mm gauge, enough to secure branches (typically 10–20 feet per tree).
- ● Watering Can – With a rose nozzle for gentle, targeted watering.
- ● Misting Bottle – To maintain humidity, especially in dry climates.
- ● Fertilizer – Balanced liquid fertilizer (10-10-10 or 20-20-20, diluted to half-strength)
- ● Slow-release granules (for seasonal feeding)
- ● Bonsai Humidity Tray – Keeps roots moist without overwatering.
- ● Grafting Tools – If you’re propagating from cuttings.
- ● Bonsai Gloves – Protects hands from soil and sharp tools.
- ● Tree Support Stakes – For stabilizing newly planted or weak trees.
- ● Pest Control Spray – Neem oil or insecticidal soap for aphids/spider mites.
- ● Bonsai Display Stand – Elevates your tree for optimal airflow and aesthetics.
Instructions for cultivating a cherry blossom bonsai through the seasons
Mastering these seasonal rhythms transforms your bonsai from a delicate sapling into a lifelong work of living art.
🌱 Step 1: Establish Proper Watering and Humidity Routines
Your cherry blossom bonsai thrives on consistency—water when the top 1 inch of soil feels dry to the touch, using room-temperature water to avoid shocking the roots. I pour until water drains freely from the bottom, then let excess collect in the tray for 10 minutes before discarding it. This prevents root rot while maintaining moisture.
Humidity is critical, especially indoors. Place the pot on a humidity tray filled with pebbles and water, or mist the foliage daily during dry months. Watch for curled leaves—they signal thirst, while yellowing indicates overwatering. Adjust your schedule based on seasonal air changes; winter air typically holds less moisture, requiring more frequent misting.
☀️ Step 2: Manage Light Exposure Seasonally
Outdoors, position your bonsai where it receives 4-6 hours of morning sun and 2-4 hours of afternoon shade during spring and fall. Direct midday sun in summer can scorch delicate blossoms, so I move mine to partial shade by 11 AM. Indoors, place it near an east-facing window for gentle, diffused light—south-facing windows may deliver too much intensity.
In winter, supplement with a grow light if natural light drops below 12 hours daily. I use a full-spectrum LED positioned 12 inches away for 6 hours each evening. Lack of light causes buds to drop prematurely, so monitor leaf color: vibrant green means sufficient light, while pale yellow signals deficiency.
✂️ Step 3: Execute Precision Pruning for Structure and Bloom
Prune new growth in late spring after blossoms fade, cutting back to the first set of mature leaves to encourage branching. Use sharp, sterilized shears to make clean cuts at a 45-degree angle just above a bud. This prevents tearing and promotes stronger regrowth. I prune one-third of new shoots to maintain the tree's natural silhouette while stimulating future blooms.
For shaping, wire branches gently but firmly—never bend more than 45 degrees at once to avoid breaking. Remove wires after 3-4 months to prevent scarring. The goal is to guide growth, not force it. Watch for buds forming along the wire: these indicate successful training, while sparse budding suggests the tree needs more light or fertilizer.
🌿 Step 4: Adjust Fertilization for Seasonal Growth Phases
Feed your bonsai with a balanced liquid fertilizer (10-10-10) diluted to half-strength every 2 weeks during spring and summer. This supports rapid growth and bud formation. In fall, switch to a low-nitrogen formula (5-10-10) to harden the tree for winter, applying it once every 4 weeks. Withhold fertilizer completely in winter unless the tree shows new growth—dormancy is its natural rest period.
I always fertilize after watering to prevent root burn. Look for dark green, glossy leaves as a sign of proper nutrition, while yellowing between veins indicates iron deficiency. If you notice slow growth despite regular feeding, the tree may need organic matter like compost mixed into the soil during repotting.
⏰ Step 5: Prepare for Dormancy and Winter Care
As temperatures drop below 50°F, reduce watering to every 5-7 days, letting the soil dry slightly between sessions. Move the bonsai to a cool location (around 40-50°F) with bright, indirect light. I wrap the pot in bubble wrap to protect roots from cold drafts, leaving the top exposed for air circulation.
Prune dead or damaged branches in early winter, but avoid heavy pruning—this stresses the tree when it’s already conserving energy. Check for pests like spider mites, which thrive in dry winter air. If you spot webbing or tiny dots on leaves, treat with neem oil and increase humidity. Spring growth will reward your winter care with vibrant new buds and foliage.
Tips & tricks for perfect cherry blossom bonsai care
Between us, these subtle adjustments make all the difference in keeping your cherry blossom bonsai thriving year-round.
Seasonal Watering Precision: The 10-minute drainage time in Step 1 isn't just about preventing root rot—it's about establishing a consistent moisture baseline. I've found that using a moisture meter (inserted 1 inch deep) gives more reliable readings than finger tests, especially in winter when soil appears dry but may still contain adequate moisture. For indoor bonsai, consider adding a small fan nearby to improve air circulation around the pot, which helps prevent fungal issues while maintaining that critical humidity balance.
Light Exposure Troubleshooting: That 11 AM move to partial shade in summer is crucial, but here's what nobody tells you—watch for leaf scorch on the undersides of leaves first. If you notice crispy brown edges developing despite your shading efforts, your tree might need even more protection. For indoor grow lights, I've had success with a simple timer set for those 6 hours to create a predictable light cycle, which helps regulate your bonsai's internal clock and prevents the stress of irregular light exposure.
Pruning Technique Refinement: When you're pruning those one-third of new shoots in Step 3, focus on cutting just above the bud at that 45-degree angle—but here's the secret: use a magnifying glass to verify you're actually cutting above a bud, not between nodes. I also recommend sterilizing your shears with rubbing alcohol between cuts to prevent spreading any potential pathogens. For wiring branches, I've found that aluminum wire works better than copper for delicate cherry blossom branches because it's more flexible and less likely to cut into the bark over time.
Winter Care Optimization: That 50°F threshold for winter adjustments is your guide, but don't forget about temperature fluctuations. Place your bonsai away from drafty windows or exterior doors where cold air rushes in. I've had success using a small space heater with a thermostat set to maintain that 40-50°F range in particularly cold rooms. The bubble wrap around the pot is a game-changer—it creates an insulating barrier without trapping too much moisture, which could lead to root issues.
Pro Tips for Cherry Blossom Bonsai Tree Care
- Between us, these subtle adjustments make all the difference in keeping your cherry blossom bonsai thriving year-round.
- Seasonal Watering Precision: The 10-minute drainage time in Step 1 isn't just about preventing root rot—it's about es...
- Light Exposure Troubleshooting: That 11 AM move to partial shade in summer is crucial, but here's what nobody tells y...
Frequently asked questions
How often should I prune my cherry blossom bonsai?
Prune your bonsai twice a year: once after flowering (late spring) to shape the tree and again in summer to encourage dense foliage. Avoid heavy pruning in fall/winter—this is when the tree rests! Use sharp, sterilized tools to make clean cuts at 45-degree angles.
Can I keep my cherry blossom bonsai outdoors year-round?
Yes, but with caution! These bonsai love fresh air but need shelter from extreme cold (below 10°F/-12°C) and harsh winds. In winter, move it to a covered patio or garage if temperatures drop. Avoid sudden temperature swings—consistency is key!
Why are my cherry blossom bonsai leaves turning yellow?
Yellow leaves usually signal overwatering or nutrient deficiencies. Check the soil—it should stay slightly moist but never soggy. If roots smell rotten, repot in fresh, well-draining mix. For yellowing between veins, try a balanced liquid fertilizer (diluted to half-strength) every 4–6 weeks in growing season.
How do I encourage more blossoms on my bonsai?
Blossoms thrive with proper light, pruning, and dormancy. Place your bonsai in bright, indirect sunlight (6+ hours daily). After flowering, prune spent blooms but leave some buds to signal the tree to flower again. In late fall, reduce watering to mimic winter dormancy—this helps set next year’s blooms!
What’s the best soil mix for a cherry blossom bonsai?
Use a well-draining mix like 50% akadama, 30% pumice, and 20% organic matter (like peat moss). Avoid heavy garden soil—it compacts and suffocates roots. Repot every 2–3 years in spring to refresh nutrients and prune roots gently with a root rake.
Wrapping up and next steps
Caring for a cherry blossom bonsai tree is a rewarding journey that blends artistry with patience—each prune, trim, and watering step brings you closer to a living masterpiece. 🌸 Remember, the key lies in consistent attention, seasonal adjustments, and a deep appreciation for the tree’s delicate beauty.
Whether you’re a beginner or a seasoned bonsai enthusiast, every effort nurtures not just a plant, but a symbol of grace and resilience.
Now that you’re armed with the essentials, why not take the next step? Start small—grab your tools and give your bonsai a gentle inspection today!
Or, explore advanced techniques like jins or shohin styling to elevate your craft further. Your cherry blossom bonsai is waiting for your touch! ✨