
Tools
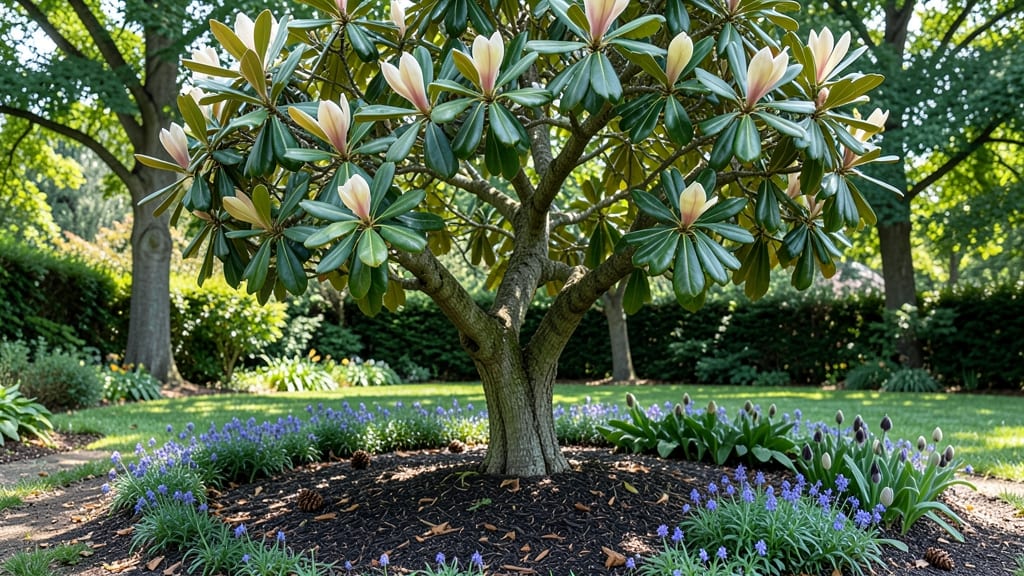
A tree garden bed turns even the tiniest yard into a lush, layered landscape. 🌳 I designed mine around a dwarf Japanese maple, pairing it with shade-loving ferns and delicate hostas—what was once bare soil now feels like a secret woodland retreat.
The key? Choosing slow-growing trees that won’t outgrow the space in five years, while still creating instant vertical interest.
Start with soil prep—amend with compost to improve drainage, since tree roots need room to breathe. Then layer companion plants in three tiers: tall perennials at the back, mid-height shrubs in the middle, and trailing ground covers like ajuga or creeping thyme up front.
My design stays under 6 feet wide to avoid crowding, with paths woven through for easy access. The result? A garden that grows with you, not against you.
By summer, you’ll have a textured, multi-level display that thrives even in tight spaces. The maple’s delicate leaves filter sunlight for shade plants below, while the hostas and ferns add lush green contrast.
This isn’t just a garden bed—it’s a living sculpture that evolves with the seasons, from spring blooms to autumn’s fiery foliage.
Works for any small yard, balcony, or even large containers. The same principles apply whether you go for a whimsical cottage look or a sleek modern arrangement. Let’s make your space feel bigger—and more magical—than it is.
📚 In This Guide
- What you need
- Instructions
- Tips and common mistakes
- Wrapping up and next steps
What you need
- ● Garden bed frame: Plywood or cedar boards (½-inch thick, 4’ x 8’ sheet) – 1-2 sheets
- ● Wooden posts or stakes (4x4 inches, 4-6 feet tall) – 4-6 pieces
- ● L-brackets or corner braces (galvanized steel) – 4-6 pieces
- ● Growing medium: High-quality potting mix (moisture-retentive, well-draining) – 2-3 cubic feet
- ● Perlite or vermiculite (for aeration) – 1 small bag
- ● Drainage: Landscape fabric (to prevent soil erosion) – 1 roll
- ● Drainage holes (pre-drill or use a hole saw) – ¼-inch diameter
- ● Hardware: Outdoor screws (2.5-inch deck screws, stainless steel) – 20-30 screws
- ● Wood glue (for extra stability) – 1 small bottle
- ● Planting essentials: Small trees or shrubs (dwarf varieties for vertical growth) – 3-5 plants
- ● Planting pots or grow bags (fabric or plastic, 5-7 gallons) – 3-5 pots
- ● Watering system: Drip irrigation kit or self-watering reservoir
- ● Mulch: Shredded bark or coconut coir for moisture retention
- ● Paint or stain: For a polished look (weather-resistant)
- ● Hanging planters: To add extra greenery or flowers
- ● Solar-powered lights: For a magical evening glow
Step-by-Step instructions for creating a tree garden bed
Turn your small yard into a lush vertical forest with this simple, space-saving design.
🪴 Step 1: Choose and Prepare Your Site
Select a sunny, level spot with at least 6 feet of vertical space—trees need room to grow upward, not sideways. Avoid areas with overhead power lines or large structures that might obstruct growth. I like to test the soil first by digging a 6-inch hole and checking drainage: if water pools after 30 minutes, you'll need to amend with 2-3 inches of coarse sand mixed into the top 12 inches of soil.
Clear the area of weeds and debris, then mark the bed's dimensions with wooden stakes and string. For a 4-tree setup, space stakes 4 feet apart in a square or rectangular pattern. This gives each tree enough room to mature without competing for nutrients or light. Real talk: if your space is tighter, opt for dwarf varieties—they'll still thrive with just 3 feet of separation.
☀️ Step 2: Build the Raised Bed Structure
Construct a raised bed frame using untreated lumber (2x6s or 2x8s) or galvanized metal edging to contain the soil. For a 4-tree bed, build a frame 12-18 inches deep and 4 feet wide by 4 feet long—deep enough to accommodate tree roots while keeping the structure lightweight. Line the bottom with landscape fabric to block weeds but allow drainage.
I reinforce the corners with metal brackets and secure everything with deck screws to prevent shifting. If you're using wood, treat it with a non-toxic sealant to extend its life. Leave the top edges slightly flared outward to make watering easier—this prevents runoff and keeps moisture where it belongs. Pro tip: add 4 small drainage holes near the bottom corners to avoid waterlogging.
🌱 Step 3: Layer the Soil for Optimal Growth
Fill the bed with a custom soil mix designed for trees: start with a 4-inch layer of coarse gravel at the bottom for drainage, then add 6 inches of high-quality topsoil. Top this with 4 inches of compost to feed the roots as they establish. For a 4-tree bed, you'll need about 1 cubic yard of soil mix total—rent a wheelbarrow if hauling feels like too much work.
Mix in a slow-release fertilizer (like 10-10-10) at a rate of 1 pound per tree to give them a nutrient boost right away. Water the soil thoroughly after filling the bed—this helps it settle and removes air pockets. You'll know it's ready when the surface feels damp but not soggy and holds its shape when pressed gently. Here's the thing: trees hate soggy roots, so if your soil stays wet longer than 24 hours, add another 2 inches of gravel at the bottom.
🌿 Step 4: Plant the Trees Properly
Dig one hole per tree, making each twice as wide as the root ball but no deeper than the container. Gently remove each tree from its pot and loosen the roots at the edges if they're circling—this encourages outward growth. Place the tree in the hole so the top of the root ball sits level with the bed's soil surface (never bury the trunk deeper than it was in the pot).
Backfill with soil, pressing lightly to remove air pockets but avoiding compaction. Water each tree deeply to settle the soil and eliminate gaps. I like to add a 2-inch layer of mulch (like shredded bark) around the base, keeping it 3 inches away from the trunk to prevent rot. Mulch helps retain moisture and regulates soil temperature—just don’t overdo it, or it’ll smother the roots.
⏰ Step 5: Maintain for Long-Term Success
Water deeply once a week during the first growing season, aiming for 1-2 gallons per tree each time. You'll know you're doing it right when the soil 6 inches down stays consistently moist but not waterlogged. After the first year, trees develop deeper roots and need less frequent watering—every 2-3 weeks should suffice, unless you're in a hot, dry climate.
Fertilize lightly in early spring with a balanced, slow-release formula, and prune any dead or crossing branches in late winter to encourage healthy growth. Watch for signs of stress like yellowing leaves (usually a watering issue) or pests (like aphids)—address problems early to keep your vertical forest thriving. This is the moment that matters: with proper care, your trees will grow 1-2 feet per year, creating a stunning, space-saving green wall over time.
Tips & tricks for perfect tree garden beds
A few simple strategies will help you avoid common pitfalls and create a thriving vertical forest.
Soil Drainage Check: In Step 1, when testing your soil's drainage by digging that 6-inch hole, here's what I learned: if water disappears within 30 minutes, you're golden. But if it lingers, don't just add more gravel—mix in 10% perlite with that 2-3 inches of coarse sand. This creates better air pockets for roots while still improving drainage. I've seen soggy soil ruin perfectly good tree beds, so this extra step makes all the difference.
Frame Stability Secret: For Step 2, when building your raised bed frame, I recommend using 3x3-inch metal corner brackets at each connection point instead of just deck screws. These distribute weight better and prevent the frame from bowing outward over time. If you're using wood, pre-drill holes for screws to avoid splitting—especially with those 2x6s or 2x8s. Trust me on this: a sturdy frame lasts for years and keeps your soil contained.
Tree Spacing Flexibility: The instructions mention 4 feet for standard trees, but here's the thing: if you're working with container-grown trees (which are perfect for vertical gardens), you can safely reduce spacing to 3 feet between plants. Just make sure to choose varieties with similar growth rates—mixing fast growers with slow ones creates uneven competition. I've seen beautiful 3-tree setups thrive where 4-tree arrangements struggled.
Mulch Application: When adding that 2-inch layer of mulch in Step 4, keep it 3 inches away from the trunk—this prevents rot and pest issues. Here's my extra tip: use shredded hardwood mulch instead of bark chips for better moisture retention. And don't pile it up against the frame edges either—leave a 2-inch border to prevent water pooling against the wood. This small detail keeps your trees healthy for years.
Pro Tips for Tree Garden Bed
- A few simple strategies will help you avoid common pitfalls and create a thriving vertical forest.
- Soil Drainage Check: In Step 1, when testing your soil's drainage by digging that 6-inch hole, here's what I learned:...
- Frame Stability Secret: For Step 2, when building your raised bed frame, I recommend using 3x3-inch metal corner brac...
Frequently asked questions
Got questions about creating a tree garden bed? You’re not alone! Here are some of the most common queries—and their practical answers—to help you get started with confidence.
What’s the best time of year to plant a tree garden bed?
The ideal time is early spring (after the last frost) or fall (6–8 weeks before the first frost). This gives roots time to establish before extreme temperatures. For container-grown trees, you can plant year-round in mild climates, but avoid heatwaves or freezing conditions.
Can I use a tree garden bed for large trees, or is it only for small varieties?
Tree garden beds work best for dwarf or semi-dwarf trees (like fruit trees, citrus, or ornamental varieties). Large trees need more root space—opt for 5+ gallon containers or ground-planted beds with deep soil. Always check the tree’s mature size before planting!
How do I prevent roots from circling or becoming root-bound in containers?
Use well-draining soil with organic matter (like compost) and prune roots at planting if they’re circling. Repot every 2–3 years into slightly larger containers. For ground beds, mulch heavily (3–4 inches) to encourage outward root growth.
What if my tree garden bed doesn’t get enough sunlight?
Most trees need 6+ hours of sunlight daily. If your space is shady, choose low-light tolerant varieties like dwarf figs, columnar apples, or shade-tolerant citrus. Supplement with grow lights (12–14 hours/day) for indoor setups or relocate the bed to a sunnier spot.
What’s the easiest way to troubleshoot yellowing leaves in my tree?
Yellow leaves usually signal overwatering, underwatering, or nutrient deficiency. Check soil moisture (top 2 inches should be dry), adjust watering, and fertilize with a balanced, slow-release fertilizer. If pests (like spider mites) are present, treat with neem oil or insecticidal soap.
Still stumped? Tag us with your progress—we love helping tree gardeners thrive!
Wrapping up and next steps
A tree garden bed is your ticket to transforming limited space into a lush, functional green haven—without sacrificing style or productivity! 🌿 Whether you’re a seasoned gardener or a beginner with a green thumb, this vertical solution maximizes growth while minimizing footprint.
With the right tools, materials, and a dash of creativity, you’re just steps away from reaping the rewards of fresh herbs, veggies, or even fruit right outside your door.
Ready to take the next step? Start small—sketch your design, gather supplies, and let your tree garden bed flourish! 🌱 Your future self (and your plants) will thank you.