
Pruning
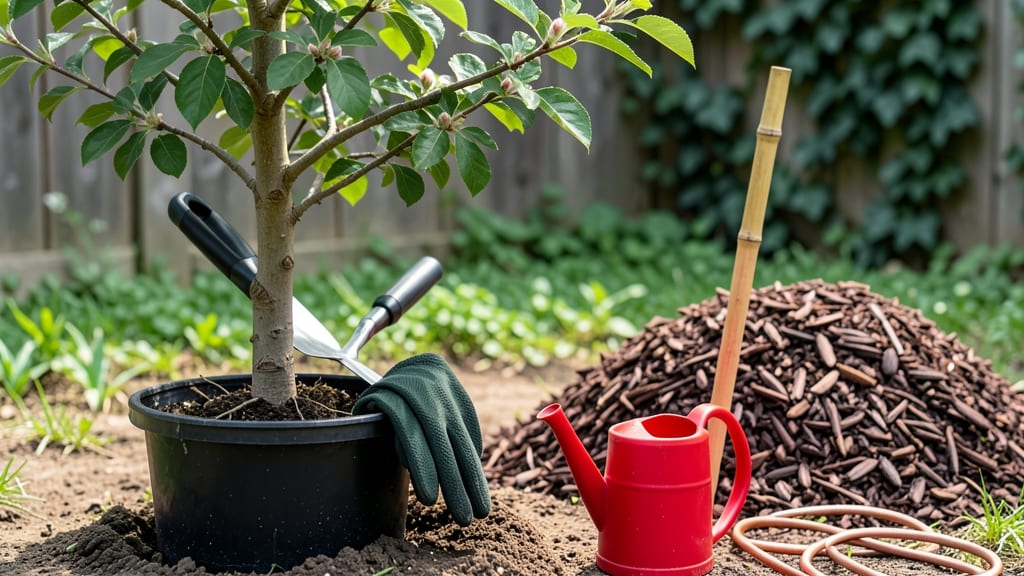
Your first peach tree starter could be the sweetest decision you make this spring. 🌱 Dwarf peach trees aren't just for orchards—they thrive in containers, producing fruit in just 2-3 years with the right care.
I've grown mine in 15-gallon pots for four seasons now, and the harvest keeps getting better. The secret starts with choosing a dwarf variety like 'Bonanza' or 'Redhaven' that's bred for smaller spaces. These need well-draining soil, full sun (6+ hours daily), and consistent watering—never soggy roots.
My trees get watered twice a week in summer, and I mulch heavily to keep moisture steady. By late summer, you'll see those first fuzzy peach blossoms forming, and with proper care, your tree will reward you with juicy, homegrown fruit by next fall.
The key is patience—first-year growth focuses on roots, not fruit, but that's exactly what builds a strong tree. Works for balconies, patios, or even sunny windowsills with proper light. Here's how to set yours up for success!"
📚 In This Guide
- What you need
- Instructions
- Tips and common mistakes
- Wrapping up and next steps
What you need
- ● Dwarf peach tree starter: Choose a Prunus persica variety like ‘Bonanza,’ ‘Redhaven,’ or ‘Elberta’ (ensure it’s labeled “dwarf” or “semi-dwarf” for container suitability). Quantity: 1 tree.
- ● Container: A large pot (minimum 18–24 inches in diameter) with drainage holes. Material: Plastic, fabric, or ceramic (avoid metal).
- ● High-quality potting mix: A well-draining blend with perlite or sand (e.g., 50% garden soil + 30% compost + 20% perlite). Quantity: Enough to fill the container (typically 5–10 gallons).
- ● Drainage layer: Small rocks, gravel, or broken pottery shards (1–2 inches thick) to prevent root rot.
- ● Slow-release fertilizer: Balanced (e.g., 10-10-10) or citrus-specific fertilizer. Quantity: Follow package instructions (usually 1–2 tbsp per gallon of soil).
- ● Mulch: Wood chips or straw (2–3 inches thick) to retain moisture and regulate temperature.
- ● Watering can or hose with gentle spray nozzle: For even hydration without disturbing roots.
- ● Gloves: Heavy-duty garden gloves to protect your hands.
- ● Trowel or small shovel: For planting and soil adjustments.
- ● Pruning shears: Sharp, clean shears (bypass-style) for shaping or removing dead branches.
- ○ Support stake or cage: Optional for windy areas (choose a flexible, lightweight option).
- ● pH testing kit: To ensure soil pH is 6.0–7.0 (ideal for peaches).
- ○ Epsom salt: Optional boost for magnesium (mix 1 tbsp per gallon of water monthly).
- ● Container saucer or tray: To catch excess water and protect surfaces.
How to start a dwarf peach tree in containers
Here's how I get my container peach trees thriving—no yard required.
🌱 Step 1: Choose the Right Dwarf Variety and Container
Pick a cold-hardy dwarf peach like 'Bonanza' or 'Redhaven' that stays under 8 feet tall—perfect for containers. Your pot needs at least 24 inches deep and 18 inches wide with drainage holes. I use unglazed terra cotta because it breathes and prevents root rot. Place a 3-inch layer of gravel at the bottom for drainage.
Real talk: If you skip the gravel, water pools at the roots and your tree will drown. Test your pot by filling it with water—if it drains completely in under 10 minutes, you're good. Otherwise, add more gravel or switch to a pot with bigger holes.
🪴 Step 2: Prepare the Soil Mix for Maximum Growth
Fill the pot with equal parts potting mix, compost, and perlite—this gives your peach tree roots room to breathe while holding moisture. I mix 2 gallons of potting mix, 1 gallon compost, and 1 gallon perlite for my 24-inch pot. The perlite prevents compaction, which is deadly for peach roots.
Don't use garden soil—it compacts in containers and suffocates roots. Instead, add a handful of slow-release fertilizer (like 10-10-10) to the mix. This gives your tree a steady nutrient supply without burning tender roots. Water the mix until it's damp but not soggy—you want it to hold together when squeezed.
☀️ Step 3: Plant Your Tree and Position for Sun
Dig a hole twice as wide as the root ball but no deeper. Gently remove the tree from its nursery pot and loosen any circling roots with your fingers. Place it in the hole so the graft union (the bump near the base) sits 2 inches above soil level. This prevents rot and ensures proper growth.
Backfill with soil, pressing lightly to remove air pockets. Water deeply until it runs out the drainage holes—this settles the soil and removes air gaps. After planting, your tree needs full sun (6+ hours daily). A south-facing spot gets the best results, but east or west works too if you rotate the pot weekly to prevent leaning.
💧 Step 4: Water and Fertilize for Healthy Growth
Water your peach tree when the top 2 inches of soil feel dry—usually 2-3 times per week in summer. Overwatering is the #1 killer of container peaches. I check by sticking my finger in the soil; if it's dry at that depth, it's time to water. Always water at the base, not overhead, to prevent fungal diseases.
Feed your tree every 4-6 weeks with a balanced fruit tree fertilizer (like 10-10-10). In spring, switch to a higher-nitrogen fertilizer (like 12-4-8) to encourage leafy growth. Stop fertilizing in late summer to let the tree harden off for winter. You'll see new leaves emerge within 2-3 weeks of proper feeding—that's your signal everything's working.
⏰ Step 5: Prune and Protect for Long-Term Success
Prune in late winter (before buds swell) to remove dead wood and shape the tree. Cut back 1/3 of last year's growth to encourage fruiting. I also thin out crossing branches to improve airflow—this prevents fungal diseases like brown rot. Sterilize your pruners with rubbing alcohol between cuts to avoid spreading disease.
In winter, move your pot to a protected spot (like against a south-facing wall) if temperatures drop below 10°F. Wrap the pot in burlap to shield roots from freezing winds. With proper care, your dwarf peach will bear fruit in 2-3 years—small but sweet, just like container gardening should be.
Tips & tricks for perfect container-grown dwarf peach trees
Here's what nobody tells you about keeping your dwarf peach thriving in pots—lessons I learned after losing three trees to common mistakes.
Drainage is Non-Negotiable: That 10-minute water test in Step 1 isn't just a suggestion—it's critical. If your pot fails this test, you'll end up with root rot before your tree even gets established. I've seen people skip the gravel layer and wonder why their tree's leaves turn yellow after two weeks. Pro tip: Use a pot with holes AND a saucer with drainage holes too, so excess water can escape completely.
Soil Mix Matters More Than You Think: The equal parts potting mix, compost, and perlite in Step 2 creates the perfect balance, but here's the secret: pre-mix your soil before adding fertilizer. Sprinkle the slow-release 10-10-10 fertilizer directly into the potting mix first, then add compost and perlite. This prevents fertilizer burn when you water the mix. I learned this the hard way after watching new leaves turn brown within days.
Sunlight Strategy for Small Spaces: While 6+ hours of sun is ideal, don't assume every spot gets equal light. In Step 3, if you're using an east or west-facing spot, rotate your pot weekly so the tree grows straight rather than leaning toward the sun. I've had trees grow at crazy angles because I forgot this simple trick—now they look like they're doing yoga instead of growing upright!
Winter Protection Goes Beyond Temperature: The 10°F threshold in Step 5 is just the starting point. When wrapping your pot in burlap, leave the top 6 inches uncovered so the trunk can still breathe. I've seen trees develop fungal issues from being completely wrapped—it's like putting a sweaty athlete in a plastic bag. Also, elevate the pot slightly off the ground with bricks or pot feet to prevent water pooling at the bottom during winter thaws.
Pro Tips for Peach Tree Starter
- Here's what nobody tells you about keeping your dwarf peach thriving in pots—lessons I learned after losing three tre...
- Drainage is Non-Negotiable: That 10-minute water test in Step 1 isn't just a suggestion—it's critical. If your pot fa...
- Soil Mix Matters More Than You Think: The equal parts potting mix, compost, and perlite in Step 2 creates the perfect...
Frequently asked questions
Got questions about starting your own peach tree in containers? You’re not alone! Here are some of the most common concerns—and answers—to help you grow with confidence.
What’s the best dwarf peach tree variety for beginners?
Start with reliable dwarf varieties like Bonanza or Redhaven—they’re compact, productive, and well-suited for containers. Look for grafted trees (marked "dwarf" or "semi-dwarf") to ensure consistent size. Avoid heirloom or standard varieties unless you have ample space!
When is the ideal time to plant a peach tree starter?
Plant in early spring (after the last frost) or late fall (6–8 weeks before your first hard freeze). Container-grown trees adapt well to transplanting, but avoid extreme heat or cold. If buying bare-root, soak roots for 2–4 hours before planting for better shock resistance.
How do I keep my container peach tree from fruiting in the first year?
Young trees need energy to establish roots—remove any fruit that forms in Year 1. Focus on watering, fertilizing (balanced 10-10-10), and pruning to encourage strong growth. By Year 2 or 3, you’ll see your first sweet harvest!
Why are my peach tree leaves yellowing or curling?
Yellow leaves often signal overwatering or nutrient deficiencies (like nitrogen or zinc). Check soil moisture—containers dry out fast! Curling leaves may mean pests (aphids, mites) or heat stress. Spray with neem oil or adjust watering to revive your tree.
Can I grow a peach tree in a pot without cross-pollination?
Yes! Some self-pollinating dwarf varieties (like Bonanza) produce fruit alone. For others, plant a second tree nearby (even in a different container) to ensure pollination. Bees love peach blossoms—just place pots where they can access your garden!
How do I protect my container peach tree in winter?
Move pots to a sheltered spot (garage, porch) before temps drop below 20°F. Wrap the container in bubble wrap and mulch the soil with straw. Water sparingly—overwatering can freeze roots. Prune in late winter to remove dead wood and shape the tree.
Wrapping up and next steps
Starting your peach tree journey with a dwarf variety is a fantastic way to enjoy homegrown fruit without the space or maintenance of a full-sized tree! 🌱 Whether you’re a beginner or a seasoned gardener, these compact varieties offer delicious rewards in just a few years.
Now that you’re armed with the right knowledge—from container setups to pruning tips—it’s time to roll up your sleeves and plant!
Your next step? Pick your favorite dwarf peach, grab your supplies, and get growing! With patience and care, you’ll soon be savoring juicy, sun-ripened peaches straight from your balcony or patio. Happy planting! 🍑✨