
How To
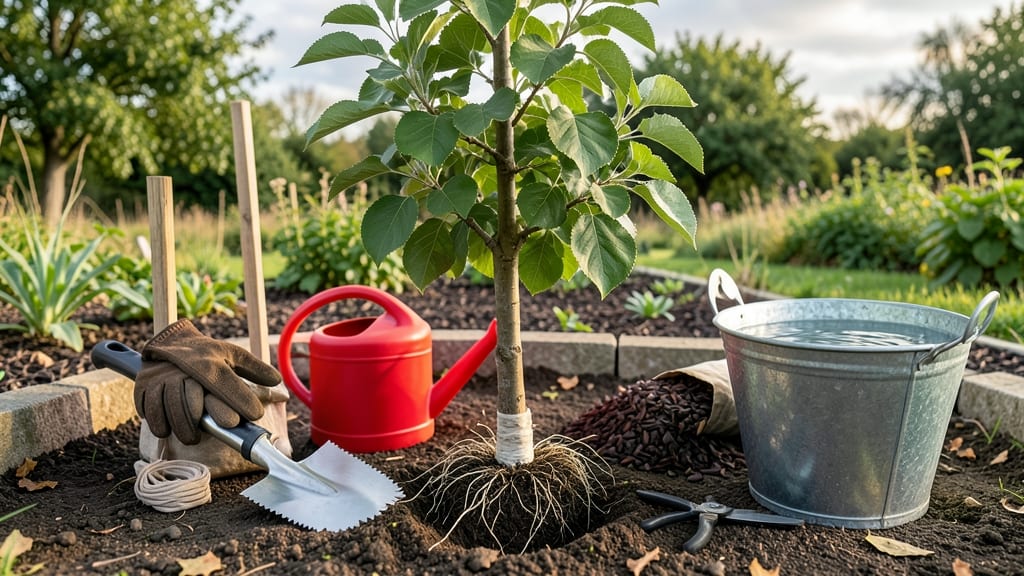
Transplanting a tree sapling feels like giving it a second chance—especially when those roots are circling like a tangled mess. 🌳 I’ve rescued more struggling young trees than I can count, and the key isn’t brute strength but patience and prep work.
The right timing, tools, and soil prep turn what looks like a risky surgery into a smooth move that sets your tree up for years of growth.
Start by digging a hole twice as wide as the root ball and matching its depth—no deeper, or you’ll smother the roots. Gently loosen the soil around the edges, tease apart any circling roots, and keep the root ball intact as you lift.
A burlap wrap or cardboard collar can protect delicate roots, and a sturdy stake keeps it upright while it settles. Water deeply before and after, then mulch to lock in moisture and block weeds.
📚 In This Guide
- What you need
- Instructions
- Tips and common mistakes
- Wrapping up and next steps
What you need
- ● Tree sapling – Choose one with a healthy root ball (avoid pot-bound roots 🚫). Size depends on the species, but a 1–3 gallon container is ideal for most.
- ● Shovel or spade – A round-point shovel (16–18 inches wide) works best for digging.
- ● Garden fork or root pruner – Helps loosen compacted soil and trim tangled roots if needed.
- ● Watering can or hose – With a gentle spray nozzle for hydrating roots before/after transplanting.
- ● Pruning shears – To trim any damaged or overly long roots (sterilize blades first!).
- ○ Mulch (optional but recommended) – Shredded bark, wood chips, or straw (2–4 inches deep) to retain moisture and suppress weeds.
- ● Staking materials (if needed) – 2–3 bamboo stakes (1–2 inches wide) + soft tree ties for young, top-heavy saplings.
- ● Compost or well-aged manure – 1–2 gallons mixed into the planting hole for nutrients.
- ● Gloves – Heavy-duty gardening gloves to protect your hands from thorns or rough bark.
- ● Best time to transplant: Early spring or fall (avoid extreme heat or frost 🌡️).
- ● Site preparation: Dig a hole twice as wide as the root ball but only as deep. Amend soil with compost if your area has poor drainage.
- ● Weather check: Plan for an overcast day or water the sapling 1–2 days before transplanting to keep roots hydrated.
- ● Permits (if applicable): Check local regulations for transplanting native or large species (some areas require approval!).
- ● Root stimulator – A liquid or powder (like Mycorrhizal fungi) to encourage root growth.
- ● Soil moisture meter – To monitor hydration levels post-transplant.
- ● Mulch rings or landscape fabric – To keep mulch in place and block weeds.
- ● Tree guard or protective barrier – For young saplings in high-traffic or pet-friendly areas.
Step-by-Step instructions for transplanting a tree sapling
Here's the straightforward method I use to move saplings without shocking their roots.
🪴 Step 1: Prepare the New Planting Hole
Dig a hole that's twice as wide as your sapling's root ball but only as deep as the container it's currently in. This prevents burying the trunk too deeply, which can suffocate the tree. I like to use a shovel to loosen the sides of the hole—this gives roots room to spread without compacted soil.
Mix the native soil you removed with half its volume of compost or aged manure. This improves drainage and provides nutrients without overwhelming the young tree. Tap the hole gently with your foot to settle the soil, but don't pack it down tightly. You want the soil to be loose enough for roots to penetrate easily.
✂️ Step 2: Remove the Sapling from Its Container
Water the sapling thoroughly 24 hours before transplanting—this helps reduce root damage when you remove it. Gently squeeze the sides of the container to loosen the root ball. If the sapling is root-bound (roots circling inside), use a knife to carefully slice through the roots at the edges of the container. This encourages outward growth instead of tangled roots.
Turn the container upside down and tap the base firmly to release the root ball. If the sapling resists, don't force it—you might snap fragile roots. Instead, wiggle the container gently while supporting the base of the sapling with your other hand. Once free, place the root ball in the hole and adjust it so the top of the root ball sits 1 inch above the surrounding soil level.
💧 Step 3: Backfill and Water Thoroughly
Fill the hole with the soil-compost mix, tamping it down lightly in layers to eliminate air pockets. Press gently but don't compact too firmly—you want the soil to settle naturally over time. Once the hole is filled, create a small 2-inch deep basin around the base of the sapling to help direct water to the roots.
Water the sapling deeply until water runs out of the basin and the surrounding soil is thoroughly moist. This helps the roots settle into their new home. Avoid overwatering, though—you want the soil to be damp, not soggy. A good rule of thumb is to water until the soil feels moist 6 inches down.
☀️ Step 4: Provide Support and Shade
Stake the sapling only if it's tall or top-heavy. Use 2-3 stakes positioned around the sapling, not touching the trunk, and tie it loosely with soft material like old fabric strips or tree ties. Tighten the ties just enough to hold the sapling upright—you don't want to restrict growth or damage the bark.
Shade the sapling for the first 2-3 weeks using a lightweight cloth or shade cloth. This reduces stress from direct sunlight, which can dry out the roots and leaves. Check the sapling daily—if the leaves start wilting, it's a sign it needs more water or shade. Most saplings recover well if you catch the stress early.
🌱 Step 5: Monitor and Maintain Through the First Season
Water the sapling once a week during the first growing season, or more often if the weather is hot and dry. Stick your finger 2 inches into the soil—if it feels dry, it's time to water. Deep watering encourages roots to grow downward, making the tree more stable and drought-resistant.
Fertilize lightly in the spring with a balanced, slow-release fertilizer. Too much fertilizer can burn young roots, so follow the package instructions for application rates. Mulch around the base of the sapling with 2-3 inches of organic mulch, keeping it 6 inches away from the trunk to prevent rot. This helps retain moisture and regulates soil temperature.
Tips & tricks for transplanting tree saplings
Here's what I learned the hard way about transplanting saplings—these tricks help you avoid the most common mistakes.
Root Ball Care: When you're loosening the root ball in Step 2, don't rush it. If the sapling resists coming out of the container, take a moment to gently score the roots at the edges with a knife—this prevents root damage and helps the tree establish faster. I've seen saplings recover poorly when roots are torn instead of carefully released. The extra 5 minutes now saves weeks of recovery time later.
Soil Mix Matters: In Step 1, the ratio of native soil to compost is crucial. If your native soil is heavy clay, you might want to increase the compost to two-thirds instead of half—this improves drainage dramatically. Test the mix by squeezing a handful: it should hold its shape but crumble easily when you poke it.
Watering Wisdom: After planting in Step 3, don't just water once and walk away. Set a timer for every 30 minutes during the first hour to give the roots a chance to settle into their new home. This gradual soaking prevents water from running off too quickly, which can leave air pockets around the roots.
Staking Strategy: Only use the 2-3 stakes mentioned in Step 4 if your sapling is taller than 4 feet or has a thin trunk. For smaller saplings, staking can actually restrict growth. If you do stake, check the ties every week—they should be loose enough to allow the trunk to sway slightly in the wind.
Pro Tips for Transplant A Tree Sapling
- Here's what I learned the hard way about transplanting saplings—these tricks help you avoid the most common mistakes.
- Root Ball Care: When you're loosening the root ball in Step 2, don't rush it.
- Soil Mix Matters: In Step 1, the ratio of native soil to compost is crucial.
Frequently asked questions
Got questions about transplanting a tree sapling? You’re not alone! Here are some of the most common concerns—and their answers—to help you feel confident before digging in.
When is the best time of year to transplant a tree sapling?
The ideal window is early spring or late fall when temperatures are mild, and the tree isn’t actively growing. Avoid transplanting during extreme heat, drought, or frost—these conditions stress saplings and reduce survival rates. If you’re in a warm climate, opt for the wettest season to minimize shock.
How long does it take for a transplanted sapling to recover?
Recovery time varies by species, but most saplings show signs of stabilizing within 4–8 weeks. Watch for new leaf growth, which signals the roots are re-establishing. Patience is key! Avoid pruning or fertilizing heavily during this period—focus on consistent watering and mulching instead.
What if my sapling’s leaves turn yellow or wilt after transplanting?
Yellowing leaves (chlorosis) or wilting often mean transplant shock or root damage. Check the soil moisture—overwatering or underwatering are common culprits. Trim any brown, crispy leaves to redirect energy to healthy growth. If the issue persists after a week, inspect for root rot (mushy roots) or pests like aphids.
Can I transplant a large sapling (5+ feet tall) using the same method?
For taller saplings, dig a wider root ball (2–3x the trunk diameter) and use support stakes to prevent toppling. Burlap-wrapping the root ball helps retain moisture. Consider hiring a professional for saplings over 6 feet—their equipment ensures minimal root disturbance. Smaller roots = easier recovery!
Are there alternatives if my sapling won’t survive transplanting?
If your sapling is struggling, try layering (bending a low branch to root it in place) or grafting (attaching a cutting to a sturdy rootstock). For quick greenery, opt for fast-growing ground covers or container plants that tolerate relocation better. Remember: Some trees (like oaks) are highly sensitive—research your species first!
Still unsure? Drop your specific tree type or location in the comments—we’re happy to help troubleshoot!
Wrapping up and next steps
Transplanting a tree sapling might seem daunting, but with the right tools and techniques, you’ve got this! 🌱 By following these 5 simple steps—from digging carefully to watering deeply—you’re giving your young tree the best shot at thriving in its new home.
Remember, patience and preparation are key, so don’t rush the process.
Now that you’re armed with the know-how, take the next step: mark your new planting spot, gather your supplies, and get ready to give your sapling a fresh start. Happy planting—your future shade (or fruit!) will thank you! 🌳✨