Propagation
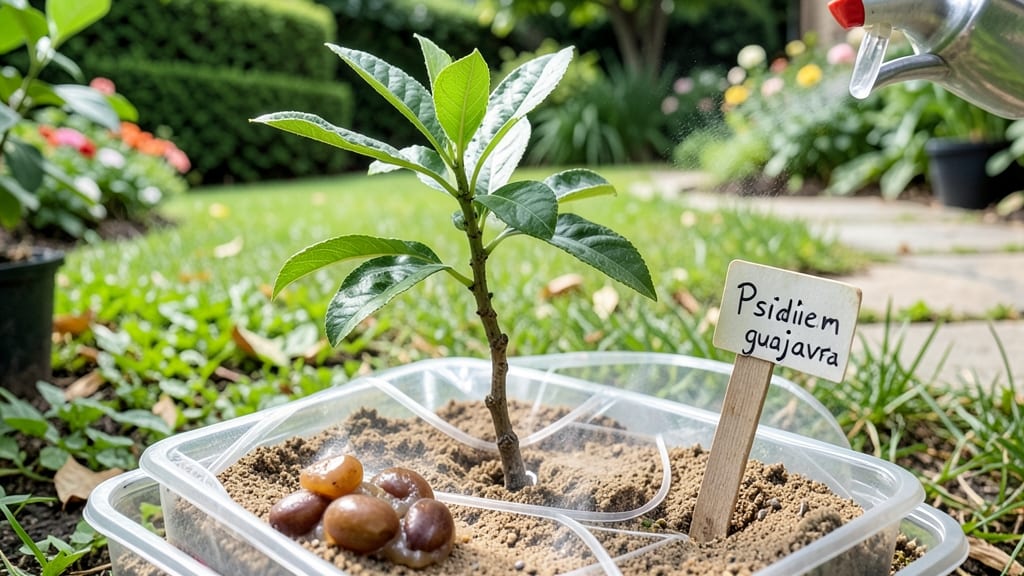
Growing a guava tree from seed delivers sweet surprises—just three months after planting, you'll spot those first true leaves. 🌱 The real magic happens when you pick ripe fruit from your own tree years later, but the journey starts with a single seed, proper soil, and a sunny spot.
I've started dozens, and the key to success lies in patience and the right conditions from day one.
You'll need just a few supplies: guava seeds (from a ripe fruit), a small pot with drainage, well-draining potting mix, and a warm, bright location.
The trick is keeping the soil consistently moist but never soggy—guava seeds need warmth to germinate, so a heat mat helps if your home stays cool. Most seeds sprout within 2-4 weeks, though some stubborn ones take up to 8 weeks.
Once those first leaves appear, you're on the path to a tropical treasure. Transplant the young seedling into a larger container when it's about 6 inches tall, and give it full sun (at least 6+ hours daily) to grow strong.
The real payoff comes years later when you harvest fruit, but the satisfaction of nurturing a tree from seed is immediate.
This method works best in warm climates (zones 9-11), but even in cooler areas, you can keep the seedling indoors near a sunny window. The secret to success? Consistency in watering and sunlight—guava trees reward patience with lush growth and eventually, those delicious fruits you've been dreaming of.
📚 In This Guide
- What you need
- Instructions
- Tips and common mistakes
- Wrapping up and next steps
What you need
- ● Guava seeds: 3–5 fresh, plump seeds (harvested from ripe guava fruit). Pro tip: 💡 Let them dry for 1–2 days to prevent mold.
- ● Seed-starting mix: 1 small bag (1–2 quarts) of sterile, well-draining potting soil (or coconut coir for moisture control).
- ● Planting containers: 2–3 small pots (4–6 inches deep) with drainage holes or a seed tray with individual cells.
- ● Plastic wrap or humidity dome: To create a mini greenhouse effect and retain moisture.
- ● Spray bottle: For gentle watering (avoid over-saturating seeds!).
- ● Pruning shears or scissors: For trimming seed pods or cleaning seeds.
- ○ Heat mat (optional): Keeps soil warm (75–85°F) to speed up germination.
- ○ Grow lights (optional): If natural light is <12 hours/day, use LED bulbs to supplement.
- ● Fertilizer (balanced, 10-10-10 or organic): Light dose (½ tsp per pot) after sprouts appear.
- ● Larger pot (1–2 gallons): For transplanting seedlings once they’re 3–4 inches tall.
- ● Mulch or pebbles: Helps retain moisture in the soil.
Step-by-step instructions for growing a guava tree from seed
Here’s how to turn a single guava pit into a thriving young tree—with fruit potential in just three months.
🌱 Step 1: Extract and Prepare the Seed
Start with a fresh guava fruit. Cut it open and remove the large, brown seeds—each one holds the promise of a tree. Rinse the seeds thoroughly to remove any remaining fruit pulp, which can rot them. I like to soak the seeds in warm water for 24 hours to soften the hard outer shell and speed up germination.
After soaking, gently rub the seed between your fingers to break the outer layer. You’ll know it’s ready when the inner seed feels soft and the shell cracks easily. This step is crucial—guava seeds have a tough coat that can delay or even prevent sprouting if left intact.
💧 Step 2: Plant the Seed in Moist Potting Mix
Fill a small pot—3-4 inches deep—with a well-draining potting mix. Guava trees hate soggy roots, so avoid garden soil. Mix in a little perlite or sand to improve drainage. Plant the seed ½ inch deep, just enough to cover it lightly but not bury it completely.
Water the soil until it’s moist but not waterlogged. Place the pot in a warm, bright spot—75-85°F is ideal. A seedling heat mat can help maintain consistent warmth, especially if your home runs cooler. Keep the soil evenly moist; let the top inch dry out slightly between waterings to prevent rot.
☀️ Step 3: Provide Warmth and Light for Germination
Guava seeds can take 2-4 weeks to sprout, depending on warmth and moisture. Cover the pot loosely with plastic wrap to retain humidity, but remove it daily to check for moisture. Once the first true leaves appear—small, rounded, and bright green—remove the plastic entirely to prevent fungal issues.
Move the seedling to a sunny window or under a grow light for 12-14 hours daily. Guava trees thrive in full sun, so avoid shady spots. If the seedling grows leggy (stretching toward light), it’s a sign it needs more brightness. Rotate the pot weekly so the stem grows straight.
🌿 Step 4: Transplant and Encourage Strong Growth
After 4-6 weeks, when the seedling has 3-4 true leaves, it’s ready for its first transplant. Choose a slightly larger pot—5-6 inches deep—and use the same well-draining mix. Gently remove the seedling, keeping the root ball intact, and replant at the same depth it was growing before.
Water thoroughly after transplanting, but hold off on heavy watering for 3-4 days to let the roots settle. Fertilize lightly with a balanced, water-soluble fertilizer (10-10-10) diluted to half strength. Guava trees grow fast once established, so feed monthly during the growing season but avoid over-fertilizing—it can burn tender roots.
⏰ Step 5: Harden Off and Prepare for Outdoor Life
When nighttime temperatures stay above 50°F, it’s time to acclimate your guava seedling to outdoor conditions. Start by placing it outside in a sheltered spot for 1-2 hours the first day, gradually increasing exposure over 10-14 days. This process, called hardening off, helps the plant adjust to wind, sun, and temperature swings.
Once the seedling tolerates full outdoor conditions, choose a permanent spot in full sun with well-draining soil. Plant it in a hole twice as wide as the root ball but no deeper. Water deeply after planting to settle the soil, and mulch around the base to retain moisture and regulate temperature. With patience, your guava tree could bear fruit in 2-3 years—though it may take longer from seed!
Tips & tricks for growing a guava tree from seed
Here's what I learned after growing my first guava tree from seed—and how to avoid the mistakes I made.
Seed Preparation: Don't skip the 24-hour soak! I tried planting dry seeds and waited weeks for germination. Warm water softens that tough outer shell, which is why I always soak mine. After soaking, gently rub the seed between your fingers until the shell cracks—this is the key to breaking dormancy. If the shell feels too hard, soak it another 12 hours.
Temperature Matters: The ideal 75-85°F range is non-negotiable for germination. If your home runs cooler, use a seedling heat mat or place the pot on top of your fridge (not inside). I once had seeds take 6 weeks to sprout because my apartment stayed around 68°F—patience paid off, but warmth would have helped so much more. Keep the soil consistently moist but never soggy during this critical phase.
Lighting Strategy: Guava seedlings need that full 12-14 hours of light daily. If your sunny window isn't cutting it, invest in a simple grow light—it's the difference between a leggy, weak seedling and a sturdy one. I rotate my pot weekly to prevent the stem from growing crooked toward the light. Watch for that telltale stretch—it's your plant begging for more brightness.
Transplanting Wisdom: When you're ready to move your 4-6 week old seedling to a 5-6 inch pot, water it thoroughly the day before transplanting. This helps reduce shock to the roots. After replanting, withhold heavy watering for those crucial 3-4 days—it gives the roots time to establish without drowning. I've seen seedlings rot in their new pots because people watered too soon after transplanting.
Pro Tips for Guava Tree From Seed
- Here's what I learned after growing my first guava tree from seed—and how to avoid the mistakes I made.
- Seed Preparation: Don't skip the 24-hour soak!
- Temperature Matters: The ideal 75-85°F range is non-negotiable for germination.
Frequently asked questions
Growing a guava tree from seed is exciting, but it’s natural to have questions along the way! Here are some of the most common concerns—and their answers—to help you succeed:
How long does it take for a guava seed to sprout?
A guava seed typically sprouts within 2 to 4 weeks if kept warm (around 70–85°F) and moist. Patience is key—some seeds may take longer, especially if stored improperly. Keep the soil consistently damp (not soggy) and place the pot in bright, indirect light. If nothing happens after 6 weeks, the seed may not be viable.
Can I grow a guava tree indoors?
Yes, but with limitations! Guava trees thrive outdoors in tropical climates, but you can grow them indoors as a houseplant. Place it near a sunny window or under grow lights for 6+ hours daily. Expect slower growth and smaller fruit yields. If you dream of a full-sized tree, transplant it outdoors once temperatures stay above 50°F year-round.
Will my seed-grown guava tree bear fruit?
Seed-grown guava trees can produce fruit, but it may take 3–5 years (or longer) compared to grafted trees. Fruit quality and consistency vary—some trees yield delicious, sweet guavas, while others produce smaller or less flavorful ones. For faster, more reliable fruiting, consider grafting a known variety onto your seedling later.
What’s the best temperature for growing guava from seed?
Guava seeds germinate best in warmth (70–85°F). Use a heat mat if your home runs cooler, or soak seeds in warm water for 24 hours before planting. Once sprouted, maintain temperatures above 50°F—cold snaps can stunt growth or kill young seedlings. If you live in a chilly climate, grow it in containers and bring it indoors during winter.
What if my guava seedling grows too fast or gets leggy?
Leggy seedlings mean they’re stretching for light. Move the pot to a brighter spot (but avoid direct sun until established) and rotate it weekly for even growth. If growth is too rapid, reduce water slightly—overwatering can weaken stems. Prune leggy stems just above a leaf node to encourage bushier growth. A 12-hour light cycle (natural or artificial) keeps seedlings strong!
Wrapping up and next steps
Growing a guava tree from seed is a rewarding journey that blends patience with tropical excitement! 🌱 With the right care—sunlight, well-draining soil, and consistent moisture—you can nurture a thriving plant that may even bear fruit in just 3 months.
Whether you’re a beginner or a seasoned gardener, this project is a fantastic way to connect with nature and enjoy homegrown tropical flavors.
Now that you’re armed with tips and answers, why not take the first step? Grab those seeds, prep your pot, and let the adventure begin! 🌿 Happy planting!