
Pruning
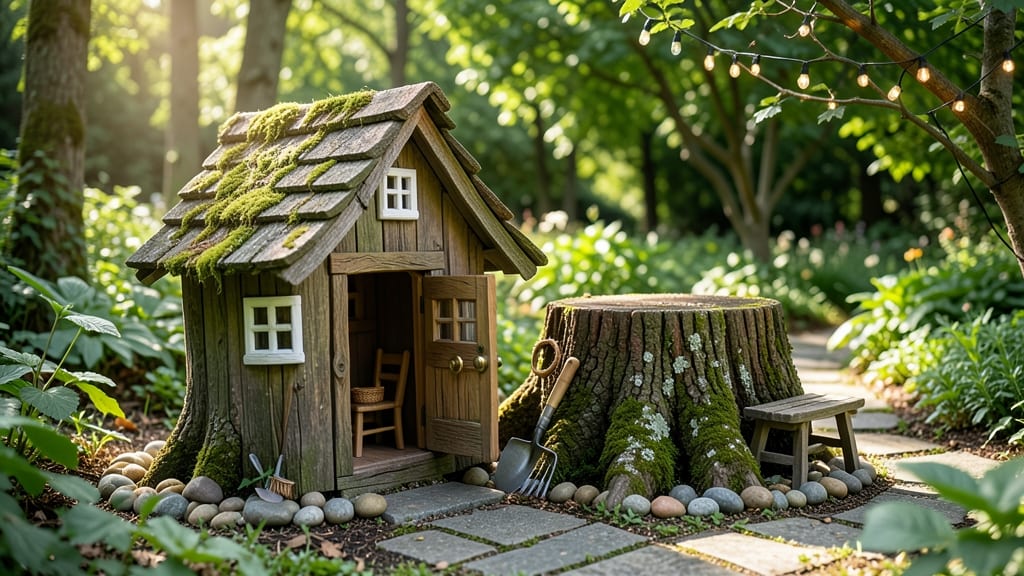
Transforming a leftover tree stump into a gnome house kit is the fastest way to add whimsy to your garden. 🌿 These kits turn ordinary stumps into charming fairy garden focal points with just a few simple steps—no pruning skills required.
The magic lies in their versatility: place them in shady corners, along garden paths, or nestled among hostas for instant charm. Most kits include pre-cut pieces that snap together like puzzle pieces, and you can customize colors to match your garden’s palette.
By adding moss, tiny pebbles, or twig fences, you’ll create a scene straight out of a storybook. The best part? Gnomes and their houses invite kids (and adults!) to imagine entire fairy villages right in your backyard.
Works for any garden style—rustic, cottage, or even modern minimalist with a playful twist. Let’s get building!
📚 In This Guide
- What you need
- Instructions
- Tips and common mistakes
- Wrapping up and next steps
What you need
- ● Tree stump: 1 (preferably 6–12 inches in diameter and 4–6 inches tall; sanded smooth for safety).
- ● Gnome house kit: 1 (includes pre-cut wood pieces, roof, and hardware like screws/nails).
- ● Outdoor wood glue: 1 small bottle (waterproof, for extra stability).
- ● Sandpaper: 120–220 grit (to smooth rough edges).
- ● Paint or stain: 1 small container (weather-resistant for outdoor use).
- ● Paintbrush: 1 (fine-tip for details).
- ● Decorative elements: Moss, pebbles, or twigs (for landscaping around the house).
- ● Screwdriver or drill: 1 (for assembling the kit).
- ● Measuring tape: 1 (to ensure proper fit).
- ● Safety gloves: 1 pair (for handling wood and tools).
- ● Workspace: Flat, clean surface (outdoor or garage).
- ● Basic DIY skills: Ability to follow instructions and use hand tools.
- ● Miniature furniture (tiny chairs, tables, or doors for the gnome house).
- ● LED tea lights or solar-powered fairy lights (for magical ambiance).
- ● Acrylic paint pens (for custom designs or gnome faces).
- ● Waterproof sealant (to extend the lifespan of your creation).
Step-by-Step instructions for building whimsical gnome houses from tree stump kits
Turn a simple stump into a charming fairy garden focal point with these easy assembly steps.
🪴 Step 1: Prepare Your Tree Stump Base
Start with a clean, dry stump—remove any loose bark or debris using a small hand scraper or wire brush. I like to smooth rough edges with fine-grit sandpaper so the kit pieces adhere better later. If your stump has deep cracks or crevices, fill them with outdoor wood filler and let it dry completely before proceeding.
Measure the diameter of your stump at the widest point. Most kits are designed to fit stumps between 6-12 inches in diameter, but always check your kit's specifications. If your stump is too large, you may need to adjust the roof or door placement later. For smaller stumps, you can use multiple kit pieces to create a cozy two-room gnome abode.
🎨 Step 2: Assemble the Kit Components
Unpack all pieces and sort them by function—walls, roof sections, door, windows, and any decorative accents like shingles or trim. Most kits include adhesive putty or outdoor-safe glue for assembly. I recommend applying a thin layer of adhesive to the back of each piece before pressing it onto the stump for a stronger bond.
Begin with the largest wall pieces, positioning them vertically around the stump. Use a level to ensure they're perfectly straight—gnome houses won't look charming if they're crooked! Press each piece firmly into place and hold for 30 seconds to allow the adhesive to set slightly. For extra security, especially in windy areas, use small outdoor screws or nails to secure the pieces from behind.
✂️ Step 3: Add Roof and Final Details
Attach the roof sections last, starting with the largest piece at the top. Most kits include angled pieces to create a peaked roof—position these carefully to mimic natural wood grain for a rustic look. Use the adhesive provided and reinforce with small nails if needed. Leave a small gap at the roof's base to allow for water drainage during rain.
Install the door and windows next, making sure they're centered and level. Some kits include removable doors for easy access to place fairy garden decor inside. Once everything is secure, add any decorative trim or shingle pieces to enhance the whimsical charm. If your kit includes moss or faux ivy, press it gently onto the roof and walls for a magical touch.
🌿 Step 4: Personalize and Place Your Gnome House
Now for the fun part—personalize your gnome house! Add tiny furniture like mushroom stools, a picket fence, or a winding path made of pebbles. I like to place a small lantern or fairy lights inside for a magical glow at night. If your gnome house has a removable roof, you can tuck in tiny plants or flowers for extra charm.
Position your gnome house in a shaded or partially shaded spot in your garden to protect the materials from direct sunlight, which can cause fading over time. If you're placing it in a high-traffic area, consider adding a small base or platform to elevate it slightly and protect it from accidental bumps. Water the surrounding area gently to help any planted decor take root.
Tips & tricks for perfect tree stump gnome house builds
Turn your fairy garden project from charming to extraordinary with these simple yet game-changing tips.
Base Prep Matters: Before applying any kit pieces, give your stump a quick test—press a piece of masking tape on the surface and pull it off. If it takes bark with it, your stump needs more sanding. A smooth base ensures your gnome house stays put for years, especially if you're placing it in a windy spot. I've seen kits slip off rough stumps after just one rainstorm!
The 30-Second Rule: When pressing those wall pieces in Step 2, those 30 seconds of holding time are crucial. Use this moment to check alignment with a level—once the adhesive sets, repositioning becomes a struggle. Pro tip: Have a helper hold the level while you press the piece firmly. This two-person approach makes all the difference for perfectly straight walls.
Roof Drainage Secret: That tiny gap at the roof's base isn't just for looks—it's essential for preventing water damage. Use a small awl or nail to create a 1/8-inch gap along the entire roof edge. This simple step keeps rainwater from pooling and rotting your beautiful creation from the inside. I've had to replace two gnome roofs because I skipped this detail!
Personalization Pro Tip: For that extra magical touch, mix your own faux moss by blending green-tinted wood glue with shredded brown paper. Press it onto the roof and walls before the adhesive dries completely. This DIY moss stays vibrant longer than store-bought versions and gives your gnome house that handcrafted charm. The glue acts as a natural adhesive too!
Pro Tips for Tree Stump Gnome House Kits
- Turn your fairy garden project from charming to extraordinary with these simple yet game-changing tips.
- Base Prep Matters: Before applying any kit pieces, give your stump a quick test—press a piece of masking tape on the ...
- The 30-Second Rule: When pressing those wall pieces in Step 2, those 30 seconds of holding time are crucial. Use this...
Frequently asked questions
Got questions about turning tree stumps into magical gnome homes? We’ve got answers! Here are some of the most common queries—plus tips to make your project a breeze.
Can I use any tree stump for a gnome house kit?
Most kits work best with clean, dry stumps that are at least 6–12 inches in diameter. Avoid stumps with deep cracks, rot, or sap leaks—these can make assembly tricky. If your stump is too small, stack two smaller ones or use a kit designed for mini stumps (like willow or birch).
How long does it take to assemble a gnome house kit?
Assembly time varies! Basic kits take 10–20 minutes for a simple shingle roof or moss covering, while detailed kits (with carvings or paint) may take 30–60 minutes. Pro tip: Pre-cut materials (like pre-sawn shingles) speed things up. Bring snacks—you’ll be in the zone!
Do I need painting or sealing supplies?
Not always! Many kits include weather-resistant stains or paints, but if yours doesn’t, grab outdoor-safe acrylic paint or a clear sealant to protect against rain. For a rustic look, skip paint and use moss or lichen (press it on with water). Always seal wood if your gnome home will sit in damp areas.
What if my kit arrives damaged or missing pieces?
First, check the packaging for hidden compartments—sometimes screws or nails get tucked away! If pieces are truly missing, contact the manufacturer within 7–10 days (most offer replacements). For minor damage (like chipped wood), use a wood glue or filler to repair before assembling. Most kits include a troubleshooting guide, too!
Are there alternatives if I don’t have a tree stump?
No stump? No problem! Try these DIY swaps:
- Log slices (stacked horizontally for a "stump" look)
- Concrete planters (paint them to resemble wood)
- Large rocks or boulders (use kits designed for flat surfaces)
- Upside-down terracotta pots (for tiny gnome abodes)
Wrapping up and next steps
Transforming a tree stump into a charming gnome house has never been easier—or more rewarding! 🌿✨ With tree stump gnome house kits, you’re not just repurposing garden waste; you’re crafting a magical focal point that sparks joy and creativity.
Whether you’re a DIY novice or a seasoned builder, these kits make whimsy accessible in minutes, proving that fairy gardens are for everyone.
Ready to bring your garden to life? Grab your kit, gather your tools, and let your imagination run wild! Start small with one stump, or turn your yard into a gnome village—your outdoor adventure awaits! 🧚♂️🔨