
Pruning
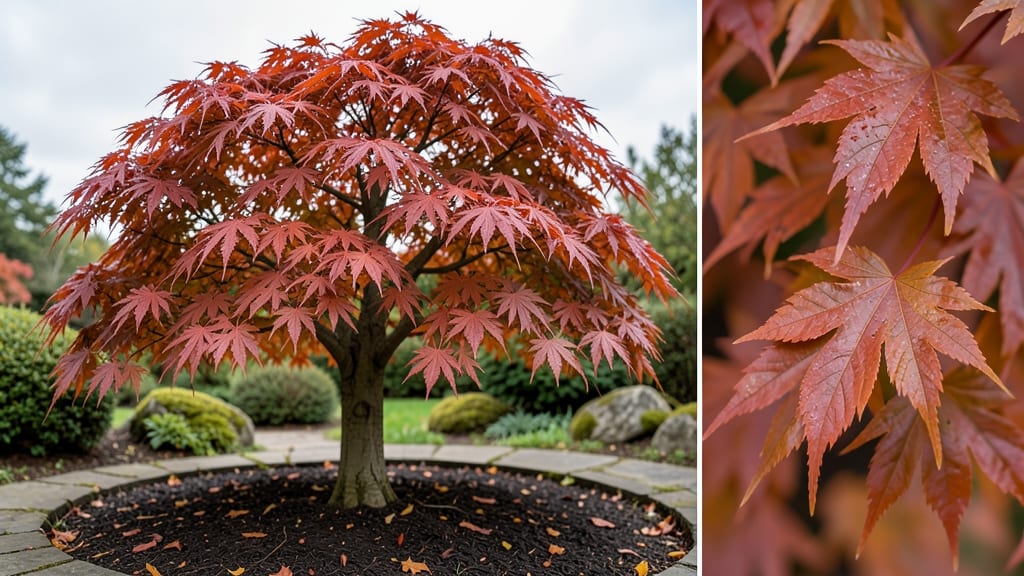
Japanese maple tree colors transform your garden into a living painting—deep reds, fiery oranges, and soft greens that shift with each season. 🌿 I’ve seen these trees go from vibrant crimson in spring to golden amber in fall, and they do it all without losing their delicate, lace-like branches.
The secret? Pruning to enhance their natural beauty while keeping their structure elegant. These trees thrive in partial shade, where their colors stay true and their foliage remains lush. Pair a deep purple variety like 'Bloodgood' with silver-blue hostas or white blooms like hydrangeas to make it pop.
A bright green maple like 'Green Dragon' contrasts beautifully with rich burgundy heucheras or black mondo grass for a bold statement. The magic happens when you place them as focal points near patios or entryways, where their colors can be enjoyed up close.
Even in winter, their branches hold charm, especially when dusted with frost. With the right pruning, you’ll keep their colors vibrant for years—no fading, no dullness, just pure, seasonal beauty. Whether you’re designing a serene Zen garden or a bold cottage-style landscape, Japanese maples bring drama and elegance.
They’re the kind of tree that makes neighbors stop and stare—literally. Let’s talk about how to make yours the star of the show!
📚 In This Guide
- What you need
- Instructions
- Tips and common mistakes
- Wrapping up and next steps
What you need
- ● Pruning shears – Bypass-type (sharp, clean cuts; avoid anvil shears for delicate branches). Quantity: 1 pair.
- ● Loppers – For thicker branches (up to 1.5 inches). Quantity: 1 pair.
- ● Hand pruners – For precision trimming of small branches. Quantity: 1 pair.
- ● Pruning saw – Only if dealing with branches over 2 inches thick. Quantity: 1.
- ● Disposable gloves – Nitrile or leather (protects from thorns and sap). Quantity: 1 pair.
- ● Rubbing alcohol (70% or higher) – For sterilizing tools between cuts. Quantity: Small bottle.
- ○ Sealing wax or pruning sealant – Optional but recommended for cuts larger than 0.5 inches. Quantity: Small jar.
- ● Ladder or sturdy step stool – For reaching higher branches safely. Height: Adjustable to 6–10 feet.
- ● Bucket or tarp – To collect pruned branches. Size: Medium (1–2 gallons).
- ● Notebook & pencil – For sketching pruning plans or tracking color changes post-prune.
- ● Extension pole pruners – For high branches without a ladder.
- ● Tree paint – To protect large cuts from disease (use sparingly).
- ● Camera or phone – Document your tree’s color transformations over time!
- ● Fertilizer (balanced 10-10-10) – Boosts recovery after pruning. Apply: Early spring or fall.
Instructions for pruning Japanese maples to enhance year-round color
Here's how I keep my Japanese maples vibrant through all seasons—no fancy tools, just smart cuts.
✂️ Step 1: Prune in Late Winter for Spring Growth
Wait until late winter when the tree is still dormant but before buds swell. This timing ensures you remove dead wood while encouraging fresh, colorful spring growth. I always prune on a dry day—wet branches are harder to see and can harbor disease.
Start by removing any dead, diseased, or crossing branches first. These are easy to spot—they're brown, brittle, or growing inward. Use clean, sharp pruners to make cuts just outside the branch collar (that swollen area where the branch meets the trunk). This prevents unsightly stubs and promotes faster healing.
For thicker branches, I make the cut at a 45-degree angle about ¼ inch above a bud facing outward. This directs new growth in the right direction. If you're unsure which way the bud faces, look for the tiny bump—it points toward where the branch will grow.
☀️ Step 2: Thin Canopy in Early Summer for Airflow
After the tree has finished its spring flush of leaves, usually in early to mid-June, it's time to thin the canopy. This step is all about improving airflow and sunlight penetration, which keeps the foliage vibrant and reduces stress on the tree.
Focus on removing overlapping branches and those growing straight upward. These compete for sunlight and often produce weaker, less colorful foliage. I aim to thin the canopy by about 20-30%—just enough to let light reach the inner branches. You'll know you're doing well when you can see light filtering through the branches on a sunny day.
When thinning, always cut back to a lateral branch or bud. Avoid leaving stubs, even small ones. The goal is to make clean cuts that heal quickly and encourage strong new growth. If a branch is too thick for your pruners, use a saw—but make sure it's sharp to avoid tearing the bark.
🌿 Step 3: Shape and Refine in Early Fall for Winter Color
As fall approaches, your Japanese maple will start showing its stunning seasonal colors. This is the time to do light shaping to enhance those colors and prepare the tree for winter. I usually prune in early September, just after the leaves have fully colored but before they fall.
Look for branches that are growing too vigorously or spoiling the tree's natural shape. I gently trim these back to maintain balance and encourage a fuller, more colorful canopy. For variegated varieties, avoid cutting back into green areas—this can reduce the striking contrast of the variegation.
This is also a great time to remove any suckers or water sprouts—those fast-growing, upright shoots that pop up at the base or along the trunk. These saplings drain energy from your prized tree. Cut them off at the base with clean pruners, and you'll see a noticeable improvement in the tree's overall health and color intensity.
⏰ Step 4: Light Maintenance in Late Fall and Winter
Once the leaves have fallen and the tree is fully dormant, your pruning work is mostly done—but not quite. Keep an eye out for any dead or broken branches that might have been missed or damaged by winter storms. Remove these as soon as you spot them to prevent pests or disease from taking hold.
In late winter, just before buds begin to swell, do a final check for any crossing branches or rubbing limbs that might have developed over the past year. These can damage the bark and create entry points for pests. A quick trim now ensures your tree stays healthy and colorful all season long.
I also like to give the base of the tree a light cleanup at this time. Remove any fallen leaves, debris, or weeds within 2-3 feet of the trunk. This reduces competition for nutrients and keeps the root zone healthy. A thin layer of 2-3 inches of mulch (not touching the trunk) helps retain moisture and regulates soil temperature—just what your Japanese maple needs to show off its best colors.
Tips & tricks for perfect Japanese maple tree colors
Here's what nobody tells you about keeping your Japanese maples vibrant year after year—these are the secrets that make all the difference.
Timing is Everything: The late winter timing in Step 1 is non-negotiable for spring growth. I've learned this the hard way—pruning too early can stimulate new growth that gets damaged by late frosts, while waiting too long means you miss the window for removing dead wood. Look for that sweet spot when buds are just starting to swell but haven't opened yet. This precise timing ensures your tree puts all its energy into colorful new foliage rather than repairing winter damage.
Tool Prep Matters: Before you even touch a branch, clean your pruners with rubbing alcohol to prevent spreading disease between cuts. I sterilize my tools after every 3-4 cuts when removing diseased branches in Step 1. Sharp tools are equally important—dull blades tear bark, creating wounds that invite pests. Test your pruners on a small twig first; if it crushes rather than cuts cleanly, your tools need sharpening. This simple prep step makes all the difference in your tree's healing process.
Visual Cues for Perfect Cuts: When making those 45-degree angle cuts in Step 1, look for the "bud triangle"—the area between two buds where you want to make your cut. The outer bud should face the direction you want new growth to go. For upward-growing branches, I aim to cut just above a bud that points outward and slightly upward. This subtle adjustment creates a more open canopy that lets sunlight reach all your foliage, which is especially important for maintaining vibrant colors in Step 2's canopy thinning.
Seasonal Color Strategy: In Step 3 when shaping for fall colors, focus on removing branches that grow too vigorously—they often produce less vibrant fall foliage. I target branches that are growing faster than the surrounding ones, as these typically have weaker color intensity. For variegated varieties, always preserve those colorful sections by avoiding cuts that would remove the patterned leaves. This selective approach ensures your tree's signature colors remain bold and striking throughout the season.
Pro Tips for Japanese Maple Tree Colors
- Here's what nobody tells you about keeping your Japanese maples vibrant year after year—these are the secrets that ma...
- Timing is Everything: The late winter timing in Step 1 is non-negotiable for spring growth. I've learned this the har...
- Tool Prep Matters: Before you even touch a branch, clean your pruners with rubbing alcohol to prevent spreading disea...
Frequently asked questions
Got questions about maximizing those stunning Japanese maple tree colors? You’re not alone! Here are answers to the most common queries—whether you’re a pruning pro or a curious beginner.
When is the best time to prune for vibrant fall colors?
Prune your Japanese maple in late winter or early spring (before buds break) to encourage healthy growth and brighter fall hues. Avoid heavy pruning in summer—it can stress the tree and dull autumn colors. Light shaping in early spring is key!
Do Japanese maples change color in winter?
While not as dramatic as fall, many varieties like ‘Bloodgood’ or ‘Emperor I’ develop subtle bronze, purple, or deep red tones in winter. Prune to open the canopy for better light exposure, which enhances these understated shades. Cold snaps can intensify colors—just don’t prune when frost is forecasted!
What if my Japanese maple’s leaves turn dull or brown?
Dull or brown leaves often signal over-pruning, disease, or poor sunlight. Check for powdery mildew (white spots) or leaf spot (dark patches)—treat with neem oil if needed. Ensure your tree gets 4+ hours of sunlight daily and avoid pruning more than 25% of the canopy at once.
Can I prune a Japanese maple for specific colors?
Yes! To boost red/purple hues, prune to improve airflow and sunlight. For golden or orange tones, focus on removing shaded inner branches. ‘Shishigashira’ (crested maples) love open pruning for vibrant colors. Just avoid heavy cuts—Japanese maples are sensitive!
Are there low-maintenance alternatives to traditional Japanese maples?
If pruning feels overwhelming, try ‘Skyrocket’ (narrow, upright growth) or ‘Drummondii’ (heat-tolerant, minimal pruning). Dwarf varieties like ‘Mikura Red’ also thrive with light shaping. Just ensure they get well-draining soil—most Japanese maples hate soggy roots!
Wrapping up and next steps
The Japanese maple tree is a true masterpiece of nature, offering a dazzling palette of colors year-round—from vibrant greens in spring to fiery reds, oranges, and purples in autumn. With the right pruning techniques, you can enhance its beauty and ensure it thrives for seasons to come. 🍁
Now that you’re equipped with the knowledge, roll up your sleeves and get pruning! Start by assessing your tree’s unique needs, then take action with confidence.
Whether you’re a seasoned gardener or a beginner, every snip brings you closer to a stunning, healthy Japanese maple that steals the show in your landscape.
Next step: Mark your calendar for late winter or early spring—ideal pruning time—and watch your tree transform into a breathtaking work of art! 🌿