
Propagation
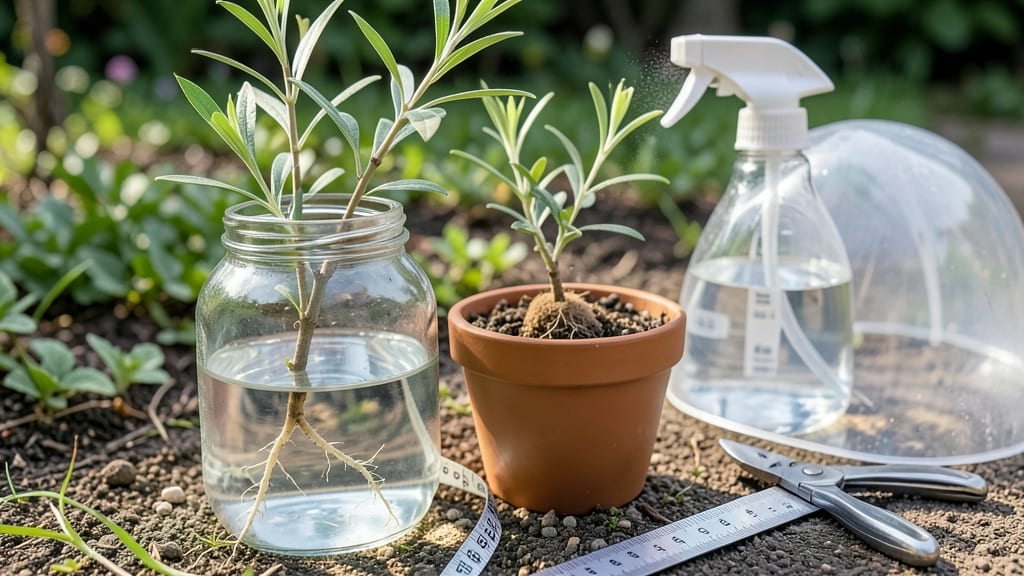
Starting a tree from a clipping feels like magic—especially when you watch roots sprout from something that was just a branch. 🌱 The secret lies in choosing the right cuttings, timing, and conditions to encourage growth.
My first attempt with a willow branch in a glass of water shocked me when roots appeared in just two weeks. You’ll need sharp pruners, rooting hormone, and either water or a propagation mix.
Softwood cuttings (new growth) work best in spring or summer, while hardwood (mature wood) can root in winter. The key is keeping cuttings moist but not soggy, and placing them in bright, indirect light.
What you’ll end up with is a thriving young tree—ready to plant in your yard or share with neighbors. The best part? You’ll save money and grow rare varieties that aren’t sold in nurseries. Let’s get those roots growing!
First, take 4- to 6-inch cuttings just below a leaf node (where leaves attach). Strip lower leaves to expose the stem, then dip the cut end in rooting hormone to boost success.
Place the cutting in water or moist propagation mix—willow, poplar, and willow oak root easily in water, while others like maple need a soil mix. Keep the container in a warm spot with bright, indirect light.
Mist cuttings daily to maintain humidity, and change the water every few days to prevent bacteria. Roots should appear in 2-8 weeks, depending on the species and conditions.
If your cuttings rot or fail to root, don’t give up. Overwatering or poor light are usually the culprits—adjust and try again. Once roots reach 2-3 inches, transplant into soil and keep the area moist. With patience, you’ll have a sturdy young tree ready for its forever home.
This method works for almost any tree species, though some (like oaks) take longer. Experiment with different types, and soon you’ll be growing a mini forest from scraps. The satisfaction of nurturing a tree from a simple clipping is unmatched—give it a try!
📚 In This Guide
- What you need
- Instructions
- Tips and common mistakes
- Wrapping up and next steps
What you need
- ● Healthy clipping: A 4–6 inch (10–15 cm) stem cutting with at least 2–3 leaf nodes (avoid flowering or fruiting branches). Quantity: 3–5 cuttings for better success rates.
- ● Sharp pruning shears or scissors: Clean, sterilized tools to make clean cuts (avoid crushing the stem).
- ○ Rooting hormone (optional but recommended): A powder or gel to boost root growth (e.g., Rootone or Clonex).
- ● Well-draining potting mix: A blend of perlite, vermiculite, or sand mixed with peat or coconut coir (sterilized to prevent fungus). Quantity: Enough to fill a small pot (4–6 inches wide).
- ● Small pots or containers: With drainage holes (yogurt cups, plastic nursery pots, or seed trays work). Size: 3–4 inches in diameter per cutting.
- ● Plastic bag or humidity dome: To create a mini greenhouse effect (e.g., a ziplock bag with holes or a clear plastic cover).
- ● Watering can or spray bottle: For gentle hydration (avoid soaking the mix).
- ● Labeling tags: To track cutting types and dates (use toothpicks + masking tape!).
- ● Heat mat: Keeps roots warm (70–75°F/21–24°C) for faster growth—great for slow-rooting species.
- ● Fogging system: Mist cuts 2–3 times daily to maintain humidity without overwatering.
- ● Grow lights: If propagating indoors with low natural light (12–16 hours/day).
- ● Epsom salt: A pinch dissolved in water (1 tbsp/gal) can provide magnesium for tougher cuttings.
- ● Aluminum foil: Wrap the base of the pot to reflect light and warmth.
Step-by-step instructions for propagating trees from clippings
Here's how I've successfully rooted cuttings from willow, maple, and even stubborn fruit trees—no fancy tools required.
🌱 Step 1: Select and Prepare the Right Clippings
Choose healthy, disease-free growth from the current season's new wood—look for 4-6 inch long stems with at least 2-3 sets of leaves. I always cut just below a leaf node (the bump where leaves attach) using clean, sharp pruners to avoid crushing the stem. The best time to take cuttings is in late spring or early summer when the tree is actively growing, but you can try year-round with the right adjustments.
Strip all but the top 2-3 leaves from each cutting, then make a clean diagonal cut just below a leaf node. This angled cut gives roots more surface area to grow into the medium. Dip the bottom inch in rooting hormone (optional but helpful for tougher species like oak or maple) to encourage faster root development. Here's the thing—if your clipping is woody or over a year old, rooting becomes much harder, so stick to fresh, flexible growth.
💧 Step 2: Set Up the Rooting Environment
Fill a clean container with well-draining propagation mix (I use a 50/50 blend of perlite and peat moss) and moisten it until damp but not soggy. Insert your cuttings 2-3 inches deep, spacing them about 3 inches apart to allow airflow. You'll want to create a humid environment, so I cover the container with a clear plastic bag secured with rubber bands or twist ties—this traps moisture and mimics a greenhouse.
Place your setup in bright, indirect light (a north-facing window works best). Too much direct sun will dry out the cuttings faster, while too little light slows root growth. I keep my cuttings at room temperature (65-75°F)—warmer than this can cause rot, while cooler temps delay rooting. Check the soil moisture every 2-3 days, misting the leaves lightly to maintain humidity. You'll know it's working when tiny white roots appear at the base after 4-8 weeks, depending on the species.
☀️ Step 3: Monitor and Encourage Root Growth
After 2-3 weeks, you might notice new leaves forming—that's your signal the cutting is settling in. This is the moment that matters: gently tug on the stem to see if resistance forms (a sign of root development). If not, be patient. I've found that willow cuttings root in as little as 2 weeks, while maple or birch can take 6-8 weeks. During this time, avoid overwatering—let the top inch of soil dry out between waterings to prevent rot.
Once roots are 1-2 inches long (visible through the clear container or when gently removed), it's time to transition to soil. Gradually remove the plastic cover over 5-7 days to harden off the cuttings, exposing them to normal air circulation. You'll see stronger stems and deeper green leaves as they adjust. Real talk: if leaves yellow or wilt, you're either overwatering or the light isn't bright enough—adjust immediately.
🪴 Step 4: Transplant and Care for New Trees
When your cuttings have 3-4 inches of roots, it's time to plant them in small individual pots with regular potting mix. I use 4-inch pots for the first year to give roots room to establish without overwhelming the young plant. Water deeply after transplanting, then keep the soil consistently moist (but not soggy) for the first 2 weeks. Place them in partial shade for another week to reduce stress before moving to their permanent spot.
Your newly rooted trees will need regular care to thrive. Feed them with a balanced fertilizer every 4-6 weeks during the growing season, and water deeply once a week (more in hot, dry weather). You'll know they're doing well when they show new growth in spring and develop a sturdy trunk. Don't skip this step—skipping fertilization or watering now means weaker roots later, and you'll end up with stunted trees.
Tips & tricks for perfect tree propagation from clippings
These simple adjustments will help your cuttings thrive—no green thumb required.
Timing is Everything: Late spring or early summer is ideal for taking cuttings because that's when trees are actively growing and producing new, flexible stems. If you're working outside this window, focus on selecting the freshest, most flexible growth you can find—avoid anything woody or over a year old. I've had success propagating in winter by using a heat mat to keep the soil at 70-75°F, but it takes longer to see results.
The Right Cut Makes All the Difference: When making your diagonal cut just below a leaf node, angle it downward—this increases the surface area for root growth. Use clean, sharp pruners to avoid crushing the stem, which can introduce bacteria. I've ruined more cuttings than I can count by using dull tools, so invest in a good pair if you don't have them already. The top 2-3 leaves should stay on to continue photosynthesis while the roots develop.
Humidity is Your Best Friend: That clear plastic bag covering your cuttings isn't just decoration—it creates a greenhouse effect that maintains humidity. Check the soil moisture every 2-3 days, but don't drown your cuttings. The mix should feel like a damp sponge, not a swamp. I've found that misting the leaves lightly with water (not soaking them) helps maintain that humid environment without overwatering the soil.
Light Matters More Than You Think: Bright, indirect light is crucial—direct sun will dry out your cuttings faster than you can water them. A north-facing window is perfect, but if that's not an option, use a grow light on a timer for 12-14 hours a day. I've seen cuttings fail spectacularly when placed in hot, sunny spots, so if you notice leaves wilting or turning brown, move them immediately to a cooler, shadier location.
Pro Tips for Start A Tree From A Clipping
- These simple adjustments will help your cuttings thrive—no green thumb required.
- Timing is Everything: Late spring or early summer is ideal for taking cuttings because that's when trees are actively...
- The Right Cut Makes All the Difference: When making your diagonal cut just below a leaf node, angle it downward—this ...
Frequently asked questions
Got questions about growing a tree from a clipping?
You’re not alone! Here are answers to the most common concerns—so you can propagate with confidence.
What’s the best time of year to take cuttings?
The ideal window is late spring to early summer (when new growth is active), but many trees (like willows or poplars) root easily year-round. For deciduous trees, avoid winter dormancy. Evergreens? Stick to early spring. Timing matters less than choosing healthy, flexible stems!
How long does it take for roots to form?
Patience is key! Most cuttings sprout roots in 4–8 weeks, but some (like maples or oaks) can take months. Check for resistance at the base or tiny root hairs in water. If nothing happens after 3 months, try again—some species just need more time.
Can I use tap water instead of rooting hormone?
For water propagation (like willows or pothos), tap water works—but add a pinch of cinnamon or 1 tsp of honey to fight bacteria. For soil/hormone methods, skip water entirely. Pro tip: Change water every 2–3 days to prevent mold.
What if my clipping rots before rooting?
Rotting is usually a sign of too much moisture or bacterial/fungal infection. Fix it by:
- Trimming the stem to healthy tissue (above rot).
- Dipping in hydrogen peroxide (3%) for 10 seconds.
- Using a sterilized container or fresh potting mix.
Which trees are easiest to grow from clippings?
Some trees are superstar rooters! Try these beginner-friendly picks:
Pro tip: Avoid citrus, avocado, or palm cuttings—they’re notoriously hard to root!
Tree Type
Method
Willow, Pothos, or Coleus
Water propagation (fastest!)
Maple, Birch, or Dogwood
Soil + rooting hormone (slower but reliable)
Oleander or Bougainvillea
Heel cutting (buried stem in soil)
Wrapping up and next steps
Starting a tree from a clipping is a rewarding way to grow your own greenery—no green thumb required! With the right techniques, patience, and a little care, you can nurture a thriving tree from just a small cutting.
Whether you’re reviving a favorite plant or expanding your garden, this method is both cost-effective and deeply satisfying. 🌱
Now that you’re armed with the know-how, pick a healthy branch and give it a try! Keep an eye on your cutting, and soon enough, you’ll be watching roots grow and new life sprout. Happy propagating!