
Planting
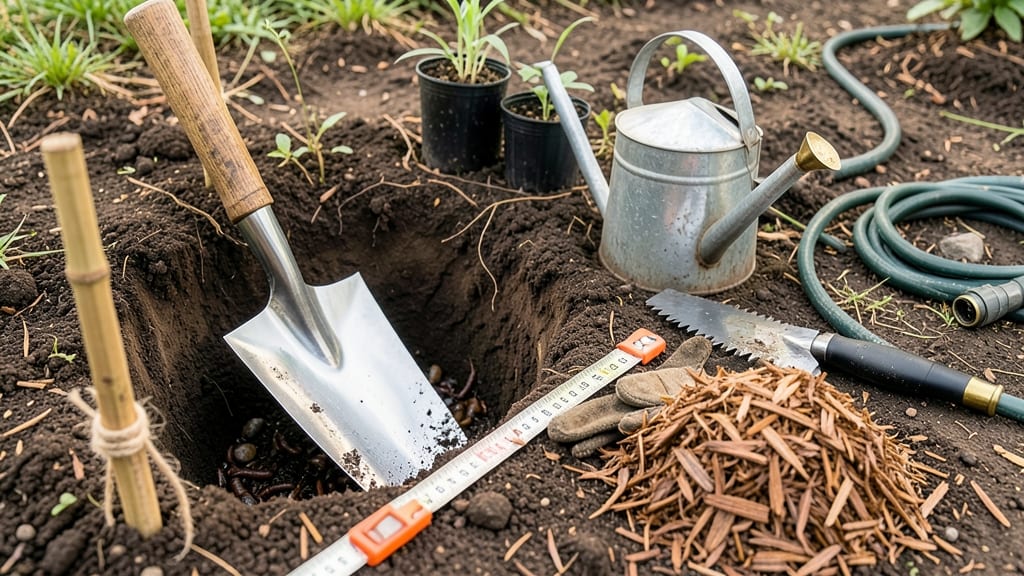
Planting tree seedlings right means the difference between a thriving shade tree and a sad, stunted sapling. 🌳 I’ve buried more than my share of seedlings too deep or too shallow—until I learned the exact technique that gives my trees the best start.
The secret isn’t just digging a hole; it’s about soil, depth, and aftercare that mimics nature’s own planting process.
You’ll need a few simple tools: a shovel, a watering can, and maybe some mulch. For most trees, the hole should be twice as wide as the root ball but only as deep—planting too deep suffocates roots, while shallow planting leaves them vulnerable.
Deciduous trees like oaks or maples need extra care with their root systems, while conifers like pines handle a bit more rough-and-tumble. The key is keeping the top of the root ball just above ground level.
After planting, water deeply to settle the soil and remove air pockets. A good soak right after planting ensures roots make contact with moisture immediately. Within a week, you’ll see new leaves unfurling as the tree establishes itself.
The first year is critical—consistent watering and mulching keep weeds at bay and retain moisture, setting your sapling up for decades of growth.
Even experienced gardeners make mistakes—like overwatering or ignoring soil type. Sandy soil drains too fast, while clay holds water too long. Amend with compost if needed, and always check the hole’s depth before planting. With these steps, your seedlings will grow into strong, healthy trees that outlast your garden mistakes.
📚 In This Guide
- What you need
- Instructions
- Tips and common mistakes
- Wrapping up and next steps
What you need
- ● Tree seedlings: 1–10 (depending on your project; choose healthy, disease-free saplings with strong root systems).
- ● Shovel or trowel: A digging shovel (for larger holes) and a hand trowel (for precision planting).
- ● Measuring tape or ruler: To ensure proper hole depth (typically 2–3 times wider and slightly deeper than the root ball).
- ● Garden gloves: A sturdy pair to protect your hands from dirt, thorns, or rough bark.
- ● Watering can or hose with a gentle spray nozzle: For hydrating seedlings before and after planting.
- ○ Mulch (optional but recommended): Shredded bark, wood chips, or straw (2–4 inches thick) to retain moisture and suppress weeds.
- ● Compost or organic fertilizer: A balanced, slow-release fertilizer (e.g., 10-10-10 or compost tea) to enrich the soil.
- ● Staking system: 3–4 ft bamboo stakes + soft tree ties for windy areas or tall seedlings.
- ● Root stimulator: A mycorrhizal inoculant or seaweed extract to boost root growth.
- ● Soil test kit: To check pH and nutrient levels (ideal range: 6.0–7.0 for most trees).
- ● Pruners: Sharp, sterilized pruners for trimming dead branches post-planting.
- ● Drip irrigation or soaker hose: For consistent watering in dry climates.
Step-by-Step instructions for planting tree seedlings
Here’s how I plant seedlings so they grow strong and healthy—tested over years of trial and error.
🌱 Step 1: Choose the Right Location and Dig the Hole
Pick a spot with full sun (at least 6 hours daily) and space for mature growth. Avoid low areas where water pools. I dig the hole twice as wide as the root ball but only as deep as the container—any deeper, and roots suffocate.
Loosen the sides of the hole with a shovel or hands. This prevents soil compaction around the roots. If your soil is heavy clay, mix in a handful of compost to improve drainage. Tap the hole gently to settle the soil before planting—this ensures the seedling sits level and doesn’t lean.
🪴 Step 2: Remove the Seedling and Prepare the Roots
Gently squeeze the container to loosen the root ball, then slide the seedling out. If roots are circling tightly (a common problem with container-grown trees), use a knife to make 2-3 vertical cuts around the root ball—this encourages outward growth. Never pull or force roots apart.
Check the roots for signs of rot (mushy, dark areas) or drying (brittle, brown tips). If you see either, soak the roots in lukewarm water for 10-15 minutes before planting. Healthy roots should look white or light tan and firm to the touch.
☀️ Step 3: Plant at the Correct Depth and Backfill
Place the seedling in the hole so the top of the root ball sits 1 inch above ground level. Planting too deep smothers the trunk and causes rot. Use one hand to hold the seedling straight while you backfill with the native soil.
Fill the hole in layers, tapping each layer gently with your foot to remove air pockets. Stop when the hole is half full, then water deeply to settle the soil. This prevents the seedling from sinking too low when you finish backfilling. Finish filling the hole and mound soil slightly around the base to create a watering well.
💧 Step 4: Water Thoroughly and Mulch
Water the newly planted seedling with 1-2 gallons of water, enough to soak the root ball completely. You’ll know it’s right when water runs out the bottom of the hole and the soil surface stays damp for a few minutes. Avoid splashing water on the trunk—this can spread disease.
Spread 2-3 inches of mulch (wood chips or straw) around the base, keeping it 6 inches away from the trunk. Mulch locks in moisture and regulates soil temperature. I always water again after mulching to help it settle and make contact with the soil.
⏰ Step 5: Stake and Monitor for Success
If your seedling is tall or top-heavy, insert a 5-foot stake into the ground at a 45-degree angle, then tie the trunk loosely to it with soft fabric or rubber tubing. Too-tight stakes can girdle the trunk as it grows. Check the ties monthly and loosen them as the seedling strengthens.
Watch for new growth in 4-6 weeks—that’s your sign the seedling is established. If leaves yellow or wilt, it’s usually overwatering or poor drainage. Adjust your watering schedule to match your climate: water deeply every 7-10 days** in dry weather, less often in rain.
Tips & tricks for planting thriving tree seedlings
Between us, planting seedlings isn't rocket science—but these little details make all the difference between a thriving tree and one that struggles from day one.
Location Intelligence: That "full sun" requirement in Step 1 isn't just about light—it's about airflow. Trees need sun for photosynthesis, but they also need air circulation to prevent fungal diseases. If your yard has shady spots, consider planting smaller varieties that tolerate partial shade, like Japanese maples. And here's the thing: if you're planting near a fence or building, leave at least 3 feet of clearance so roots can spread outward instead of getting cramped.
The Root Rescue Technique: When you're checking roots in Step 2, don't just look at the color—run your fingers along them. Healthy roots should feel springy, not mushy. I learned this the hard way after planting a seedling with some rotten roots that I missed. For that 10-15 minute soak, use room-temperature water (not cold from the tap) to avoid shocking the roots. Pro tip: If you're planting in dry conditions, soak the root ball in a bucket of water for 30 minutes beforehand to give it a head start.
Depth Matters More Than You Think: That 1-inch above ground level in Step 3 isn't just arbitrary—it's about the graft union if you're planting grafted trees. The graft union (where the top part meets the rootstock) needs to stay above soil level to prevent rot. For non-grafted trees, this depth still matters because it prevents the trunk from sitting in wet soil, which causes rot. I've seen people plant too deep and their tree just... gives up after a few years. Don't let that be you.
Watering Wisdom: The 1-2 gallons in Step 4 should create a saturated soil zone about 12 inches deep. Here's how to check: Stick your finger 2 inches down—if it comes out dry, you need more water. And that mound of soil around the base? It's not just decoration. It helps direct water right where the roots need it most. For the first month after planting, I water every 3-4 days (unless it rains) to keep the soil consistently moist but not soggy.
Pro Tips for Plant Tree Seedlings
- Between us, planting seedlings isn't rocket science—but these little details make all the difference between a thrivi...
- Location Intelligence: That "full sun" requirement in Step 1 isn't just about light—it's about airflow. Trees need su...
- The Root Rescue Technique: When you're checking roots in Step 2, don't just look at the color—run your fingers along ...
Frequently asked questions
Got questions about planting tree seedlings? You’re not alone! Here are some of the most common concerns—plus quick, actionable answers to help your saplings thrive from day one.
What’s the best time of year to plant tree seedlings?
The ideal window is early spring or fall when temperatures are mild (50–70°F) and rain is frequent. Avoid extreme heat or frost—seedlings struggle with stress. If planting in summer, opt for shade-tolerant species and water daily to prevent wilting. Pro tip: Check your USDA hardiness zone to match timing with local climate!
How often should I water newly planted seedlings?
For the first 2–4 weeks, water deeply every 2–3 days (or daily in hot/dry weather). Soak the root ball until water drains 6–8 inches down—this encourages deep roots. After establishment, taper to 1–2 times per week, but adjust for soil type (sandy soils dry faster). Overwatering is worse than underwatering—always check soil moisture before adding more!
Can I plant tree seedlings in containers instead of the ground?
Yes! Containers work well for small trees, urban spaces, or testing sites. Use pots at least 18–24 inches deep with drainage holes and well-draining soil. Repot every 1–2 years to avoid root-bound stress. Just remember: Container-grown trees need more frequent watering and fertilizer than in-ground plants.
What should I do if my seedling’s leaves turn yellow or wilt?
Yellow leaves often signal overwatering, poor drainage, or nutrient deficiency. Wilt can mean underwatering, root rot, or heat stress. First, check soil moisture—stick your finger 2 inches down. If soggy, reduce water; if dry, hydrate deeply. Trim damaged leaves and adjust care (e.g., mulch to retain moisture, or move to partial shade). Pests? Inspect for chewing or sap—neem oil can help!
How close can I plant seedlings to my house or fence?
Keep seedlings at least 3–5 feet away from structures to avoid root conflicts or damage (e.g., cracked foundations or blocked drainage). For large trees (e.g., oaks, maples), aim for 15–20 feet away. Always research your tree’s mature size—some varieties (like willows) have aggressive roots! Call 811 before digging to check for underground utilities.
Wrapping up and next steps
Planting tree seedlings is a rewarding way to contribute to the environment while nurturing new life! By following these proven steps—choosing the right location, preparing the soil, and providing consistent care—you’ll give your saplings the best chance to thrive.
Whether you’re a beginner or a seasoned gardener, every small effort makes a big difference for future generations.
Now that you’re equipped with the knowledge, take action! Pick a sunny weekend, gather your tools, and start planting. Watching your seedlings grow into strong, healthy trees is incredibly satisfying—so why wait? 🌱💚