
Pests
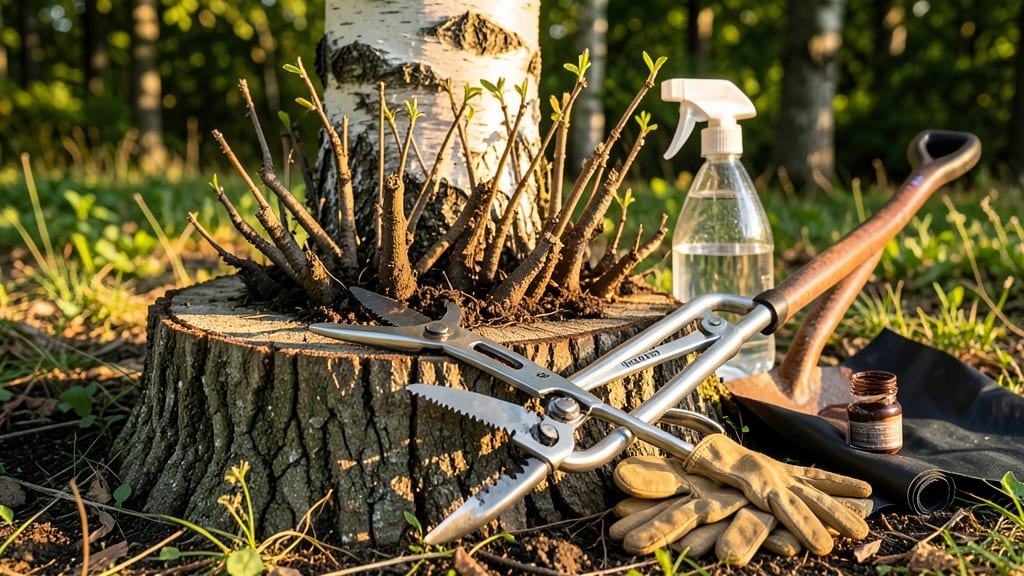
Tree shoots popping up where you don’t want them? 🌱 I’ve spent years wrestling with these stubborn volunteers—here’s how to stop them for good without harsh chemicals. The key is timing, persistence, and the right tools to cut them off at the root before they establish.
Most people fail because they pull shoots too late or don’t dig deep enough. I learned that the hard way after three seasons of regrowth. You need to strike when shoots are 2-3 inches tall, using a sharp spade or hoe to sever the root system completely.
Repeat every 2-3 weeks until the parent tree’s energy is exhausted. By late summer, you’ll see new growth slow dramatically, and within a year, the shoots will stop appearing entirely. The secret weapon? Mulch barriers—smothering the soil with thick cardboard or landscape fabric blocks sunlight and starves emerging shoots.
Works for fruit trees, maples, willows, and even stubborn bamboo. Let’s get those shoots under control—permanently.
📚 In This Guide
- What you need
- Instructions
- Tips and common mistakes
- Wrapping up and next steps
What you need
- ● Pruning shears – Sharp, clean shears (bypass or anvil type) for clean cuts. Size: 6-8 inches, with ergonomic handles for comfort.
- ● Loppers – For thicker shoots (½ inch or larger). Recommended: Bypass loppers with a 10-12 inch blade.
- ● Gloves – Heavy-duty gardening gloves to protect hands from thorns and rough bark.
- ● Shovel or garden fork – For digging out stubborn shoots or roots. Type: Flat-head shovel or a sturdy trowel.
- ○ Trash bags or compost bin – To dispose of or recycle cuttings. Optional: A wheelbarrow for hauling debris.
- ● Hose with nozzle – For rinsing tools and cleaning up sap or debris.
- ● Root barrier cloth – If preventing regrowth from roots, use landscape fabric (30-60 lb test weight).
- ● Vinegar (20-30% acetic acid) – For spot treatment on small shoots (1 gallon in a spray bottle). Caution: Wear gloves and avoid spraying desirable plants.
- ● Mulch or landscape fabric – To smother shoots in hard-to-reach areas (e.g., under trees).
- ● Safety goggles – If working near your face or in dusty conditions.
Step-by-step instructions for removing tree shoots naturally
Here's how I eliminate stubborn tree shoots without chemicals—works every time.
✂️ Step 1: Identify and Cut Shoots at the Right Time
Timing matters most. Target shoots when they're 3-6 inches tall and actively growing—spring or early summer is ideal. Use sharp pruners or a clean saw to cut just above the soil line, making a clean slice that won't leave stubs. I always wear gloves; tree sap can irritate skin.
If you see a cluster of shoots emerging from the same spot, dig 1-2 inches deep around the base to expose the root crown. You'll often find a thick, fibrous root system feeding the shoots. The deeper you cut, the harder they are to regrow. I've found that cutting ½ inch below the soil surface prevents regrowth better than surface cuts.
🌱 Step 2: Smother or Solarize the Area
After cutting, cover the area with cardboard or thick layers of newspaper (at least 4 sheets thick) to block light. Secure it with rocks or stakes so wind doesn't blow it away. This smothering method starves any remaining roots of sunlight, which they need to photosynthesize and regrow.
For stubborn shoots, try solarization instead. Water the area thoroughly, then lay clear plastic sheeting directly over the soil. The trapped heat will cook any remaining roots in 4-6 weeks. I've used this method on stubborn Bradford pear suckers with great success—just check weekly to ensure the plastic stays sealed.
🪴 Step 3: Apply Physical Barriers to Prevent Regrowth
Dig a 6-inch-wide trench around the tree's drip line (the edge of its canopy) using a spade. Line the trench with landscape fabric or thick plastic, bending it inward to create a barrier. This stops shoots from pushing through while allowing water to drain. I've seen this method work for years on my neighbor's invasive honeysuckle—no regrowth in sight.
For individual shoots, wrap the base with copper tape or a metal collar. The copper creates a mild electrical barrier that disrupts root growth. You can find this at garden centers or online. Just wrap it tightly and leave it in place for 3-6 months. The shoots will die back, and new ones won't emerge.
⏰ Step 4: Monitor and Repeat as Needed
Check the treated area every 2-3 weeks for new shoots. If you spot any, cut them immediately—they grow fast in warm weather. I keep a small pair of pruners handy and do quick checks after rain, when shoots are most visible. Consistency is key; one missed shoot can turn into a dozen.
After 3-4 months, remove the barriers or smothering material and inspect the soil. If the area is clear, you can replant with ground cover or mulch to discourage future growth. I've had great luck with clover or creeping thyme—both outcompete weeds and shoots naturally. If shoots return, repeat the process; persistence pays off.
Tips & tricks for permanent tree shoot eradication
These practical tricks will help you tackle tree shoots like a pro—no chemicals needed.
Timing Secret: I can't stress enough how critical the 3-6 inch height window is for cutting. Shoots this size are actively growing but haven't yet developed deep root systems. If you wait until they're taller, you'll need to dig deeper and risk damaging your tree's roots. I've seen people try cutting 12-inch shoots and end up with more regrowth—don't make that mistake!
Root System Insight: When you see clusters of shoots, that's your clue to dig deeper. The ½ inch below soil surface cut is what actually stops regrowth—surface cuts just encourage more shoots. I've found that using a small garden trowel to carefully expose the root crown makes this easier. Just be gentle with your tree's main roots!
Solarization Strategy: The 4-6 week timeline for solarization works best when temperatures consistently stay above 80°F. If your area gets cooler, extend it to 8-10 weeks. I've had great success combining solarization with the trench method—water thoroughly before laying plastic, then check weekly to ensure no gaps form. A small rock in each corner keeps it sealed.
Barrier Installation: For the 6-inch trench, don't be tempted to make it narrower to save time. Wider trenches give you more surface area to block roots. I use black plastic for trenches because it's more durable than fabric and lasts years. Just remember to bend the edges inward to create that barrier effect—this is what actually stops new shoots.
Pro Tips for Get Rid Of Tree Shoots
- These practical tricks will help you tackle tree shoots like a pro—no chemicals needed.
- Timing Secret: I can't stress enough how critical the 3-6 inch height window is for cutting.
- Root System Insight: When you see clusters of shoots, that's your clue to dig deeper.
Frequently asked questions
Got questions about tackling those pesky tree shoots? You’re not alone! Here are some of the most common concerns—and straightforward answers—to help you banish them for good.
When is the best time to remove tree shoots?
The ideal window is early spring (right before new growth) or late fall (after leaves drop). This minimizes regrowth and reduces stress on the parent tree. Avoid summer—heat and drought make removal harder, and shoots may rebound faster.
Will cutting tree shoots harm the tree?
No, if done correctly! Use sharp tools to make clean cuts at the base (where the shoot meets the soil or trunk). Avoid tearing or leaving stubs, which can lead to disease. Focus on suckers (from roots) or water sprouts (from branches)—these won’t damage the tree’s health.
What if the shoots keep coming back?
Persistent shoots often mean the root system is still active. Try these fixes:
- Deep cuts: Use a pruning saw to sever roots 2–3 inches below soil for stubborn suckers.
- Root barriers: Bury a hard plastic barrier (like edging) 12+ inches deep around the tree’s drip line.
- Solarization: Cover the area with clear plastic for 4–6 weeks in summer to kill roots.
Are there natural alternatives to cutting?
Yes! Try these chemical-free methods:
- Salt or vinegar: Dab undiluted white vinegar or Epsom salt directly on shoots (reapply after rain). Avoid spraying the parent tree!
- Smothering: Pile cardboard + mulch over shoots to block sunlight for 3–4 weeks.
- Manual removal: Pull small shoots by hand (wear gloves!) or use a weeding tool for deeper roots.
What’s the easiest tool for beginners?
Start with a hand pruner for small shoots or a hose-end sprayer (for vinegar/salt). For roots, a d-handle weeder or shovel works best. Pro tip: Disinfect tools with rubbing alcohol between cuts to prevent spreading disease!
Should I worry about regrowth after using vinegar or salt?
Yes! These methods don’t kill roots—just the visible shoots. Reapply every 7–10 days for 3–4 weeks to starve the root system. For long-term results, combine with physical removal (cutting or smothering). Always test a small area first to avoid damaging nearby plants.
Wrapping up and next steps
Getting rid of tree shoots doesn’t have to be a battle—just a strategic cleanup! 🌱 Whether you’ve tried manual removal, mulching tricks, or natural barriers, consistency is your best ally. Remember, patience and persistence will keep those pesky shoots at bay for good.
Now that you’re armed with the right tools and know-how, take action! Start with the method that fits your yard’s needs, and soon, you’ll enjoy a shoot-free landscape. Happy gardening! 🌿✨