
Pruning
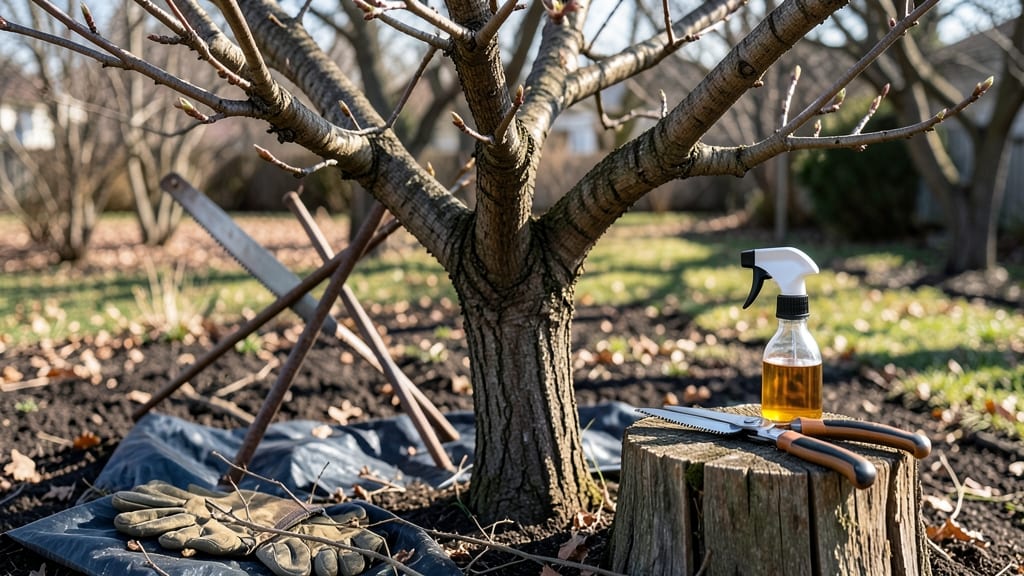
A single wrong cut can weaken your cherry tree for years—or worse, invite disease right into the wound. ✂️ I’ve seen beautiful sweet and sour cherries turned into sad, stunted bushes because pruning felt like guesswork.
The truth? Pruning cherry trees is more about strategic shaping than aggressive trimming, and timing makes all the difference.
You’ll need sharp bypass pruners, a 3-foot pole saw for higher branches, and rubbing alcohol to sterilize tools between cuts. The best time to prune depends on your goal: dormant season (late winter) for structural shaping, or immediately after harvest to encourage next year’s fruit.
Sweet cherries respond best to open-center pruning, while sour cherries thrive with a more vase-like shape—both methods keep air circulating to prevent fungal rot.
By the time you’re done, your tree will have a stronger framework, fewer crowded branches, and better sunlight exposure for fruit production.
The cuts themselves heal faster when made at a 45-degree angle just outside the branch collar, and sealing larger wounds with pruning paint isn’t just optional—it’s a game-changer for wet climates. You’ll notice the difference in next year’s blossoms and harvest.
This works for backyard orchards, urban lots, or even container-grown dwarf cherries. The key is patience—cherry trees reward thoughtful cuts over aggressive ones. Let’s get those branches looking intentional, not hacked.
📚 In This Guide
- What you need
- Instructions
- Tips and common mistakes
- Wrapping up and next steps
What you need
- ● Pruning shears: Bypass pruners (for cuts up to ½ inch thick) – 1 pair (look for ergonomic, sharp blades with a comfortable grip).
- ● Loppers: Bypass or anvil type (for cuts up to 2 inches thick) – 1 pair (extendable loppers help reach higher branches).
- ● Pruning saw: Curved-tooth or folding saw (for thicker branches) – 1 saw (choose one with a sharp, durable blade).
- ● Ladder: Sturdy, extendable aluminum or fiberglass (if tree is over 6 feet tall) – 1 ladder (ensure it’s rated for your weight and height needs).
- ● Gloves: Heavy-duty, cut-resistant (to protect hands from thorns and sharp tools) – 1 pair (gardening gloves with reinforced palms work well).
- ● Disinfectant: Rubbing alcohol (70%+ isopropyl) or bleach solution (to sterilize tools between cuts) – small bottle (or a spray bottle for convenience).
- ○ Pruning sealant: Optional but recommended for large cuts (to prevent disease entry) – small tube (choose a fast-drying, natural option like tree wound dressing).
- ● Heavy-duty trash bags: For collecting pruned branches – 2-3 bags (or a wheelbarrow if disposing of large volumes).
- ● Safety glasses: Protective eyewear (to shield from debris) – 1 pair (lightweight and comfortable for extended wear).
- ● Work boots: Steel-toe or sturdy shoes (for foot protection) – 1 pair (avoid open-toed shoes or sandals).
- ● Pole saw: For very high branches (extends reach without a ladder) – 1 pole saw (adjustable length for versatility).
- ○ Tree paint: Optional for large cuts (traditional but less recommended than sealant) – small container (choose a breathable, non-toxic option).
- ● Notebook & pen: To sketch pruning plan or track progress – 1 notebook (helpful for large or complex trees).
Step-by-step instructions for pruning cherry trees
Here's how I transform tangled branches into a strong, productive canopy—safely and with precision.
✂️ Step 1: Time Your Pruning for Maximum Recovery
Cherry trees heal best when pruned during their dormant season, ideally in late winter (just before buds swell) or early spring before leaves emerge. This timing prevents disease spread and allows wounds to seal before pests arrive. Avoid pruning in fall—wet conditions create perfect conditions for bacterial canker, a deadly cherry tree disease.
I mark my calendar for February to March in most climates, adjusting 2-4 weeks later for warmer southern zones. Watch for bud swell—when you see those tiny green buds beginning to plump up, it's your cue to grab the pruners. This is the sweet spot between winter dormancy and active growth.
🌿 Step 2: Identify and Remove Dead or Diseased Wood First
Start by scanning the tree for dead branches (no leaves, dry bark) or diseased wood (oozing cankers, discolored streaks). These must come out immediately to prevent spread. I cut 6-8 inches below any visible canker to ensure I remove the entire infected area. Use sterilized pruners between cuts—wipe blades with rubbing alcohol after each diseased branch.
Look for crossing branches rubbing together—these create wounds that invite infection. Remove the smaller branch at its base, cutting just outside the branch collar (that swollen area where the branch meets the trunk). Never leave stubs—cherry trees heal poorly from improper cuts and often develop weak regrowth.
☀️ Step 3: Open the Canopy for Better Light Penetration
Cherry trees need 6-8 hours of sunlight daily for optimal fruit production. I focus on removing suckers (vigorous shoots growing from the base or trunk) and overcrowded branches growing inward. Aim to create an open vase shape—this improves air circulation and reduces humidity where fungal spores thrive.
For each branch, I make my cut just above an outward-facing bud at a 45-degree angle. This ensures water runs off the cut and new growth emerges in the right direction. Never cut more than 25% of the tree's foliage in one season—cherry trees are sensitive to heavy pruning and may struggle to recover.
⏰ Step 4: Shape for Structure and Future Growth
Now it's time to refine the tree's shape. I start at the top center and work downward, removing branches that grow straight up (these create weak crotches) or cross the main scaffold branches. For each cut, I visualize how the branch will affect the tree's balance—never remove more than one-third of a branch's diameter in one cut.
Pay special attention to water sprouts (fast-growing vertical shoots) and rubbing branches (those that grow toward each other). These compete for energy and create entry points for disease. I make clean cuts just outside the branch collar, using sharp bypass pruners for branches under ½ inch thick and a pruning saw for thicker branches.
🪴 Step 5: Seal Cuts and Monitor for Recovery
After pruning, I inspect each cut for smooth surfaces—no jagged edges or torn bark. For cuts larger than ½ inch, I apply pruning sealant to prevent moisture loss and infection. This isn't about hiding the cut, but creating a protective barrier while the tree seals the wound naturally over 2-4 weeks.
Water the tree deeply after pruning to help it recover, then monitor for new growth within 4-6 weeks. Avoid fertilizing immediately—cherry trees need time to adjust. If you notice oozing sap or unusual wilting, it could signal stress or infection. In that case, apply a copper fungicide as a preventive measure.
Tips & tricks for pruning cherry trees like a pro
Here's what I've learned after years of shaping cherry trees—these tricks make all the difference between a healthy tree and one that struggles.
Timing is Everything: The February to March window isn't just arbitrary—it's when cherry trees enter active growth but haven't yet burst into leaves. If you're in a warmer climate, those 2-4 week adjustments can mean the difference between a thriving tree and one that develops bacterial canker. I always check for bud swell as my final confirmation—it's nature's perfect signal that the tree is ready. This timing also gives wounds plenty of time to seal before spring pests arrive.
Cutting Technique Matters More Than You Think: That 45-degree angle isn't just for looks—it's about water runoff. When you cut just above an outward-facing bud at this angle, rainwater flows away from the wound rather than pooling, which dramatically reduces infection risk. And remember, always cut just outside the branch collar, never inside it. I've seen so many pruning mistakes where people leave stubs, and those little nubs become perfect entry points for disease. Use sharp tools—dull blades tear bark and create jagged edges that heal poorly.
The 25% Rule is Non-Negotiable: Cherry trees are sensitive to heavy pruning. Never remove more than 25% of the foliage in one season, or you'll shock the tree. I always work in stages if needed, spacing out major pruning over two or three years. This gradual approach maintains the tree's energy reserves while still giving you that open vase shape that lets sunlight penetrate to all branches. Think of it like dieting—you wouldn't try to lose 50 pounds in a month, right?
Sealant Strategy for Larger Cuts: For any cut larger than ½ inch, that pruning sealant isn't just optional—it's insurance. I apply it immediately after cutting to create a protective barrier while the tree's natural healing process takes over during those critical 2-4 weeks. Don't skimp on quality here—cheap sealants can actually trap moisture and cause more problems. And remember, you're not hiding the cut—you're giving the tree the best chance to heal cleanly.
Pro Tips for Cherry Tree Cut
- Here's what I've learned after years of shaping cherry trees—these tricks make all the difference between a healthy t...
- Timing is Everything: The February to March window isn't just arbitrary—it's when cherry trees enter active growth bu...
- Cutting Technique Matters More Than You Think: That 45-degree angle isn't just for looks—it's about water runoff. Whe...
Frequently asked questions
Got questions about pruning your cherry tree? You’re not alone—many gardeners want to get it right the first time. Below, we’ve answered the most common questions to help you cut with confidence!
When is the best time to prune a cherry tree?
For most cherry trees, late winter or early spring (before buds swell) is ideal—this minimizes disease risk. Avoid pruning in fall, as wet conditions can invite fungal infections like silver leaf disease. Sweet cherries (like Bing) should be pruned after harvest if needed, but sour cherries (like Montmorency) tolerate winter pruning better.
How do I know which branches to cut?
Focus on:
- Dead/diseased branches (snaggy, discolored, or hollow)
- Crossing or rubbing branches (they’ll weaken the tree over time)
- Water sprouts (fast-growing, vertical shoots—remove them at the base)
- Suckers (shoots growing from the root flare or trunk)
Can I top a cherry tree to make it shorter?
While topping (cutting the top flat) might seem easy, it’s a bad idea for cherry trees. It creates stubs that rot, invites pests, and weakens the tree. Instead, prune selectively to shape naturally—focus on removing entire branches at their collars (the swollen area where the branch meets the trunk).
How do I prevent disease after pruning?
Cleanliness is key! Sterilize tools with rubbing alcohol or a 10% bleach solution between cuts. Seal larger wounds (over ½ inch) with pruning sealant to reduce infection risk. Avoid pruning when the tree is wet, and remove fallen leaves/debris promptly to deter fungal spores.
What if my cherry tree isn’t fruiting well after pruning?
Poor fruiting often stems from over-pruning (cutting too aggressively) or timing issues. Cherry trees need balanced light and energylight pruning in late winter and fertilize with citrus/nut-specific fertilizer in early spring.
Wrapping up and next steps
Pruning your cherry tree isn’t just about aesthetics—it’s the secret to a stronger, healthier, and more fruitful tree year after year. 🌿 By mastering the right cuts, timing, and techniques, you’ll encourage vibrant blooms, better fruit production, and even pest resistance.
Whether you’re a seasoned gardener or a beginner, every trim brings your tree one step closer to its full potential.
Ready to roll up your sleeves? Grab your tools, mark your calendar for the best pruning windows, and start shaping your cherry tree today! 🌱 Your future harvests—and your tree’s longevity—will thank you.