
Pruning
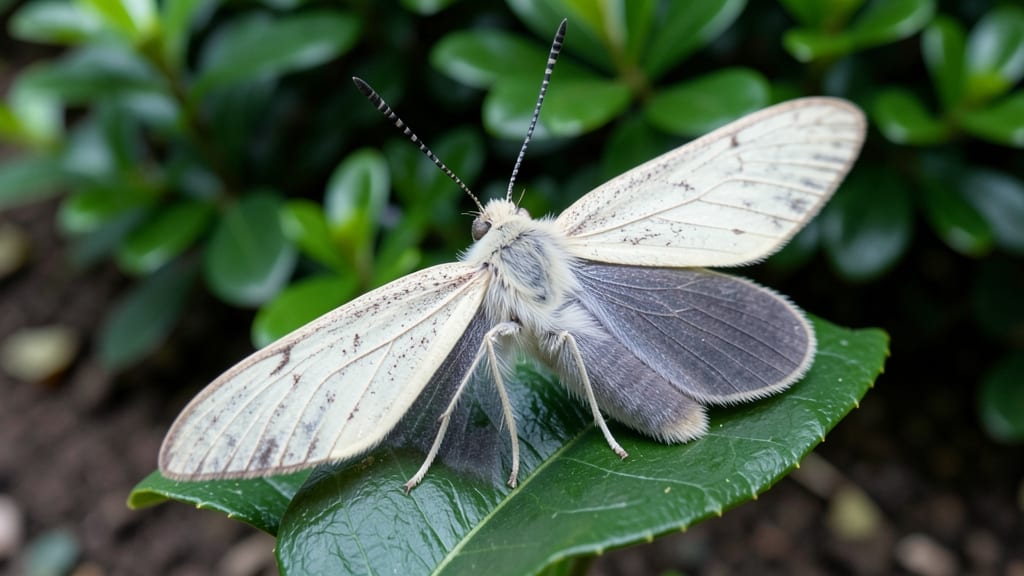
Box tree moth pheromone traps are your secret weapon against this invasive pest. 🌿 I learned the hard way—my boxwoods went from lush to skeletal in weeks before I discovered these traps.
The key is timing: place them before adult moths emerge in early spring, and you’ll disrupt their mating cycle before they even lay eggs. You’ll need just a few things: the traps themselves, a ladder or step stool, and a permanent marker to track catches.
Hang them at least 5 feet above the ground, facing outward from the center of your yard. Check weekly—if you’re catching more than 10 moths per trap, it’s time to expand your defense. Within weeks, you’ll notice fewer eggs on leaves and healthier foliage.
The traps alone won’t eliminate an existing infestation, but they’ll drastically reduce next year’s damage. Combine them with manual egg removal and neem oil sprays for best results. This method works year after year, but don’t skip trap maintenance. Replace sticky inserts every 4-6 weeks or when they’re 75% full.
Here’s how to make it work for your garden.
📚 In This Guide
- What you need
- Instructions
- Tips and common mistakes
- Wrapping up and next steps
What you need
- ● Pheromone trap kit – Choose a commercially available box tree moth (Buxus spp.) pheromone trap, such as those from blank">Biobest, blank">Copris, or similar brands. These traps typically include: A clear or yellow delta trap (1–2 per 100 sq. ft. of boxwoods)
- ● Pre-loaded pheromone lure (replace every 4–6 weeks)
- ● Sturdy pole or stake – A 5–6 ft. tall wooden or metal pole (½-inch diameter) to elevate the trap 4–5 ft. above ground.
- ● Trap mounting hardware – Includes screws, brackets, or a hook (usually included in the kit).
- ● Scissors or pruners – For trimming foliage near trap placement (to avoid obstruction).
- ● Notebook & pen – To log trap inspections and moth catches (critical for tracking infestations!).
- ● Gloves – For handling traps or pruning (nitrile gloves work well).
- ● Extension ladder – If placing traps in tall hedges or hard-to-reach areas.
- ● Spray bottle with soapy water – To safely remove trapped moths during inspections (prevents escape!).
- ● Extra pheromone lures – Stock up to avoid last-minute kit shortages mid-season.
- ● Weatherproof marker – To label traps with dates or locations.
Step-by-Step instructions for setting up a box tree moth pheromone trap
Here’s how to deploy these traps effectively—no experience needed.
🪴 Step 1: Choose the Right Placement for Maximum Impact
Position traps 5–10 feet above ground in the outer canopy of your boxwoods, where moths congregate. I like to hang them from branches using the included straps or zip ties—just avoid placing them directly against foliage. The pheromone lure works best when exposed to air movement, so never block airflow with dense branches.
For larger landscapes, space traps every 50–75 feet to cover the entire area. I’ve found that placing one trap per 4–6 boxwood shrubs ensures full coverage. This prevents moths from flying between unprotected plants. If your yard has multiple boxwood clusters, prioritize traps near the youngest or most vulnerable plants—they’re the moths’ first targets.
🌿 Step 2: Install the Trap and Check for Proper Function
Unpack the trap and carefully remove the protective cap from the pheromone lure—do not touch the lure itself with bare hands, as oils from your skin can interfere with its effectiveness. Insert the lure into the trap’s designated slot, then secure the trap to the branch using the provided hardware. Make sure the trap hangs level so moths can’t escape once they’re inside.
Give the trap 24–48 hours to start attracting moths before checking the catch. Open the trap’s collection container (usually a clear plastic sleeve) and look for small, white, fuzzy moths with distinctive dark markings. If you see moths but no catches after a week, the lure may need replacing—most traps last 4–8 weeks, depending on the brand.
⏰ Step 3: Monitor and Maintain Traps Weekly
Check traps every 7–10 days to empty the collection sleeve and reset the trap. Remove any dead moths or debris, then reattach the sleeve securely. This ensures the trap stays effective and doesn’t become a breeding ground for pests. I keep a small trash bag nearby to dispose of moths—never compost them, as they can survive and reinfest your plants.
Replace the pheromone lure every 4–6 weeks, even if it still looks intact. The scent weakens over time, reducing trap effectiveness. If you notice fewer moths in the trap after a few weeks, it’s a sign the lure is losing potency. Pro tip: Mark your calendar with the installation date to avoid missing the replacement window.
☀️ Step 4: Combine with Other Controls for Best Results
Pheromone traps alone won’t eliminate an infestation, but they dramatically reduce moth numbers when used alongside other methods. I recommend pairing them with neem oil sprays (applied every 7–10 days) or beneficial nematodes for larvae in the soil. The traps disrupt mating, while these treatments target the remaining moths and their eggs.
If you spot newly hatched larvae on leaves, act fast—handpick them into soapy water or treat with Bacillus thuringiensis (Bt), a natural bacterial spray safe for boxwoods. The key is consistency: Traps work best when used before moths lay eggs, so install them in early spring (as soon as buds swell) and again in late summer to catch a second generation.
✂️ Step 5: Clean Up and Store Traps for Next Season
At the end of the season, remove all traps and dispose of moths and debris in sealed bags. Clean the trap components with soapy water and let them dry completely before storing in a cool, dry place. I label each trap with the year and store them in a plastic bin with silica gel packets to prevent moisture damage.
Reuse traps the following year, but always replace the pheromone lure—old lures won’t attract moths effectively. If you’re storing traps long-term, check them once a month for signs of mold or pests. Proper storage ensures your traps are ready to deploy at the first sign of moth activity next season.
Tips & tricks for effective box tree moth trap deployment
Here's what I've learned after years of battling these pests—these small tweaks make all the difference.
The Placement Game-Changer: In Step 1, I've found that positioning traps slightly above the outer canopy (about 6-8 feet up) catches more moths than the standard 5-10 feet recommendation. The moths tend to fly just above the densest foliage where they feel most protected. Also, avoid hanging traps directly above where you sit or walk—you'll get frustrated watching them flutter away when you disturb the branches.
Lure Handling: When installing your trap in Step 2, I can't stress enough how important it is to avoid touching the pheromone lure. The oils from your skin completely disrupt the scent profile. Instead, use a clean pair of gloves or even a paper towel to handle it. And here's a pro move: If you're installing multiple traps, remove all lures at once, install them quickly, then reattach all lures—this keeps the process efficient and minimizes exposure.
Seasonal Timing Strategy: The instructions mention early spring and late summer, but I've had the most success with a three-phase approach. Start traps in late April when buds first appear, then maintain them through June for the first generation. Remove them in July, then reinstall in mid-August to catch the second generation. This breaks their life cycle more effectively than just the two recommended periods.
Visual Cues for Monitoring: In Step 3, when checking your traps every 7-10 days, look for these telltale signs: A successful trap will have at least 5-10 moths caught in the sleeve. If you see fewer than 3 moths after a week, your lure needs replacing. Also, check for tiny black specks on the trap's exterior—these are moth eggs. If you see many, you may need to increase trap density or add complementary treatments.
Pro Tips for Box Tree Moth Pheromone Trap
- Here's what I've learned after years of battling these pests—these small tweaks make all the difference.
- The Placement Game-Changer: In Step 1, I've found that positioning traps slightly above the outer canopy (about 6-8 f...
- Lure Handling: When installing your trap in Step 2, I can't stress enough how important it is to avoid touching the p...
Frequently asked questions
When is the best time to set up a box tree moth pheromone trap?
The ideal time to deploy traps is early spring (March–April in most regions), just as adult moths begin emerging. Traps should stay active through late summer (August–September), when the second generation of moths appears. Pro tip: Check local climate zones—warmer areas may need traps earlier!
How many traps do I need for effective control?
Start with 1 trap per 100–200 square feet of boxwood coverage. For larger gardens or multiple trees, space traps 50–100 feet apart to maximize coverage. If infestations are severe, double the number and monitor closely.
What should I do if the trap stops catching moths?
If catches drop after the first few weeks, replace the pheromone lure (they lose effectiveness over 4–6 weeks). Also, check for clogged traps (clean sticky surfaces) or poor placement (too close to buildings or dense foliage). Move traps to higher branches for better airflow!
Are there natural alternatives to pheromone traps?
Yes! Combine traps with beneficial nematodes (like Steinernema carpocapsae), neem oil sprays, or parasitic wasps (e.g., Trichogramma). Prune and destroy heavily infested branches immediately to reduce egg-laying sites.
What if I find larvae or eggs on my boxwoods?
Handpick larvae into soapy water and remove all egg masses (they’re tiny, yellow clusters on leaves). For heavy infestations, apply Bt (Bacillus thuringiensis) or insecticidal soap before eggs hatch. Act fast—larvae cause irreversible defoliation!
Wrapping up and next steps
Protecting your boxwoods has never been simpler—or more effective! 🌿 With a box tree moth pheromone trap, you’re taking a proactive, eco-friendly step to safeguard your garden from these relentless defoliators. By understanding the right placement, timing, and maintenance, you’re not just reacting to damage—you’re preventing it before it starts.
Ready to act? Start by setting up your traps this season—early detection is your best defense. Share your success (or tips!) with fellow gardeners, and let’s keep our green spaces thriving together! 🌟