
Pruning
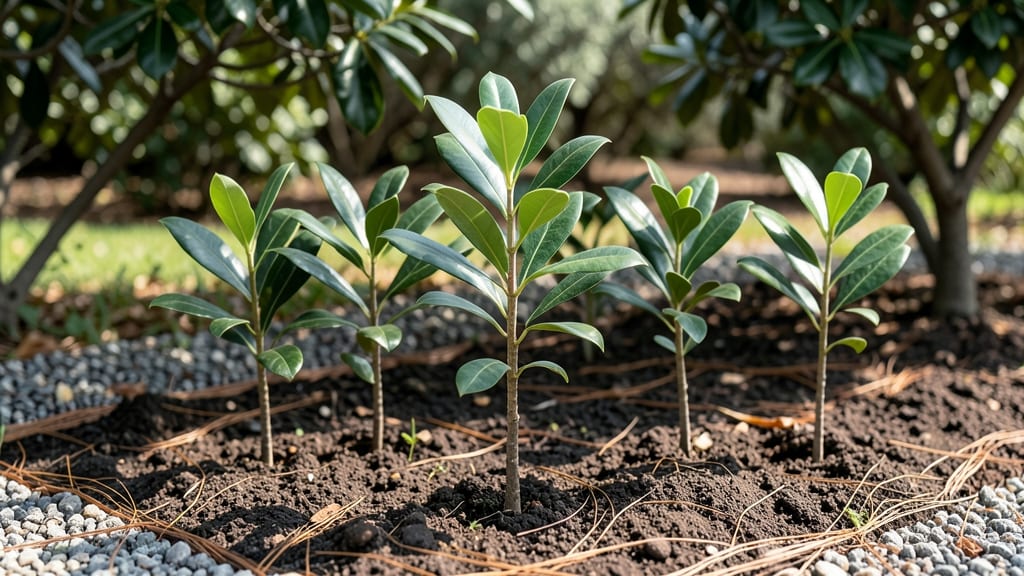
Starting with bay tree saplings gives you a head start on fragrant, culinary-ready plants. 🌿 Unlike seeds, these young trees skip the slow germination phase and grow into productive bushes within months.
My first bay sapling became a kitchen staple in just two seasons—imagine the flavor you’ll unlock with your own. The secret to container success lies in well-draining soil and a pot with drainage holes. Bay trees hate soggy roots, so mix equal parts potting soil with perlite or coarse sand.
Place your container where it gets 6+ hours of sunlight daily, and water only when the top inch of soil feels dry to the touch. With proper care, your dwarf bay tree will reward you with glossy leaves and that unmistakable aroma.
Prune lightly in spring to encourage bushiness, and watch as it grows into a compact, evergreen centerpiece for your kitchen or patio. The best part? You’ll have fresh bay leaves for cooking year-round.
Container-grown bay trees stay manageable and productive for years, making them perfect for small spaces. Just avoid overwatering—the number one killer of young bay trees—and watch out for spider mites, which love dry conditions. A quick spray of water or neem oil keeps pests at bay.
Here’s the kicker: these dwarf varieties stay under 3 feet tall, so they’re ideal for balconies, windowsills, or even as a potted accent. Start with a 1-gallon container, and upgrade to 5 gallons as the roots fill the pot. Your kitchen—and your recipes—will thank you.
📚 In This Guide
- What you need
- Instructions
- Tips and common mistakes
- Wrapping up and next steps
What you need
- ● Bay tree saplings: Choose Laurus nobilis (sweet bay) or dwarf varieties like ‘Angustifolia’ or ‘Undulata’. Start with 1–3 saplings (or more if you’re planting in a large container).
- ● Containers: Minimum 12–18 inches in diameter (bigger for multiple saplings).
- ● Ensure pots have drainage holes (terracotta or fabric grow bags work well).
- ● Well-draining potting mix: A blend of 50% peat-free compost, 30% perlite or coarse sand, and 20% coconut coir or orchid bark (mimics Mediterranean soil).
- ● Slow-release fertilizer: 10–10–10 NPK or organic options like fish emulsion (mix 1 tbsp per gallon of soil).
- ● Mulch: 1–2 inches of pine bark or shredded leaves to retain moisture and regulate temperature.
- ● Pruning shears: Bypass pruners (sharp, clean, and sanitized with rubbing alcohol).
- ● Gloves: Heavy-duty gardening gloves to protect from thorns (especially on ‘Undulata’).
- ● Watering can: With a rose nozzle for gentle, deep watering.
- ○ Support stakes: 3–4 ft bamboo stakes (optional, for dwarf varieties that may need light trellising).
- ● pH test kit: To monitor soil pH (ideal range: 6.0–7.0).
- ○ Container saucers: For drainage collection (optional but helpful for tidiness).
Step-by-Step instructions for growing dwarf bay tree saplings in containers
Here's my foolproof method for nurturing sturdy, aromatic bay trees that stay compact enough for patios or sunny windowsills.
🌱 Step 1: Select the Right Containers and Soil Mix
Choose 12-15 inch diameter pots with drainage holes—bay trees hate soggy roots. I prefer terracotta because it breathes and prevents moisture buildup. Fill each pot with a mix of 60% potting soil, 30% perlite, and 10% compost to ensure excellent drainage while retaining moisture.
Tap the pot gently to settle the mix without compacting it. The soil should feel like a damp sponge—squeeze it and it should hold its shape but not drip water. Add a handful of slow-release fertilizer to the bottom layer for steady nutrition without burning young roots.
☀️ Step 2: Plant Saplings at the Correct Depth and Position
Dig a hole twice as wide as the sapling's root ball but only as deep as the container's original planting depth. Gently remove the sapling from its nursery pot and tease the roots outward if they're circling. Place it in the hole so the top of the root ball sits ½ inch below the pot's rim—this prevents soil from washing away during watering.
Fill the hole with your prepared soil mix, pressing lightly around the roots to eliminate air pockets. Water thoroughly until it drains from the bottom hole. Position the pot in a spot with 6+ hours of morning sun and partial afternoon shade—bay trees appreciate bright light but can scorch in intense afternoon rays.
💧 Step 3: Establish a Consistent Watering Routine
Water when the top 1-2 inches of soil feel dry to the touch. I check by sticking my finger in—if it comes out clean, it's time. Bay trees are drought-tolerant once established, but young saplings need consistent moisture. Water deeply until it runs out the drainage hole, then empty the saucer to prevent root rot.
Mist the leaves occasionally during dry spells to maintain humidity, especially if your home has dry air. You'll notice the leaves droop slightly when thirsty—this is your cue to water. Overwatering is the biggest mistake; yellowing leaves usually mean you're watering too frequently.
✂️ Step 4: Prune for Shape and Encourage Bushiness
Prune in early spring before new growth begins. Use clean, sharp pruners to trim back any leggy growth to just above a leaf node. This encourages branching and keeps your bay tree compact. I also remove any dead or yellowing leaves to redirect the plant's energy toward healthy growth.
Pinch back the tips of new growth in late spring to promote fuller, bushier growth. Never remove more than ⅓ of the plant's foliage at once—bay trees are resilient but dislike drastic pruning. After pruning, give the plant a light feeding with a balanced liquid fertilizer to support new growth.
🪴 Step 5: Repot and Refresh Soil Annually
Repot your bay tree every spring into a container just 1-2 inches larger in diameter than the current one. This prevents root-bound stress while keeping the plant compact. Refresh the soil mix with 50% new potting soil and 50% of the old mix to preserve beneficial microbes.
This is also the perfect time to check the roots. If you see roots circling the bottom or growing out of drainage holes, it's time to upgrade the pot size. After repotting, water thoroughly and place the plant back in its sunny spot. With proper care, your dwarf bay tree will stay manageable and productive for years.
Tips & tricks for perfect dwarf bay tree growth
Between us, growing dwarf bay trees in containers is one of those rewarding projects that feels like magic when it works. Here's what I've learned to keep my compact bay trees thriving year after year.
Container Material Matters: While terracotta is my favorite for its breathability, plastic pots actually retain moisture better in dry climates. If you choose plastic, add an extra 10% perlite to your soil mix to prevent compaction. I've found that glazed ceramic pots can trap too much moisture—stick with unglazed options if you prefer this material. The key is balancing drainage with moisture retention, especially in those 12-15 inch pots we're using.
Root Health Check: When you're repotting annually in Step 5, take a moment to inspect the roots more closely than just checking for circling. Healthy roots should be white or pale tan, while dark brown or mushy roots signal overwatering. I've caught root rot early this way—something that would have been disastrous if I'd missed it. If you find any damaged roots, trim them away with clean scissors before repotting.
Sunlight Strategy: That 6+ hours of morning sun is crucial, but here's what nobody tells you—bay trees actually appreciate a little afternoon shade during summer's peak heat. If you notice leaves curling or turning yellow in intense afternoon sun, move your pot to a spot with filtered light for a few hours. I've seen dramatic recovery when I adjust the position during heatwaves. The leaves will perk up noticeably within a week.
Fertilizer Timing: The slow-release fertilizer in Step 1 will last about 3 months, but I've found that giving a light dose of balanced liquid fertilizer every 6 weeks during growing season (spring through fall) makes a noticeable difference. Just be careful not to overdo it—bay trees are sensitive to excess salts. I mix mine at half-strength to be safe, especially with those young saplings.
Pro Tips for Bay Tree Saplings
- Between us, growing dwarf bay trees in containers is one of those rewarding projects that feels like magic when it wo...
- Container Material Matters: While terracotta is my favorite for its breathability, plastic pots actually retain moist...
- Root Health Check: When you're repotting annually in Step 5, take a moment to inspect the roots more closely than jus...
Frequently asked questions
Got questions about growing bay tree saplings—especially dwarf varieties in containers? You’re not alone! Here are answers to the most common queries to help you nurture healthy, thriving plants with ease.
What’s the best time of year to plant bay tree saplings in containers?
Plant your Laurus nobilis saplings in early spring (after the last frost) or late summer (late August to early September). This gives roots time to establish before winter or summer stress. Avoid planting in extreme heat or cold—your saplings will thank you with faster growth!
How often should I water container-grown bay tree saplings?
Water daily for the first week after planting, then every 2–3 days (or when the top inch of soil feels dry). Dwarf varieties in containers dry out faster than in-ground plants. Pro tip: Use well-draining soil and a saucer to catch excess water—bay trees hate soggy roots!
Do dwarf bay trees need pruning, and how often?
Yes! Prune lightly in early spring to shape your dwarf bay and encourage bushier growth. Trim back any leggy branches by ⅓ of their length. Avoid heavy pruning—bay trees respond best to gradual shaping. Bonus: Pruned leaves make great culinary bay leaves!
Can I grow a bay tree sapling from a cutting instead of buying one?
Take a 4–6 inch cutting from a healthy branch (just below a leaf node), dip it in rooting hormone, and plant it in moist perlite or sand. Keep it humid (use a plastic bag!) and in bright, indirect light. Roots should form in 4–8 weeks. Warning: Not all cuttings root—be patient!
What pests should I watch for in container-grown bay trees?
Keep an eye out for aphids, spider mites, and scale insects—they love tender new growth. Spray with neem oil or insecticidal soap if you spot them. Prevention tip: Inspect leaves weekly and remove any infested branches immediately to stop outbreaks fast.
How big will dwarf bay trees get in containers?
Dwarf varieties like ‘Tiny Tower’ or ‘Golden Bay’ typically stay 3–5 feet tall in containers. With regular pruning, you can even keep them smaller! Just ensure your pot has drainage holes and repot every 2–3 years for optimal growth.
Wrapping up and next steps
Growing bay tree saplings—especially dwarf varieties—is a rewarding journey that brings fragrant greenery and culinary potential right to your doorstep! 🌿 With the right container, soil, and care, you’ll enjoy lush foliage and aromatic leaves for years.
Whether you’re a seasoned gardener or a beginner, these tips make it simple to nurture your own thriving bay tree.
Now that you’re equipped with the know-how, take the next step—pick your favorite dwarf variety, grab a pot, and get planting! Your kitchen (and senses) will thank you. Happy growing! 🌱