
Planting
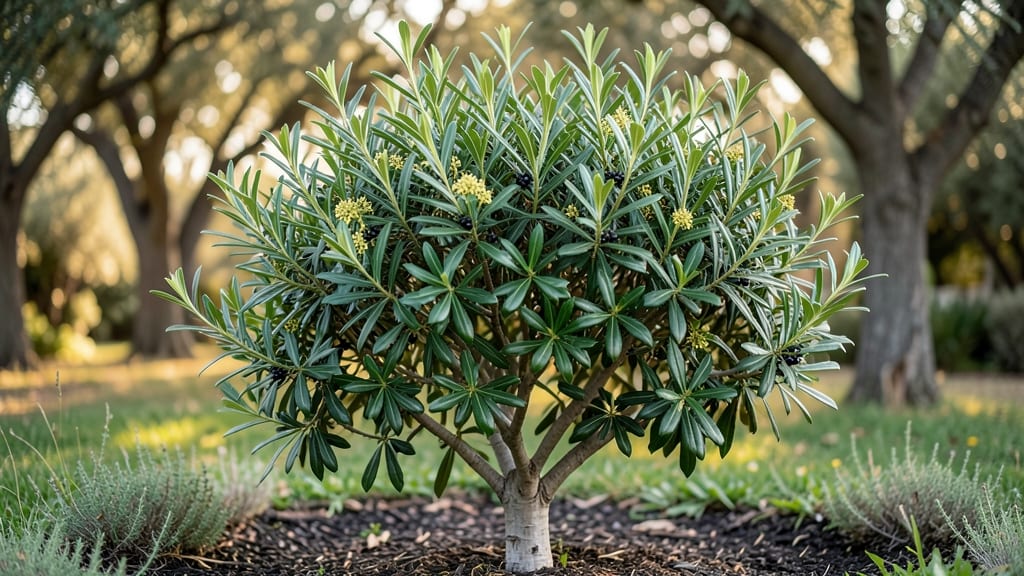
Planting a bay tree transforms your garden into a fragrant, evergreen sanctuary—even in colder climates. 🌿 I’ve grown these resilient shrubs through three winters, and the secret lies in choosing the right cold-hardy variety and giving them the perfect spot.
The key isn’t just about survival; it’s about watching them thrive year after year with glossy leaves and that signature bay scent.
Start with well-draining soil mixed with compost—bay trees hate soggy roots—and plant them where they’ll get at least 6 hours of sunlight daily. In colder zones (USDA 7-9), protect young trees with a thick mulch layer and a frost cloth during sudden freezes.
The first year is critical: water deeply once a week, but never let them sit in standing water.
Prune in late winter to shape the tree and encourage bushier growth, and watch as it fills out with vibrant, aromatic foliage. By summer, you’ll have a lush, fragrant hedge or container specimen that repels pests naturally.
The best part? These trees keep their leaves all winter, adding structure and interest when other plants fade.
Whether you’re planting in the ground or a large pot, bay trees adapt beautifully to both. For containers, choose a 15-gallon pot with drainage holes—just move it indoors before temperatures drop below 15°F. The payoff? A kitchen-scented garden that’s as practical as it is pretty.
📚 In This Guide
- What you need
- Instructions
- Tips and common mistakes
- Wrapping up and next steps
What you need
- ● Bay tree sapling or seeds: 1–3 cold-hardy bay tree plants (e.g., Laurus nobilis or Umbellularia californica for milder climates). Nursery-grown saplings (1–3 gallons) establish faster.
- ○ Optional: Seeds (if starting from scratch—germination takes 4–6 weeks).
- ● Planting site: Full sun to partial shade (6+ hours of sunlight daily for optimal growth).
- ● Well-draining soil (pH 6.0–7.5). Amend clay soil with 2–3 inches of compost or organic matter.
- ● Container growers: 1 large pot (18–24" diameter) with drainage holes. Terracotta or fabric pots work best.
- ● High-quality potting mix (e.g., 60% peat/perlite, 40% compost).
- ● Digging tools: 1 garden trowel or spade (for transplanting).
- ● 1 hand pruners (sterilized with rubbing alcohol).
- ● Mulch: 2–3 inches of organic mulch (e.g., shredded bark or wood chips) to retain moisture.
- ● Watering supplies: Garden hose with adjustable nozzle or watering can (1–2 gallons capacity).
- ○ Optional: Drip irrigation system for containers.
- ● Fertilizer: Balanced slow-release fertilizer (10-10-10 or 5-5-5 NPK ratio). Apply once in early spring.
- ○ Optional: Liquid seaweed extract (for a natural boost).
- ● Protective gear (for cold climates): Burlap wrap or frost cloth (to shield young plants from temperatures below 15°F).
Step-by-Step instructions for planting cold-hardy bay trees
Here’s how to establish these elegant evergreens for lasting beauty and resilience.
🌱 Step 1: Select and Prepare the Planting Site
Choose a location with partial shade to full sun—cold-hardy bay trees tolerate light shade better than full sun in hot climates. The soil should be well-draining but moisture-retentive, with a pH between 6.0 and 7.5. If your soil is heavy clay, amend it with 2-3 inches of compost mixed into the top 12 inches of soil to improve drainage and fertility.
Dig a hole twice as wide as the root ball but only as deep. This prevents burying the trunk too deeply, which can cause rot. Loosen the sides of the hole with a shovel to encourage root spread into surrounding soil. If planting multiple trees, space them 10-15 feet apart to allow for mature growth without crowding.
🪴 Step 2: Remove the Bay Tree from Its Container and Inspect Roots
Gently squeeze the sides of the container to loosen the root ball before sliding the tree out. Cold-hardy bay trees often develop a dense root system, so tease apart any circling or tightly bound roots with your fingers. This step is critical—roots that stay compacted will struggle to establish in the new soil.
Check the root ball for signs of disease or damage. Healthy roots should be white or light tan, not dark or mushy. If you notice any brown, slimy areas, trim those sections with sterilized pruners and dip the cuts in fungicide to prevent infection. This is your chance to give the tree a fresh start before planting.
☀️ Step 3: Position and Plant the Bay Tree
Place the tree in the hole so the top of the root ball sits 1 inch above ground level. This slight elevation prevents water from pooling around the trunk, which can lead to rot. Fill the hole with the native soil, tamping down gently in 2-inch layers to eliminate air pockets. Avoid compacting too firmly—you want the soil to settle naturally over time.
Water the tree deeply right after planting to help settle the soil around the roots. You’ll know it’s done correctly when water drains freely from the bottom of the hole—no standing water should remain. Mulch the base with 2-3 inches of organic mulch, keeping it 6 inches away from the trunk to prevent moisture buildup against the bark.
💧 Step 4: Establish a Watering Routine for the First Year
Water the bay tree 2-3 times per week for the first month, providing 1-2 gallons per watering session. Cold-hardy varieties are drought-tolerant once established, but young trees need consistent moisture to develop strong roots. Check soil moisture by sticking your finger 2 inches deep—if it feels dry, it’s time to water.
After the first month, reduce watering to once a week unless your area experiences extreme heat or drought. Overwatering is a common mistake—bay trees hate soggy roots. You’ll see healthy growth when new leaves emerge in spring or early summer, signaling the tree has taken root successfully.
✂️ Step 5: Prune and Maintain for Long-Term Health
Prune in late winter or early spring before new growth begins. Remove any dead, diseased, or crossing branches with clean, sharp pruners. Cold-hardy bay trees respond well to light pruning—never remove more than 25% of the foliage in one season. Focus on shaping the tree to encourage an open, airy canopy that reduces disease risk.
Fertilize in early spring with a balanced, slow-release fertilizer (10-10-10 or similar). Apply it 6 inches away from the trunk and water it in thoroughly. Avoid heavy-handed fertilization—bay trees prefer lean soil and over-fertilizing can lead to weak, leggy growth. Monitor for pests like spider mites or scale, treating infestations early with neem oil or insecticidal soap.
Tips & tricks for planting cold-hardy bay trees
These insights will help you avoid common pitfalls and ensure your cold-hardy bay tree thrives from day one.
Soil Preparation Insight: When amending heavy clay soil with compost in Step 1, mix in a handful of perlite or coarse sand along with the 2-3 inches of compost. This creates tiny air pockets that improve drainage while maintaining moisture retention—the perfect balance for bay trees. The goal is to mimic the well-draining yet fertile conditions they prefer in their native Mediterranean environments.
Root System Strategy: In Step 2, pay special attention to any roots circling the root ball. These "root-bound" roots can strangle the tree as it grows. Use your fingers to gently separate them, making small cuts if needed with sterilized pruners. This might seem tedious, but it's one of the most critical steps for long-term tree health—healthy roots mean a healthy tree for decades to come.
Planting Depth Precision: The 1-inch elevation above ground level in Step 3 is non-negotiable. Use a small stake or marker to ensure you maintain this precise elevation. Too deep and you risk trunk rot; too shallow and the tree may become unstable. Think of it as the Goldilocks principle—just right prevents both rot and wind damage.
Watering Wisdom: After planting, the deep watering in Step 3 should saturate the soil to a depth of 12 inches. You'll know it's done correctly when water flows freely from the bottom of the hole without pooling. This initial deep watering establishes the moisture gradient that encourages roots to spread downward rather than remaining compacted near the surface.
Pro Tips for Bay Tree Plant
- These insights will help you avoid common pitfalls and ensure your cold-hardy bay tree thrives from day one.
- Soil Preparation Insight: When amending heavy clay soil with compost in Step 1, mix in a handful of perlite or coarse...
- Root System Strategy: In Step 2, pay special attention to any roots circling the root ball. These "root-bound" roots ...
Frequently asked questions
Got questions about growing your own bay tree?
You’re not alone! Whether you’re a first-time gardener or a seasoned plant parent, these answers will help you cultivate a thriving, cold-hardy bay tree with ease.
Can bay trees survive winter in cold climates?
Most bay trees (Laurus nobilis) are tender and struggle in freezing temps below 15°F (-9°C). However, cold-hardy varieties like Laurus azorica or Umbellularia californica (California bay) can tolerate down to 10°F (-12°C) with proper protection. Plant in sheltered spots, mulch heavily, and wrap young trees in burlap for extra defense.
How long does it take for a bay tree to grow large enough for harvesting leaves?
With patience, you’ll start seeing usable leaves in 2–3 years for container-grown trees and 3–5 years for in-ground plants. Prune lightly to encourage bushier growth, but avoid heavy harvesting until the tree is at least 3 feet tall. Harvest sparingly—never take more than 1/3 of the leaves at once!
What’s the best alternative if my bay tree keeps dying in winter?
If your bay tree struggles with cold, consider these hardy substitutes:
- Oregano or marjoram (herbs with similar flavors, survive down to 0°F/-18°C)
- California bay (Umbellularia californica)
- Sweet bay arboreal (Laurus azorica)
- Peppermint or spearmint (for culinary use, cold-resistant)
Why are my bay tree leaves turning yellow or brown?
Yellowing leaves often signal overwatering or root rot, while brown edges or crispy leaves usually mean underwatering or sunburn. Check soil moisture (it should be slightly dry between waterings) and ensure your tree gets morning sun + afternoon shade. Pests like spider mites or aphids can also cause stress—spray with neem oil if you spot tiny webs or sticky residue.
How do I harvest bay leaves for cooking without killing the tree?
Harvest leaves from non-flowering branches (they’re more flavorful!) and avoid taking more than 1/3 of the foliage at once. For best flavor, pick younger, lighter green leaves. Dry them in a warm, dark place for 1–2 weeks, then store in airtight containers. Pro tip: Label your jars—fresh bay leaves lose potency after 6 months!
Wrapping up and next steps
Growing a bay tree plant in your garden or home isn’t just about adding beauty—it’s about embracing resilience and versatility!
Whether you’re drawn to the Texas Bay for its cold tolerance or the classic Sweet Bay for its culinary charm, these cold-hardy varieties bring year-round elegance and practicality to your space. With the right care, your bay tree will thrive, offering shade, fragrance, and even fresh leaves for cooking.
Ready to take the next step? Start small—whether it’s planting a single sapling or nurturing a container-grown bay tree indoors. Watch it grow, experiment with pruning, and enjoy the rewards of your green thumb! 🌿✨