
Pruning
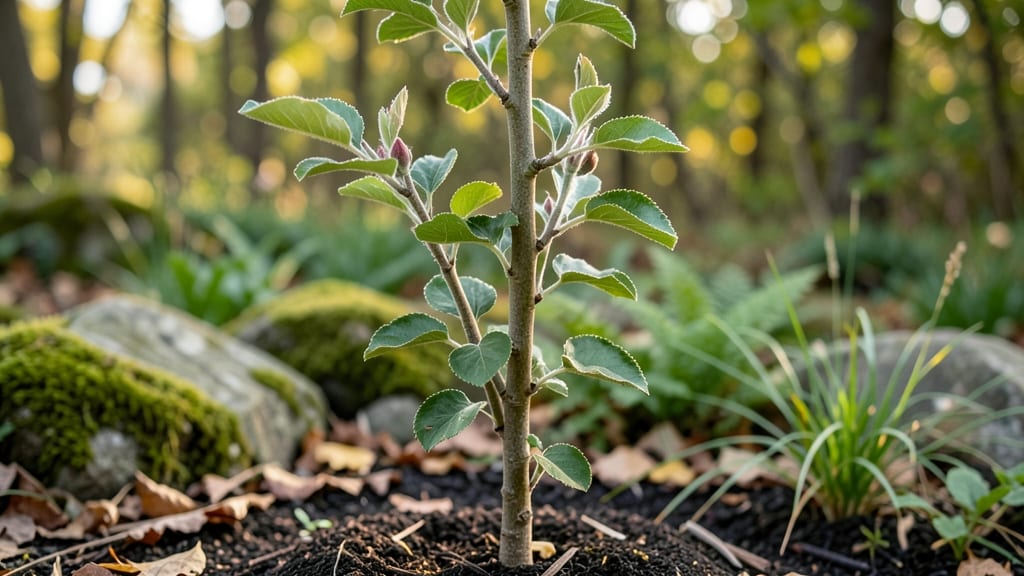
Pruning apple tree shoots transforms a wild, leggy mess into a compact, fruit-bearing powerhouse—and it’s easier than you think. ✂️ I’ve spent years watching my backyard tree go from a tangled tangle to a structured beauty that produces bushels of fruit, all by mastering a few simple cuts at the right time.
The secret isn’t just when you prune, but how—and I’ll show you exactly what to look for in those shoots to keep your tree thriving.
Start by spotting the healthy shoots: they’re sturdy, green, and growing outward from the center of the tree, not inward. Weak shoots are thin, spindly, or growing straight up—they’ll never bear fruit and just steal energy from your tree.
Grab your pruners and make clean cuts just above a bud or branch collar (that little bump where the shoot meets the branch), and you’ll encourage the tree to focus its energy where it counts.
This isn’t rocket science, but it is the difference between a tree that looks like a bird’s nest and one that’s easy to harvest.
By summer’s end, you’ll see new growth shooting out in all the right directions, and those cuts will set your tree up for bigger blooms and heavier fruit next season. The best part?
You don’t have to wait for spring—pruning in late winter, early summer, and even a light trim in fall keeps your tree in check year-round. Just avoid hacking away more than 25% of the tree’s branches at once, or you’ll shock it into stress.
Think of it like a haircut: a little at a time keeps things looking sharp.
Whether you’re dealing with a young sapling or a mature tree that’s gotten a little out of hand, this method works for any size or shape.
The key is consistency—just 30 minutes every few months will keep your apple tree productive, pest-resistant, and looking like it belongs in a storybook. Ready to turn those wild shoots into a fruit-filled future? Let’s get started.
📚 In This Guide
- What you need
- Instructions
- Tips and common mistakes
- Wrapping up and next steps
What you need
- ● Pruning shears: Bypass shears (sharp, clean blades) for small shoots (1/4"–3/8" thick)
- ● Loppers: For medium branches (3/8"–2" thick), with a 6–8" cutting range
- ● Pruning saw: For thicker branches (2"+ thick); choose a curved blade for precision
- ● Gloves: Heavy-duty, cut-resistant gloves (e.g., Mechanix Wear or Tough Outdoors)
- ● Disinfectant: 70% isopropyl alcohol or bleach solution (1 part bleach : 9 parts water) for sterilizing tools
- ○ Pruning sealant: Optional but helpful for larger cuts (e.g., Tanglefoot Tree Wound Pruning Sealer)
- ● Ladder or step stool: Sturdy, extendable (for trees 6+ feet tall)
- ● Heavy-duty trash bags: For collecting pruned branches (1–2 bags per session)
- ● Hand pruners with ratchet: For fatigue-free trimming of 100+ cuts
- ● Pole pruner: Extendable (10–15 ft) for high branches without a ladder
- ● Marking spray: Fluorescent paint to tag cuts for future reference
- ● Safety glasses: Protect your eyes from debris
- ● Work boots: With ankle support for stability on uneven ground
- ● Notebook & pen: To log pruning notes (e.g., branch locations, dates)
- ● Knowledge of tree anatomy: Identify water sprouts, suckers, and fruit spurs (watch a quick video if unsure!)
- ● Weather check: Prune on a dry, cloudy day (avoid extreme heat/cold)
- ● Tree health assessment: Ensure your apple tree is disease-free (no signs of fire blight, canker, or mildew)
- ● Local regulations: Check if your area requires permits for large-scale pruning
Step-by-Step guide to pruning apple tree shoots for compact growth
Here’s how I prune apple tree shoots to keep them strong, compact, and bursting with fruit.
🌱 Step 1: Identify and Prepare for Pruning Season
Start by inspecting your apple tree in late winter or early spring, just before buds swell but before new growth begins. This timing ensures you’re pruning dormant wood, which heals faster and reduces disease risk. I always wear gloves and pruning shears—apple tree branches can be sharp, and you’ll be handling them often.
Look for water sprouts (fast-growing vertical shoots) and crossing branches—these compete for energy and block sunlight. Mark these with a piece of tape if you’re unsure, so you don’t accidentally remove healthy growth. Pruning at this stage sets the foundation for a balanced tree.
✂️ Step 2: Remove Problematic Shoots and Branches
Cut out water sprouts first—they’re the thin, upright shoots growing straight up from the trunk or limbs. These shoots steal energy from fruit production and weaken the tree’s structure. Use clean, sharp pruners to make a 45-degree cut just above a bud or lateral branch.
Next, remove any branches that cross or rub against each other. Friction creates wounds where disease can enter, and crossing branches limit airflow, increasing humidity and fungal risks. If a branch is dead (brown, brittle, or doesn’t bleed sap when cut), remove it entirely. Always cut back to a healthy bud or branch collar.
☀️ Step 3: Thin Out for Better Airflow and Sunlight
Step back and assess the tree’s canopy. You want sunlight to reach the inner branches—this is where most fruit develops. Remove about 20-30% of the smallest, weakest shoots to open up the center. Focus on shoots growing inward or downward, as these block light and air.
For larger branches, use the three-cut method to avoid tearing the bark: First, make an undercut on the underside of the branch, then a top cut slightly farther out, and finally, twist the branch off cleanly. This prevents jagged edges that invite pests. After pruning, the tree should look like an open umbrella with light filtering through.
🌿 Step 4: Shape the Tree for Future Growth
Now’s the time to encourage a compact, open-center shape. Select 3-5 strong, evenly spaced branches to serve as the tree’s main scaffold. These should be 4-6 feet apart and spaced around the trunk. Prune any competing shoots growing from the same area to avoid overcrowding.
If your tree is young, you can also prune to create a central leader (a single dominant trunk) or an open vase shape, depending on your preference. For older trees, focus on maintaining the balance—never remove more than 25% of the tree’s foliage in one season, or you’ll stress the tree.
⏰ Step 5: Summer Pruning for Ongoing Maintenance
After the initial spring pruning, monitor the tree throughout the growing season. In summer, remove any suckers (shoots growing from the base or roots) and excessive growth that’s shading the center. Use hand pruners for smaller shoots and loppers for thicker branches.
This summer pruning keeps the tree from becoming too dense and helps direct energy toward fruit production. Avoid heavy pruning in late summer or fall, as new growth won’t harden off before winter. Instead, focus on light maintenance to keep the tree healthy and productive.
Tips & tricks for pruning apple tree shoots
Real talk: Pruning apple tree shoots feels overwhelming at first, but these small tweaks make all the difference between a healthy tree and one struggling to produce fruit.
Timing is Everything: The late winter/early spring window is critical because dormant wood heals faster and disease risk drops dramatically. If you miss this, wait until summer—but avoid late summer/fall pruning entirely. New growth won't harden off before winter, leaving your tree vulnerable to cold damage. I've seen trees recover from poor pruning, but never from winter-killed new growth.
The Three-Cut Method Matters: When removing larger branches in Step 3, that three-cut technique isn't just fancy—it's essential. The undercut prevents bark tearing when you make the final cut. I've made this mistake twice: once with a jagged tear that took months to heal, and another time where the branch split mid-cut. Always make your top cut slightly farther out than the undercut, then twist gently. The branch should separate cleanly at the collar.
Don't Stress the Tree: The 20-25% foliage limit in Step 4 isn't arbitrary—it's based on how much a tree can regenerate in one season. I learned this the hard way when I removed too much from an older tree and it struggled to recover. For young trees, focus on shaping rather than removing large portions. Think of it as sculpting rather than hacking—you're guiding growth, not forcing it.
Pro Tips for Apple Tree Shoots
- Real talk: Pruning apple tree shoots feels overwhelming at first, but these small tweaks make all the difference betw...
- Timing is Everything: The late winter/early spring window is critical because dormant wood heals faster and disease r...
- The Three-Cut Method Matters: When removing larger branches in Step 3, that three-cut technique isn't just fancy—it's...
Frequently asked questions
about apple tree shoots—because every gardener deserves clarity! Whether you're a pruning pro or just starting, these answers will help you grow a healthier, fruit-bearing tree.When is the best time to prune apple tree shoots for fruit production?
The ideal time is late winter or early spring (just before buds swell), but you can also prune in summer after harvest. Avoid heavy pruning in fall—it stresses the tree and invites disease. Light maintenance (removing water sprouts) can happen year-round, though!
How much of an apple tree’s shoots should I cut back each year?
Aim for no more than 25% of the tree’s total growth per year. For young trees, prioritize removing dead, crossing, or inward-growing shoots. Mature trees benefit from selective thinning to improve airflow. Pro tip: Never remove more than 1/3 of the canopy in a single session!
Can I prune apple tree shoots in summer, or is winter-only the best approach?
Summer pruning (called summer thinning) is great for shaping and controlling shoot growth, especially in hot climates. Focus on removing vigorous water sprouts and thinning dense foliage to boost fruit size. Just avoid heavy cuts—stick to 10-15% of the canopy max. Pair it with winter pruning for best results!
What should I do if my apple tree shoots are dying or turning brown?
Brown or dying shoots often signal disease (fire blight), pests, or environmental stress. First, sterilize pruners with rubbing alcohol to prevent spreading. Remove affected shoots 6 inches below the damage. Check for signs of sooty mold, borers, or fungal spots—treat with copper fungicide or horticultural oil if needed.
Are there alternatives to pruning if my apple tree shoots are getting out of control?
If pruning feels overwhelming, try selective thinning (removing only the worst offenders) or topping (cutting the main stem to encourage bushier growth). For dwarf varieties, regular pinching (trimming new shoots by hand) can keep them compact. Just remember: No pruning is better than poor pruning!
Wrapping up and next steps
Cultivating apple tree shoots with precision pruning isn’t just about shaping your tree—it’s about unlocking its full potential for abundant, high-quality fruit year-round. By mastering the art of selective cuts, you’ll encourage healthier growth, better airflow, and a more manageable (yet productive!) tree.
Whether you’re a seasoned gardener or just starting out, every trim brings you closer to that perfect harvest.
Ready to transform your orchard? Start small—pick one branch this season and practice your technique. Before you know it, you’ll be pruning like a pro, and your apple tree will thank you with juicy, sun-ripened fruit for years to come! 🍏✨